C-PILLAR TRIM REMOVAL/INSTALLATION


id091700802200


4SD

1.  Remove the following parts:

(1)  Rear scuff plate (See REAR SCUFF PLATE REMOVAL/INSTALLATION.)
(2)  Rear seat cushion (See REAR SEAT CUSHION REMOVAL/INSTALLATION.)
(3)  Rear side seat back (See REAR SIDE SEAT BACK REMOVAL/INSTALLATION.)
(4)  Tire house trim (See TIRE HOUSE TRIM REMOVAL/INSTALLATION.)

2.  Set the rear seat belt aside from the slit area shown in the figure.

am6zzw00010479

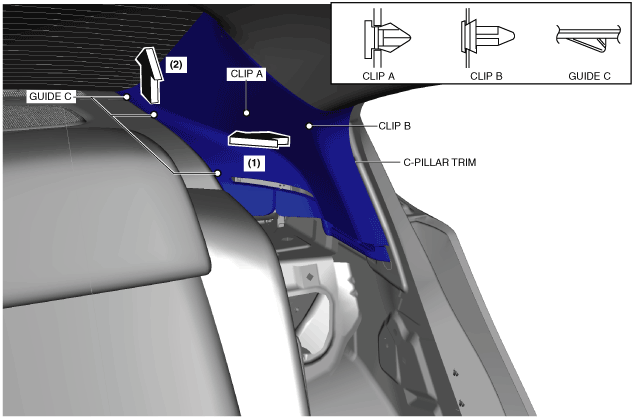
3.  Pull the C-pillar trim in the direction of the arrow in the order of (1), (2) while detaching clip A, clip B and guides C.

am6zzw00010480

4.  Install in the reverse order of removal.


WGN

1.  Disconnect the negative battery cable. (See NEGATIVE BATTERY CABLE DISCONNECTION/CONNECTION [SKYACTIV-G 2.0, SKYACTIV-G 2.5].) (See NEGATIVE BATTERY CABLE DISCONNECTION/CONNECTION [SKYACTIV-G 2.0, SKYACTIV-G 2.5 (WITHOUT i-stop)].) (See NEGATIVE BATTERY CABLE DISCONNECTION/CONNECTION [SKYACTIV-D 2.2].)

2.  Remove the following parts:

(1)  Rear scuff plate (See REAR SCUFF PLATE REMOVAL/INSTALLATION.)
(2)  Rear seat cushion (See REAR SEAT CUSHION REMOVAL/INSTALLATION.)
(3)  Rear seat belt lower anchor installation bolt (See REAR SEAT BELT REMOVAL/INSTALLATION.)
(4)  Trunk covering (See TRUNK COVERING REMOVAL/INSTALLATION.)
(5)  Trunk board (See TRUNK BOARD REMOVAL/INSTALLATION.)
(6)  Trunk side pocket (See TRUNK SIDE POCKET REMOVAL/INSTALLATION.)
(7)  Trunk end trim (See TRUNK END TRIM REMOVAL/INSTALLATION.)
(8)  Trunk side upper trim (See TRUNK SIDE UPPER TRIM REMOVAL/INSTALLATION.)

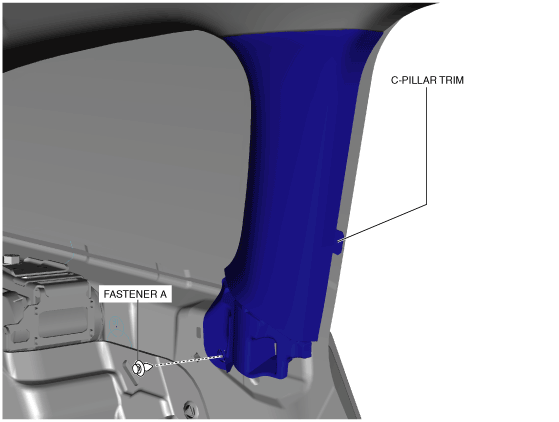
3.  Remove fastener A.

am6zzw00010481

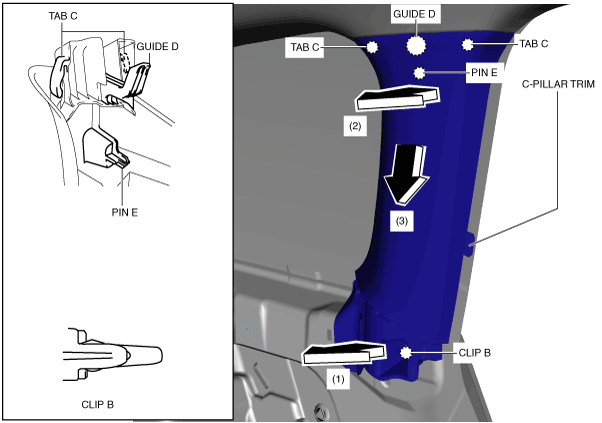
4.  Pull the C-pillar trim in the direction of the arrow in the order of (1), (2), (3) while detaching clip B, tabs C, guide D and pin E.

Caution
•  If the C-pillar trim is pulled in the direction of the arrow (3) forcefully, guide D may be damaged. Carefully pull the C-pillar trim so as not to damage guide D.
am6zzw00011416

5.  Install in the reverse order of removal.