 |
am6zzw00002252
DISCHARGE HEADLIGHT CONTROL MODULE REMOVAL/INSTALLATION
id091800805300
1. Disconnect the negative battery cable.
2. Remove the front bumper. (See FRONT BUMPER REMOVAL/INSTALLATION.)
3. Remove the front combination light. (See FRONT COMBINATION LIGHT REMOVAL/INSTALLATION.)
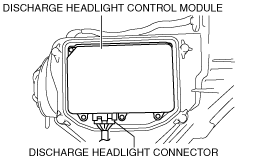
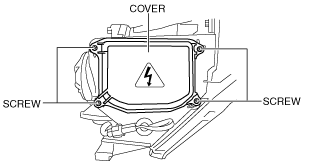
4. Remove the screws shown in the figure, then remove the discharge headlight control module cover.
am6zzw00002252
|
5. Remove the screws shown in the figure.
am6zzw00002253
|
6. Disconnect the discharge headlight connector.
am6zzw00002595
|
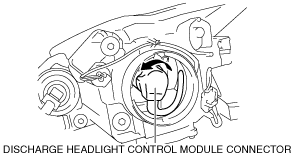
7. Remove the cover and disconnect the discharge headlight control module connector.
am6zzw00002577
|
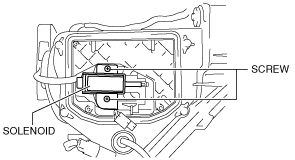
8. Remove the screws shown in the figure and set the solenoid out of the way.
am6zzw00002596
|
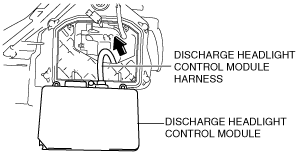
9. Pull out the discharge headlight control module wiring harness and remove the control module.
am6zzw00002597
|
10. Install in the reverse order of removal.