1. Assemble in the order indicated in the table.
|
1
|
Inner oil seal spring
|
|
2
|
Inner O-ring (small radius)
(See O-Ring Assembly Note.)
|
|
3
|
Inner oil seal
(See Oil Seal Assembly Note.)
|
|
4
|
Outer oil seal spring
|
|
5
|
Outer O-ring (large radius)
(See O-Ring Assembly Note.)
|
|
6
|
Outer oil seal
(See Oil Seal Assembly Note.)
|
|
7
|
Cut-off seal spring
|
|
8
|
Cut-off seal
(See Cut-Off Seal Assembly Note.)
|
1. Assemble the oil seal spring with the identification color upward.
Spring Identification Color
|
Rotor
|
Front rotor
|
Rear rotor
|
||
|---|---|---|---|---|
|
Engine front side
|
Engine rear side
|
Engine front side
|
Engine rear side
|
|
|
Inner
|
White
|
Blue
|
White
|
Blue
|
|
Outer
|
White + pink
|
Blue + pink
|
White + pink
|
Blue + pink
|

1. Apply petroleum jelly to a new O-ring.
2. Assemble the O-ring to the oil seal.
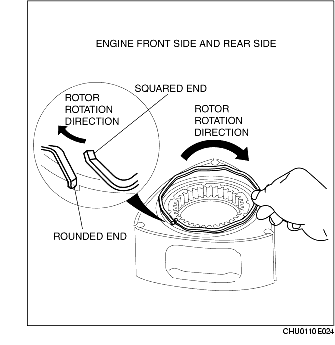
1. Temporarily install the oil seal with the squared end of the oil seal spring fit into the slot of the oil seal.
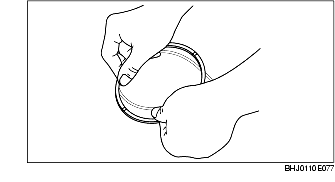
2. Push in the oil seal using an old oil seal.
3. Verify that the stroke of the oil seal is smooth and there is no catching by pushing the oil seal with your hand.
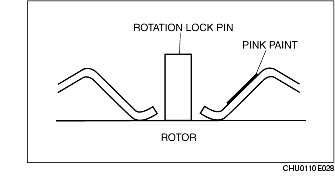
1. Assemble the cut-off seal spring with the spring end turned upward.
1. Assemble the cut-off seal so that it does not run over the rotation lock pin.