 |
atraaw00000780
AUTOMATIC TRANSAXLE INSTALLATION[LA4AX-EL (CD4E)]
id051708804700
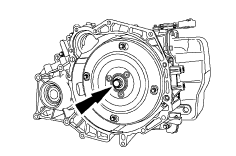
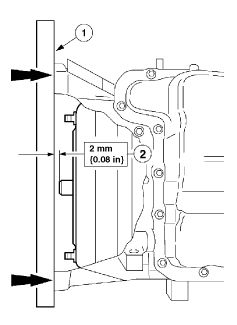
1. Inspect the installation depth of the torque converter.
atraaw00000780
|
2. Lubricate the torque converter pilot hub with the grease.
atraaw00002626
|
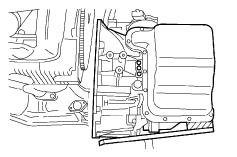
3. Position the transaxle in place.
atraaw00002627
|
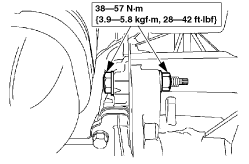
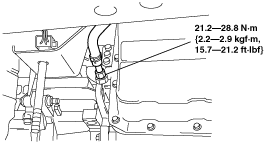
4. Move the transaxle complete toward the engine complete and install the bolt.
atraaw00000783
|
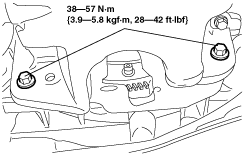
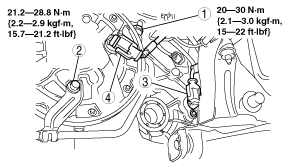
5. Install the bolt.
atraaw00000784
|
6. Install the bolts.
atraaw00002831
|
7. Remove the transaxle jack.
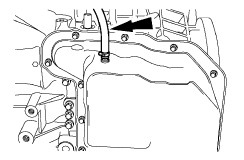
8. Install the oil hose.
atraaw00000786
|
9. Install the following parts.
atraaw00000787
|
10. Install four torque converter mounting nuts.
atraaw00002832
|
11. Install the access cover.
atraaw00002599
|
12. Lower the vehicle.
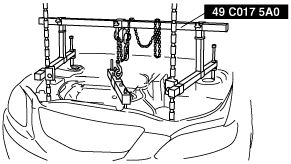
13. Raise the transaxle enough to install the cross brace.
atraaw00000063
|
14. Lift up the vehicle.
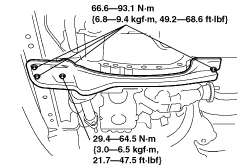
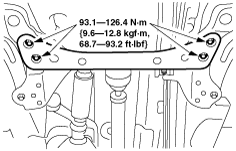
15. Install the cross brace.
atraaw00000791
|
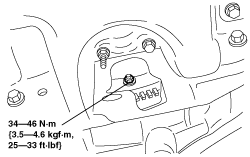
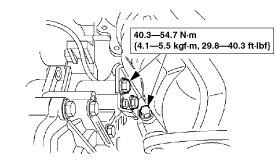
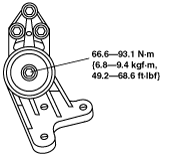
16. Install the bracket and tighten bolt.
atraaw00000792
|
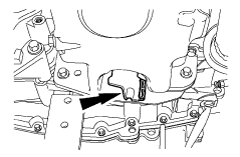
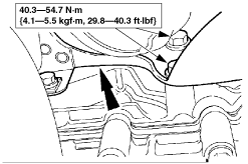
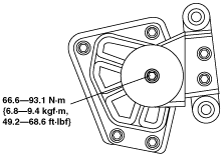
17. Install the bolts.
atraaw00000793
|
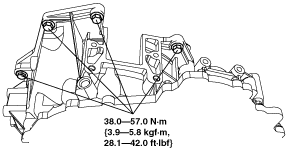
18. Install the transfer vent tube.
atraaw00001230
|
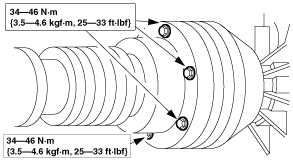
19. Install the propeller shaft and install the four rear propeller shaft bolts.
atraaw00000795
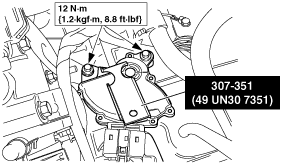
|
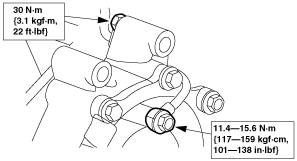
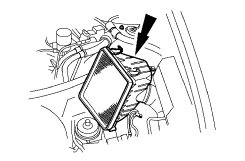
20. Install the propeller shaft center bearing nuts.
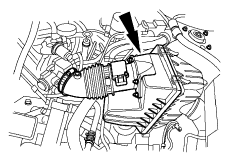
atraaw00002561
|
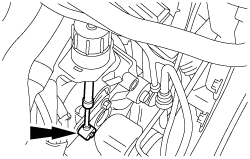
21. Install the GND strap bolt.
atraaw00002560
|
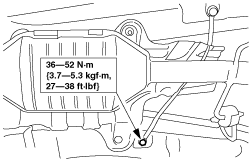
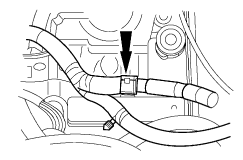
22. Install the front propeller shaft bolts.
atraaw00002628
|
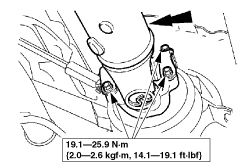
23. Install the exhaust pipe and connect the exhaust pipe flange.
atraaw00002629
|
24. Connect the front flange.
25. Install the exhaust pipe.
atraaw00000799
|
26. Install the cross brace.
atraaw00002630
|
27. Install the drive shaft component (LH). (See FRONT DRIVE SHAFT REMOVAL/INSTALLATION.)
28. Install the drive shaft (RH) and joint shaft component. (See FRONT DRIVE SHAFT REMOVAL/INSTALLATION.) (See JOINT SHAFT REMOVAL/INSTALLATION[AJ (3.0L Duratec)].)
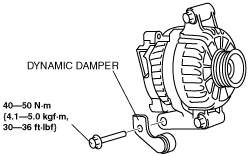
29. Install the generator dynamic damper.
atraaw00002589
|
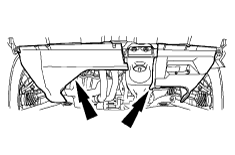
30. Install the two splash shields.
atraaw00002587
|
31. Install both front wheels. (See WHEEL AND TIRE REMOVAL/INSTALLATION.)
32. Lower the vehicle.
33. Lower the engine onto the engine mount (RH).
atraaw00000063
|
34. Install the bolt for the No.3 engine mount.
atraaw00002631
|
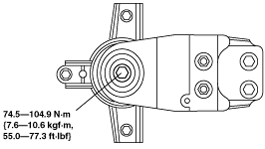
35. Install the No.1engine mount.
atraaw00002632
|
36. Install the No.4 engine mount
atraaw00002633
|
37. Install the EGR pipe. (See EGR PIPE REMOVAL/INSTALLATION[AJ (3.0L Duratec)].)
38. Install the bolt.
atraaw00002634
|
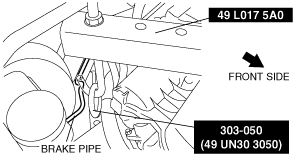
39. Remove the SSTs.
atraaw00000063
|
atraaw00000062
|
atraaw00000059
|
40. Install the vent tube.
atraaw00002582
|
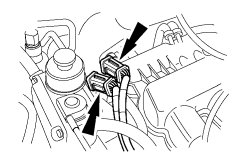
41. Connect the connectors to the valve cover.
atraaw00002581
|
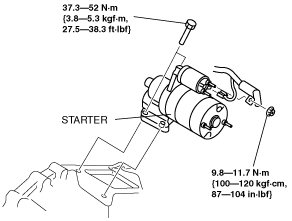
42. Install the power steering pressure hose bracket.
43. Install the starter and install the bolt.
atraaw00002635
|
44. Install the starter wiring harness connector.
45. Install the thermostat housing. (See THERMOSTAT REMOVAL/INSTALLATION[AJ (3.0L Duratec)].)
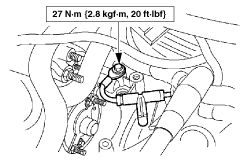
46. Install the ground wiring harness.
atraaw00000808
|
47. Install the selector cable and bracket.
atraaw00000810
|
48. Connect the selector cable.
atraaw00002828
|
49. Connect the wiring harness.
atraaw00002575
|
50. Install the wiring harness bracket spacer.
atraaw00002636
|
51. Install the wiring harness bracket and connect the transaxle wiring harness connector.
atraaw00002833
|
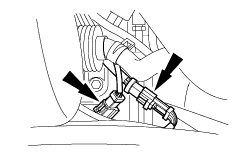
52. Connect the HO2S sensor connectors.
atraaw00002572
|
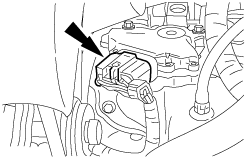
53. Connect the TR switch connector.
atraaw00002826
|
54. Align the TR switch using the SST.
atraaw00000818
|
55. Install the air cleaner component.
atraaw00002570
|
56. Install the air hose and air cleaner cover.
atraaw00002383
|
57. Connect the crankcase vent hose and MAF sensor connector.
atraaw00002382
|
58. Verify that there is no blockage or kinks, and the vent hose routing is correct.
59. Install the battery and battery tray. (See BATTERY REMOVAL/INSTALLATION[AJ (3.0L Duratec)].)
60. Connect the negative battery cable.
61. Add the engine coolant. (See ENGINE COOLANT REPLACEMENT[AJ (3.0L Duratec)].)