1.• Disconnect the negative battery cable.
2. Remove the splash shield (RH).
3. Remove the drive belt. (See DRIVE BELT REPLACEMENT [L3].)
4. Disconnect the HO2S (rear) connector.
5. Remove the vacuum chamber with the hose still connected and position the vacuum chamber so that it is out of the way.
6. Remove the exhaust manifold insulator.
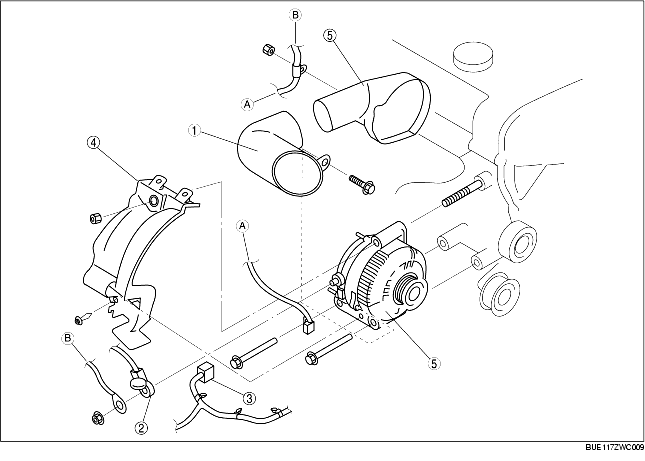
7. Remove in the order indicated in the table.
8. Install in the reverse order of removal.
|
1
|
Generator duct
|
|
2
|
Terminal B cable
|
|
3
|
Generator connector
|
|
4
|
Generator fan cover
|
|
5
|
Generator and generator duct
|
1. Remove the generator and generator duct together form the engine, and position them in the engine compartment in a location where no part can be damaged.
2. Remove the generator duct from the generator.
3. Remove the generator from above the engine compartment.
1. From above the engine compartment, set the generator down inside the compartment in a position where no part can be damaged.
2. Install the generator duct to the generator.
3. Install the generator and generator duct together to the engine.