1. Lift up the vehicle.
2. Remove the rear differential. (4WD) (See REAR DIFFERENTIAL REMOVAL/INSTALLATION.)
3. Remove the four bolts and disconnect the upper and lower arm from rear crossmember.
4. Disconnect the exhaust hanger from the rear crossmember.
5. With another person, remove the rear crossmember.
1. With another person, temporarily install the rear crossmember.
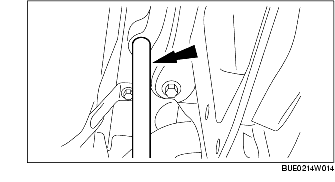
2. With a 19 mm {0.75 in} rod, align the rear crossmember with the alignment holes.
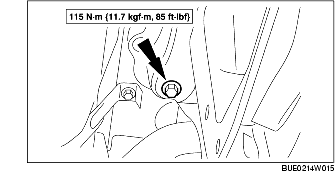
3. Tighten the rear crossmember bolts.
4. Connect the exhaust hanger to the rear crossmember.
5. Position the four rear control arms in the rear crossmember.
6. Install the rear differential. (4WD) (See REAR DIFFERENTIAL REMOVAL/INSTALLATION.)
7. Lower the vehicle.
8. Tighten the four control arms bolts.