1. Remove the upper arm or lower arm. (See REAR LOWER ARM REMOVAL/INSTALLATION.) (See REAR UPPER ARM REMOVAL/ INSTALLATION.)
2. Remove the ball joint dust boot.
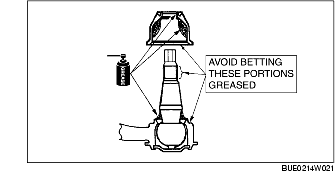
3. Wipe old grease off the ball pin, then apply new grease to the ball pin-housing contact portion.
4. Apply new grease inside the new dust boot and to the lip.
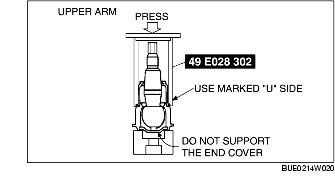
5. Install a new dust boot using the SST.
6. Inspect for any damage or deformation of the dust boot and any gap between the housing and the dust boot bottom flange.