A/C COMPRESSOR REMOVAL/INSTALLATION [AJ (3.0L Duratec)]
id0711008010c4
-
Caution
-
• To prevent refrigerant system contamination, if you are installing a new A/C compressor because the A/C compressor has failed internally, you must use the following procedures:
-
Note
-
• Installation of a new accumulator tank is not necessary when repairing the air conditioning system except when there is physical evidence of system contamination from a failed A/C compressor or damage to the accumulator tank.
1. If an A/C Flusher is available, carry out the air conditioning (A/C) system flushing general procedure. (See A/C SYSTEM FLUSHING.)
2. If the A/C Flusher is not available, carry out the refrigerant system filtering following A/C component installation general procedure. (See REFRIGERANT SYSTEM FILTERING FOLLOWING A/C COMPONENT INSTALLATION.)
3. Remove the drive belt. (See DRIVE BELT REPLACEMENT [AJ (3.0L Duratec)].)
4. If equipped, disconnect the engine block heater electrical connector.
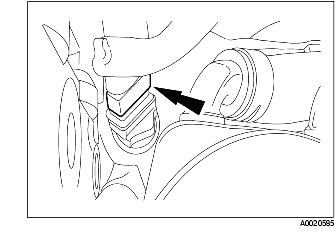
5. Disconnect the magnetic clutch connector.
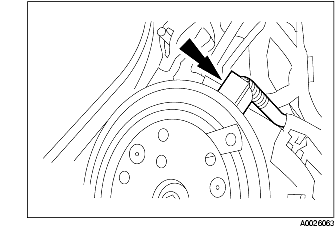
6. Remove the refrigerant line installation bolt from the top of the A/C compressor and disconnect the refrigerant line.
-
Caution
-
• Plug all ports to prevent contamination from dirt or moisture.
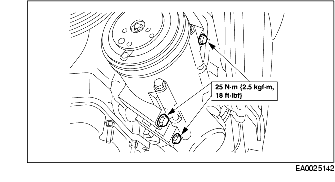
7. Remove the bolts and the A/C compressor.
8. Install in the reverse order of removal.
-
(1) Lubricate the new A/C compressor with the correct amount of PAG Compressor Oil. (See COMPRESSOR OIL ADDING.)
-
(2) Lubricate the new O-ring with PAG Compressor Oil.
-
(3) Apply Pipe Sealant.