AR35.10-P-0010P Remove/Install Complete Rear Axle
AR35.10-P-0010P Remove/Install Complete Rear Axle
- except CODE (P98) Black Series [model 209]

DANGER:
- Risk of death. Death may result if vehicle slips or topples from the lifting platform
- Align vehicle between the columns of the lifting platform and position the four support plates at the lifting platform support points specified by the vehicle manufacturer
1 Remove rear seat cushion
- With code (287a) through-loading feature
NOTE: Only fold rear seat cushion forwards Except code (287a) Through-loading feature
2 Detach rear brake cables at idler lever (110d) and on idler lever housing (110c)
3 Detach wheels
4 Remove rear diagonal struts
NOTE: Installation The diagonal struts must only be built-in, if the vehicle is standing with the wheels on the ground
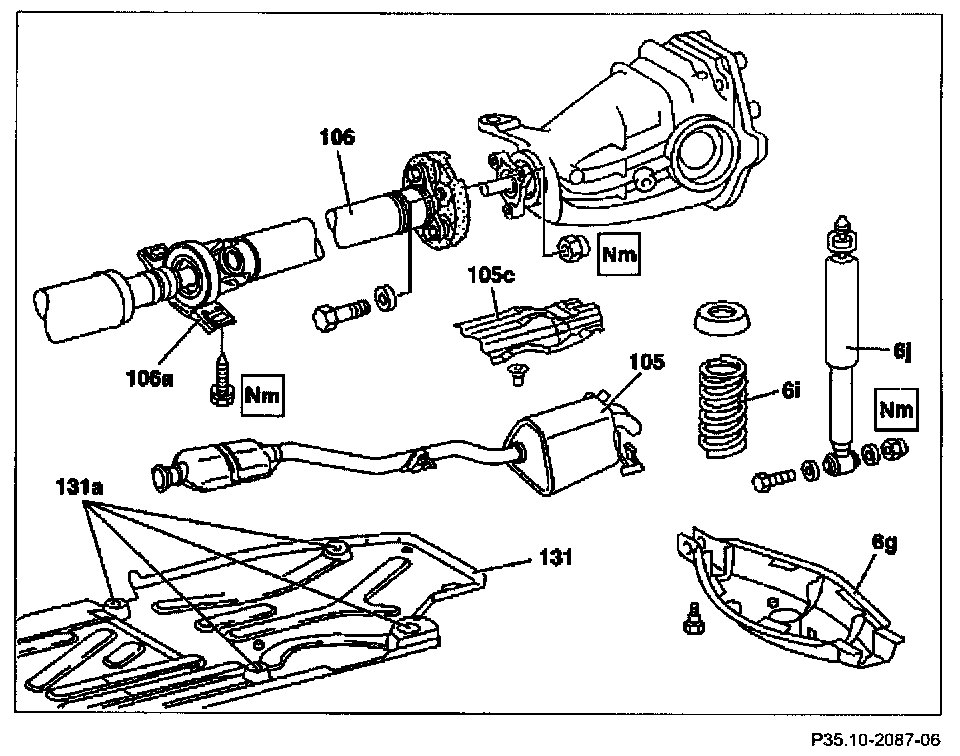
5 Remove exhaust system (105) from flange connection
6 Remove exhaust heat shield (105c)
NOTE: Lift front section and extract rear section
7 Unscrew bolts from center driveshaft bearing support (106a)
8 Disconnect propeller shaft (106) from rear axle center assembly at the flange
NOTE:
- The flexible coupling remains on the propeller shaft
- Tie propeller shaft to the side
- Installation: See Connecting rear propeller shaft to rear axle center assembly
9 Remove torsion bar (6)
NOTE: The link rods (6k) remain on the wheel carriers
10 Unscrew fixed brake caliper from wheel carrier
NOTE:
- Attach fixed brake caliper to the spring tower using a suitable wire
- Installation: Install new micro-encapsulated bolts a.
11 Disconnect rpm sensor connectors on rear axle (2) on vehicle floor
NOTE: Front connector left side Rear connector right side
12 Remove rear spring (6i)
13 Unscrew shock absorber (6j) at spring link
NOTE: To do this, remove cover of spring link (6g)
14 Unscrew nuts (131 a) of underbody paneling (131)
NOTE: Unscrew only the four nuts at the rear
15 Support rear axle with transmission lifter
NOTE: Secure against falling
16 Unscrew front and rear rear axle suspension bolts (1c, 1d)
NOTE: Replace shim (1) on torsion bar bearing (6s)
17 Lower rear axle while simultaneously pulling slightly to the rear
NOTE:
- Do not bend longitudinal paneling excessively
- Model 203.2 with level control take care not to damage level controller when lowering
18 Install in the reverse order
19 Check and correct headlamp adjustment