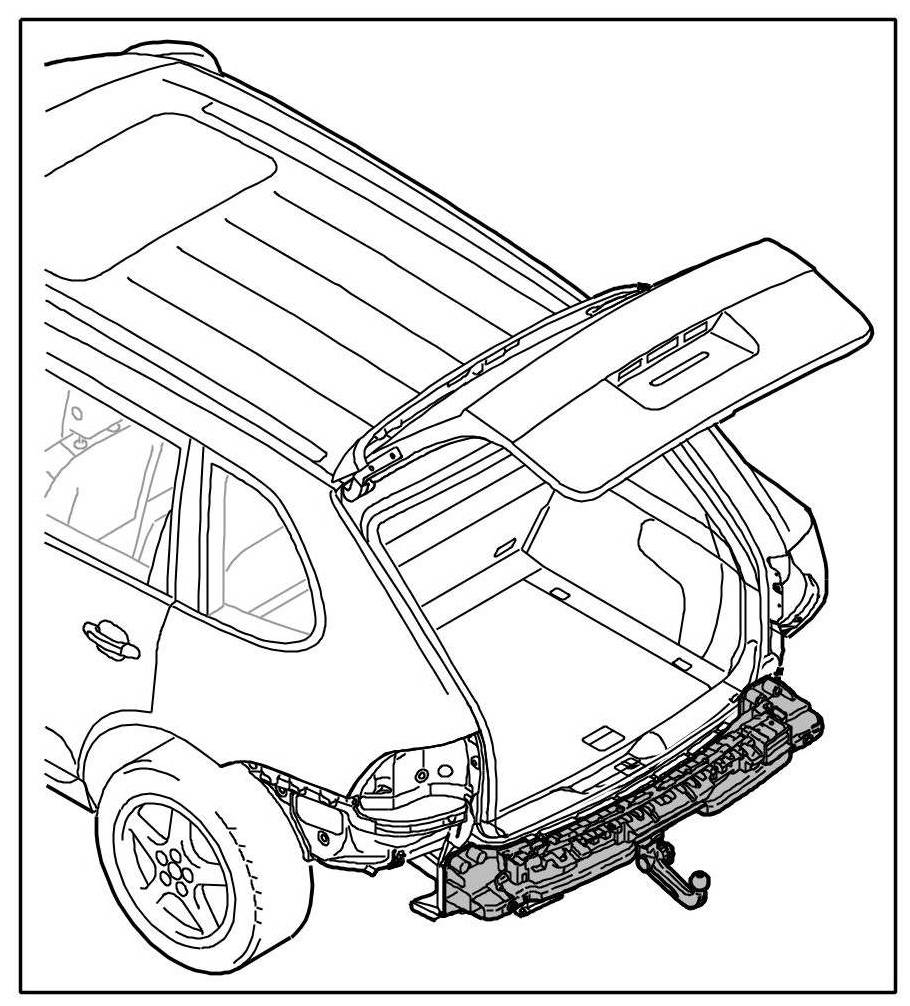
Trailer Hitch: Service and Repair
WM 669019 Removing and installing trailer hitch
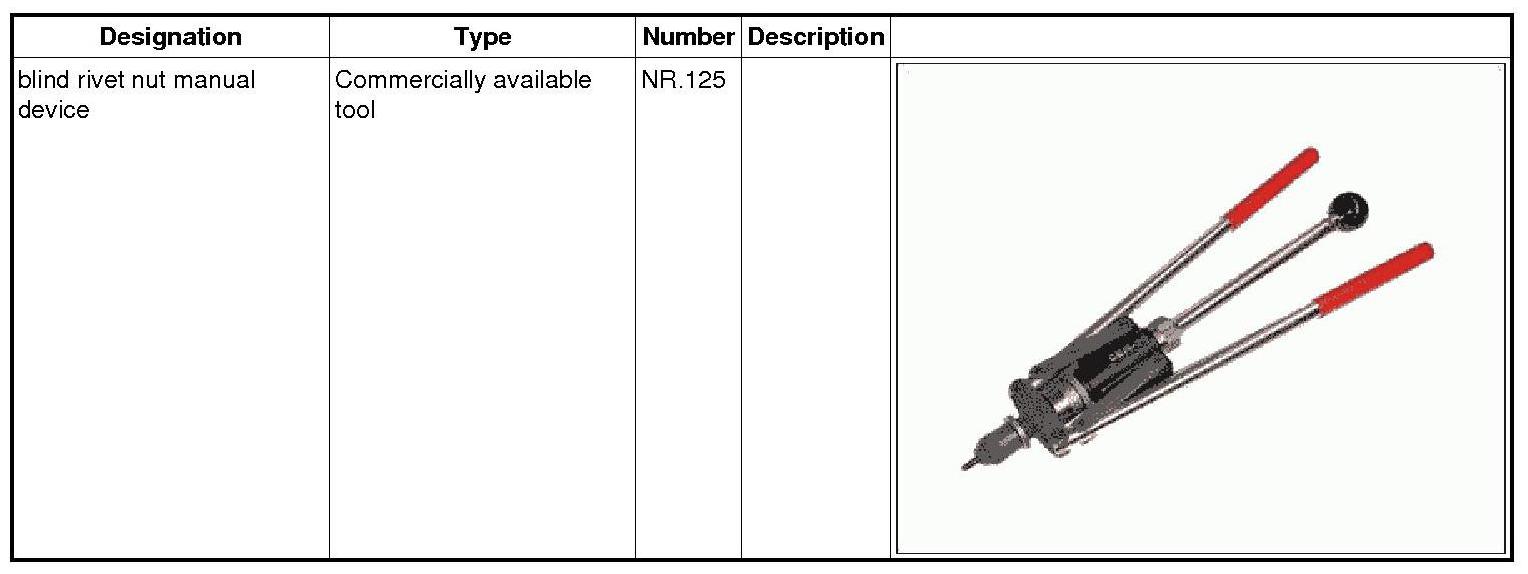
Tools
Technical values

Preliminary work
1. Remove rear spoiler. => 635519 Removing and installing rear spoiler - section on "removing"
Information
- Only for vehicles with Kessy.
2. Remove Kessy antennas at rear. => 966719 Removing and installing Kessy antenna - section on "Removing"
3. Remove socket for trailer hitch. => 972419 Removing and installing wiring harness for removable trailer hitch - section on "Removing"
Removing mechanically removable trailer hitch
Information
- For vehicles with trailer hitches that can be lowered electrically or with externally fitted spare wheel, additional assembly operations => 669019 Removing and installing trailer hitch must be performed.

Removing and installing trailer hitch
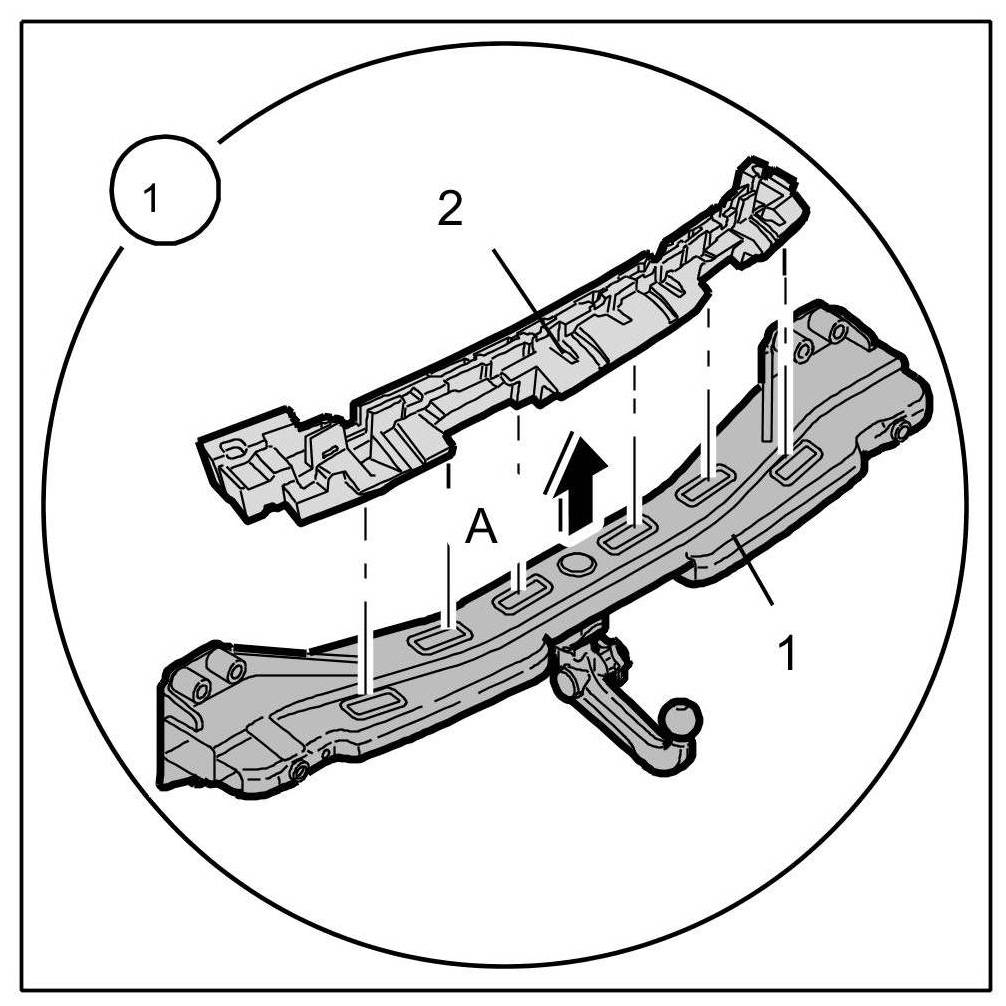
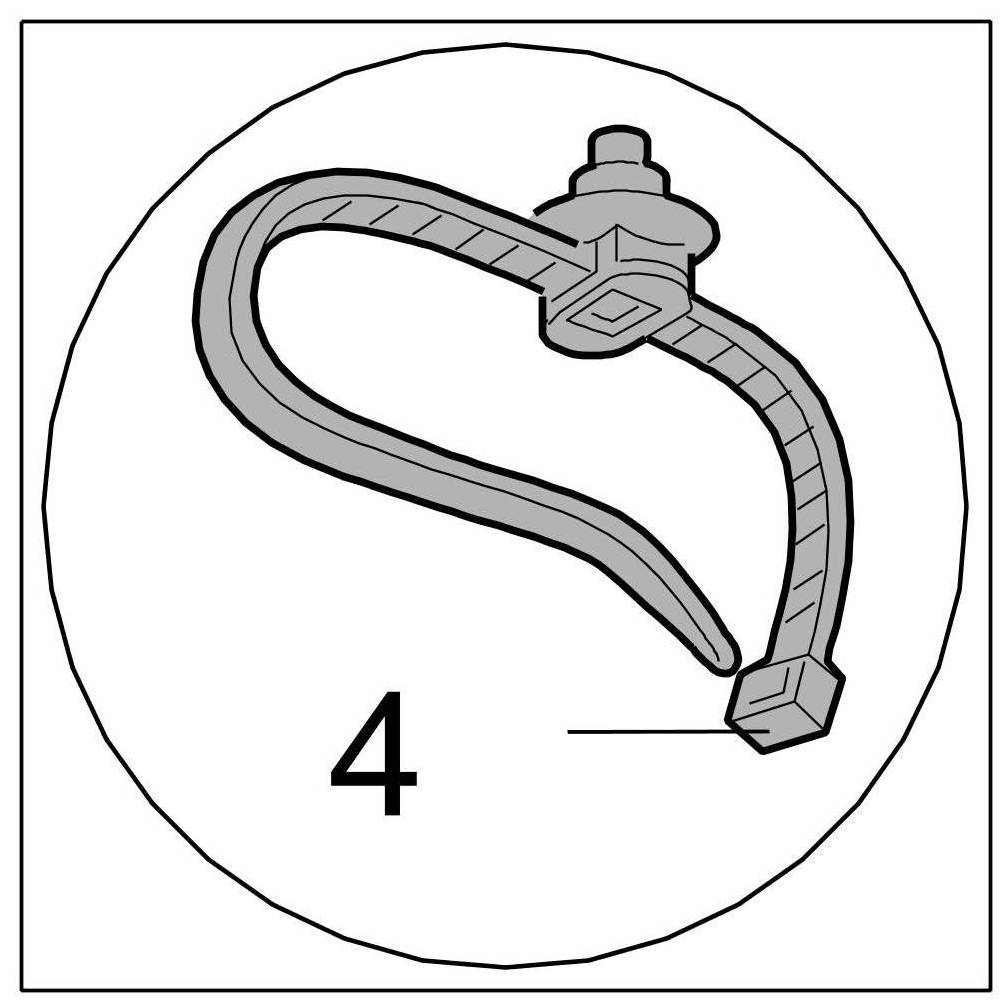
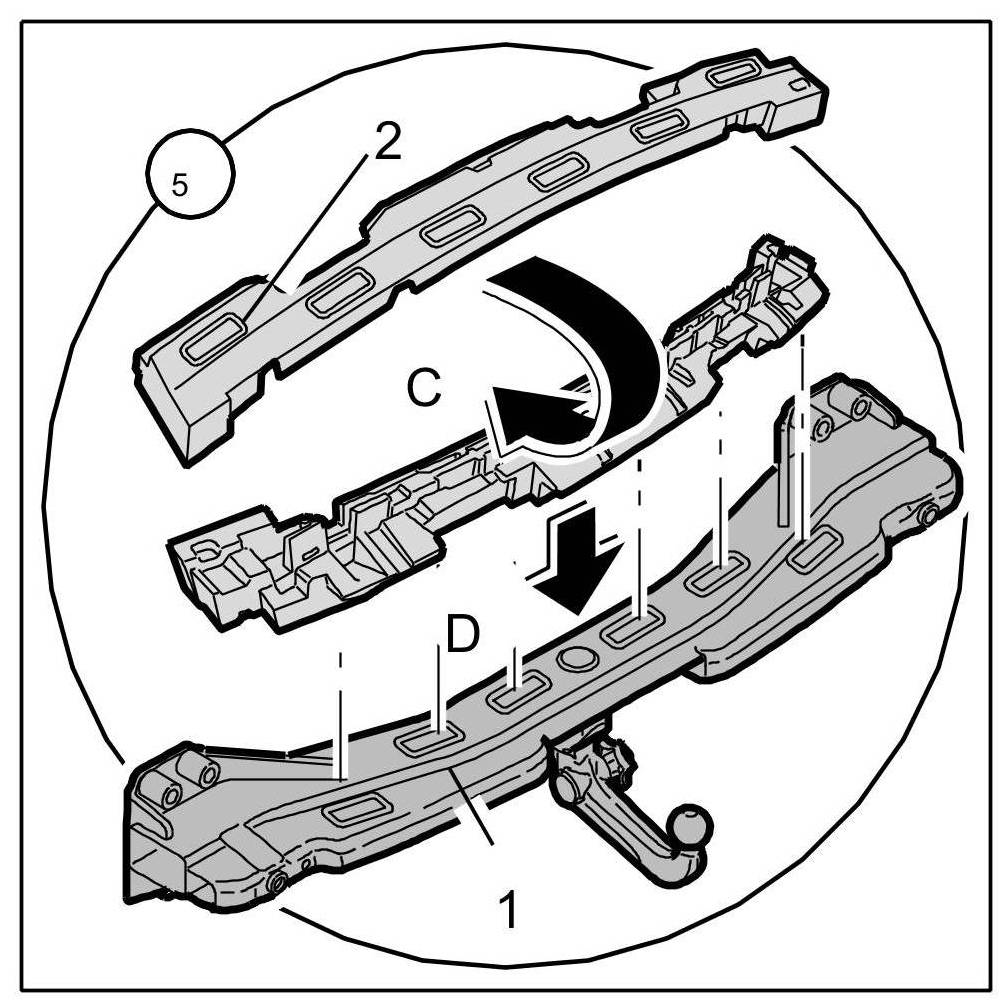
1. Remove foam part
1.1. Loosen bonds between foam part -2- and trailer hitch -1- and remove foam part -2- upwards ( -arrow A- ).
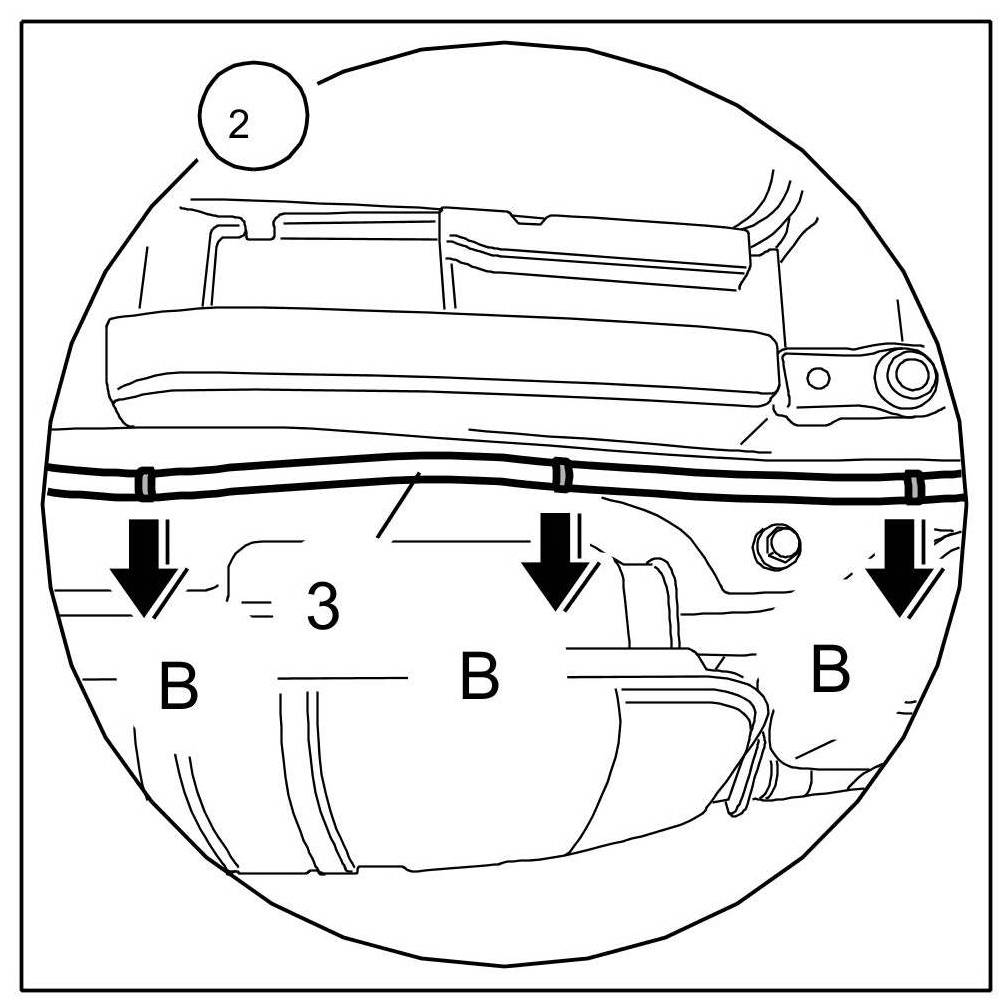
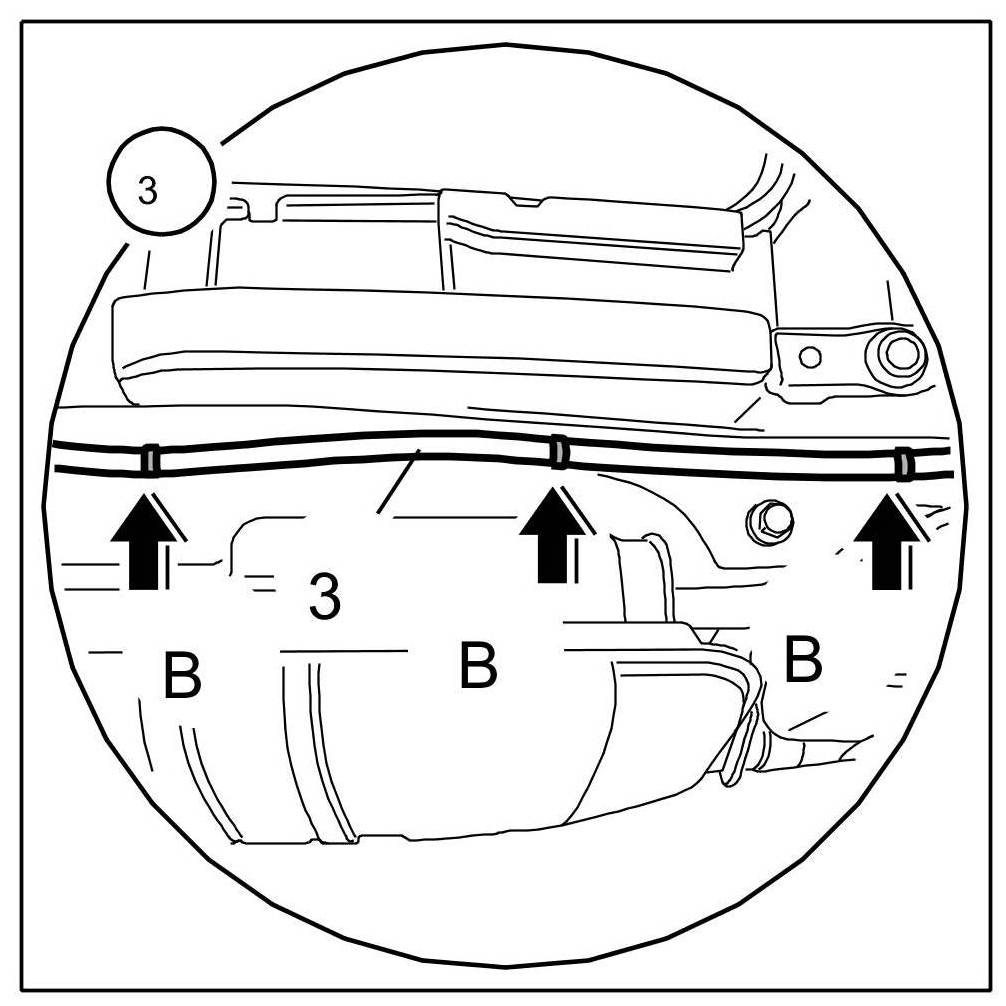
2. Release wiring harness.
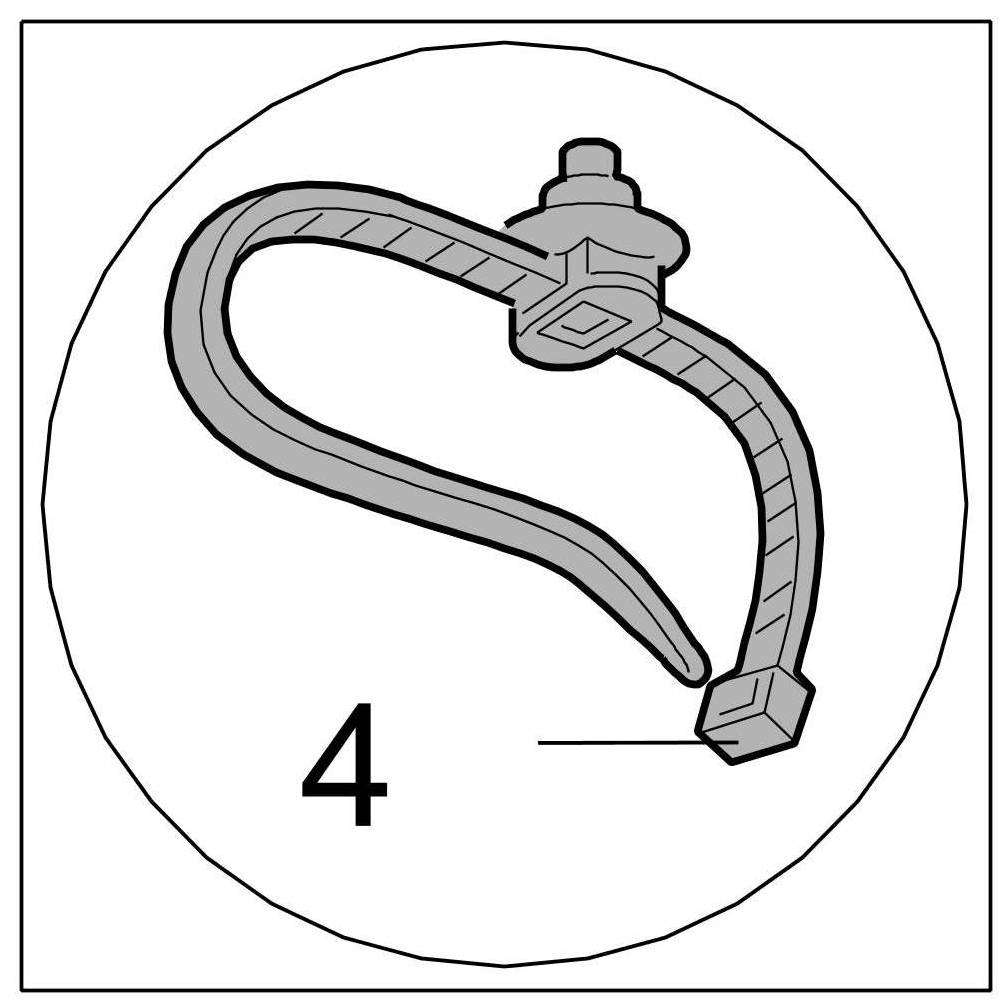
2.1. Unclip wiring harness -3- from fixing clips -4- ( -arrows B- ).
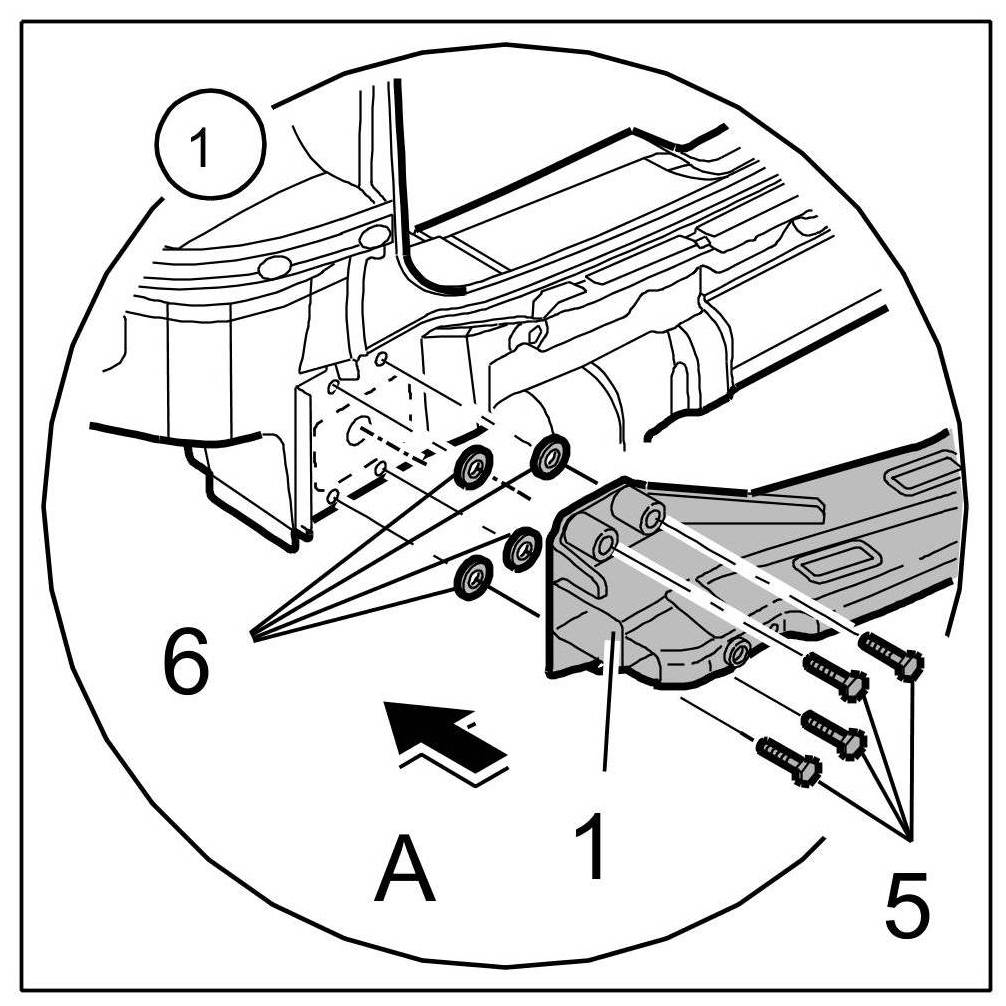
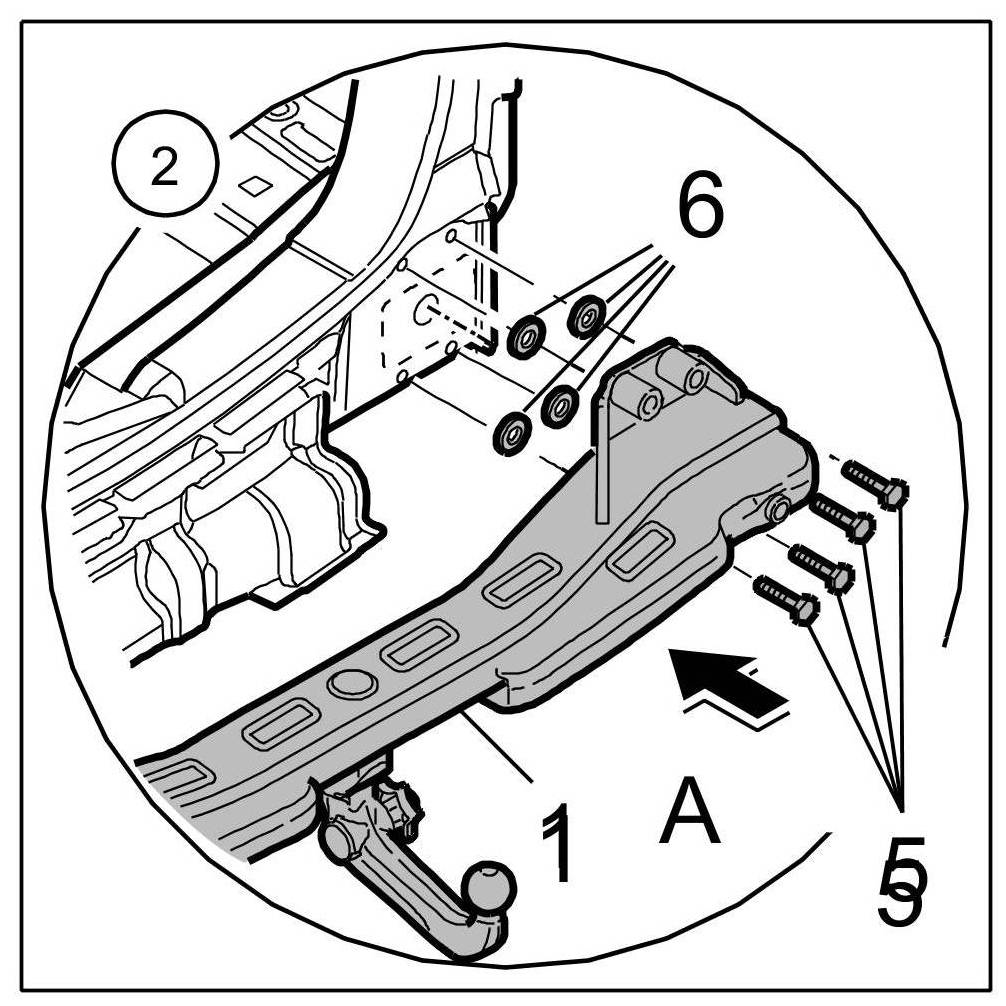
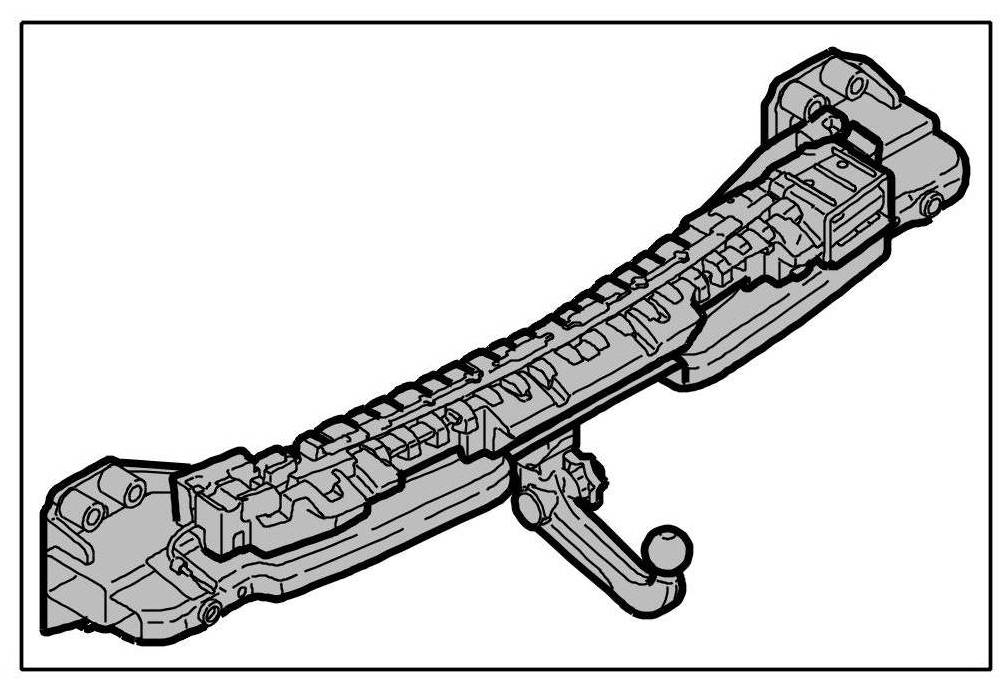
3. Remove trailer hitch.
3.1. Unscrew fastening screws -5- (or -5- ) and remove sealing rings -6- (or -6- ) and trailer hitch -1- ( -arrow C- ).


Installing mechanically removable trailer hitch
Fitting trailer hitch
Information
- Only when replacing trailer hitch on vehicles with externally fitted spare wheel.
1. Fit rivet nuts for lock support - only when replacing trailer hitch on vehicles with externally fitted spare wheel.
1.1. Insert rivet nuts into the bores of the lock support and rivet using blind rivet nut manual device NR.125.
2. Install trailer hitch.
2.1. Replace sealing rings -6- (or -6- ).
2.2. Fit trailer hitch -1- ( -arrows A- ).
2.3. Screw in new fastening screws -5- (or -5- ) and tighten to the specified torque.=> Initial tightening: 100 Nm (74 ftlb.) => Final tightening: +90°
Screwing in fastening screws
Screwing in fastening screws
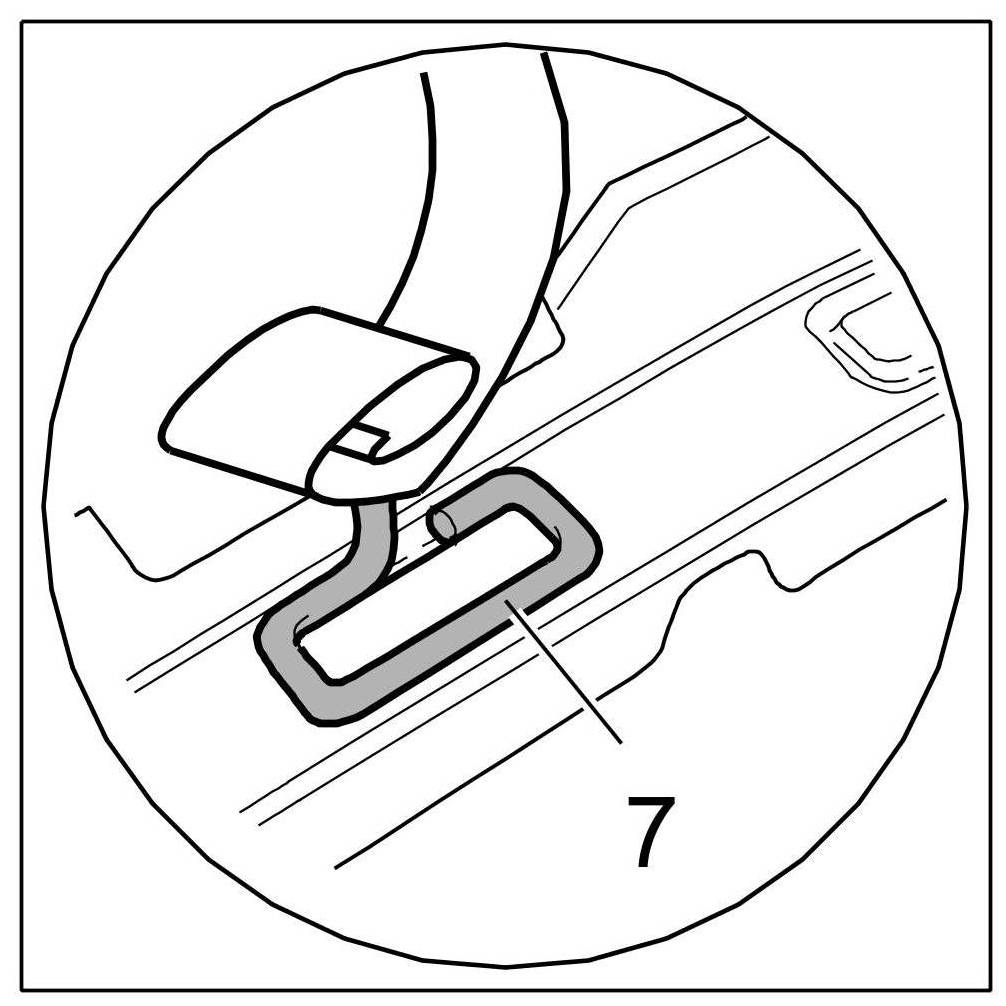
3. Secure wire harness.
3.1. Clip wire harness -3- into fixing clips -4- ( -arrows B- ).
Securing wire harness
Securing wire harness
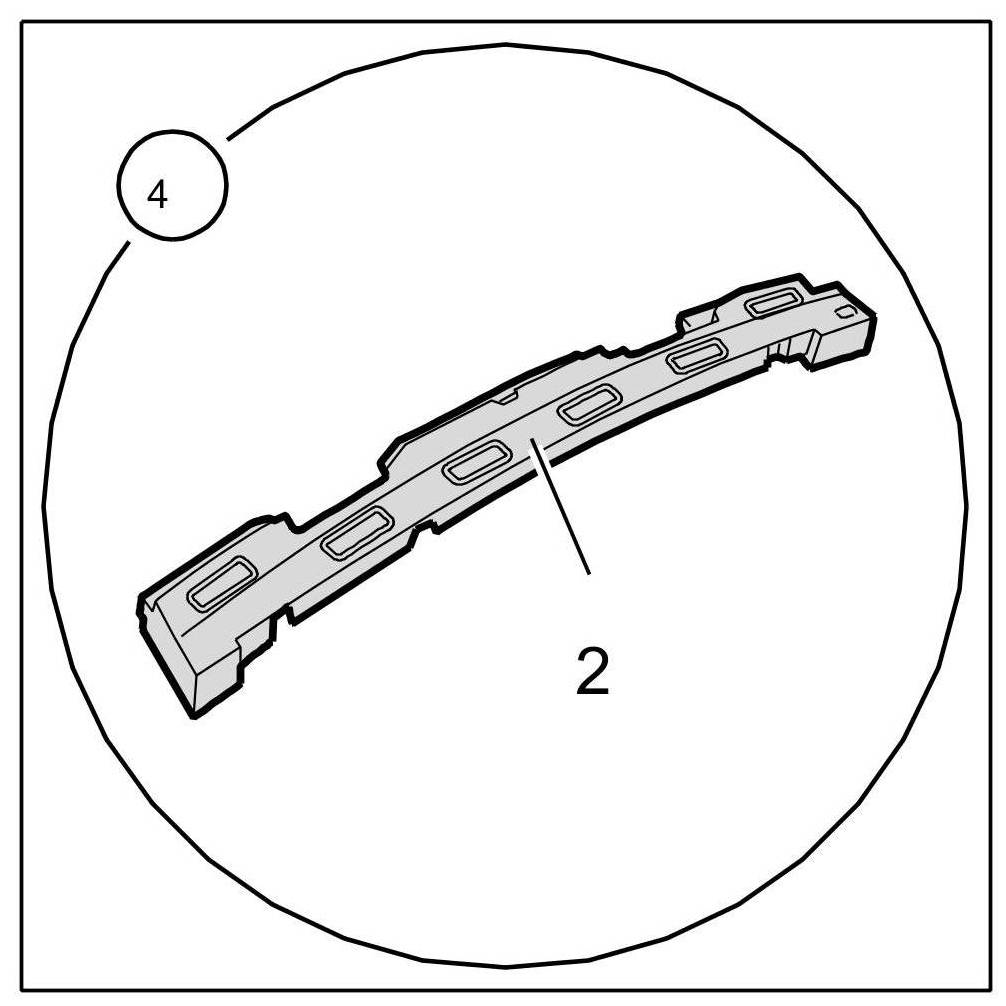
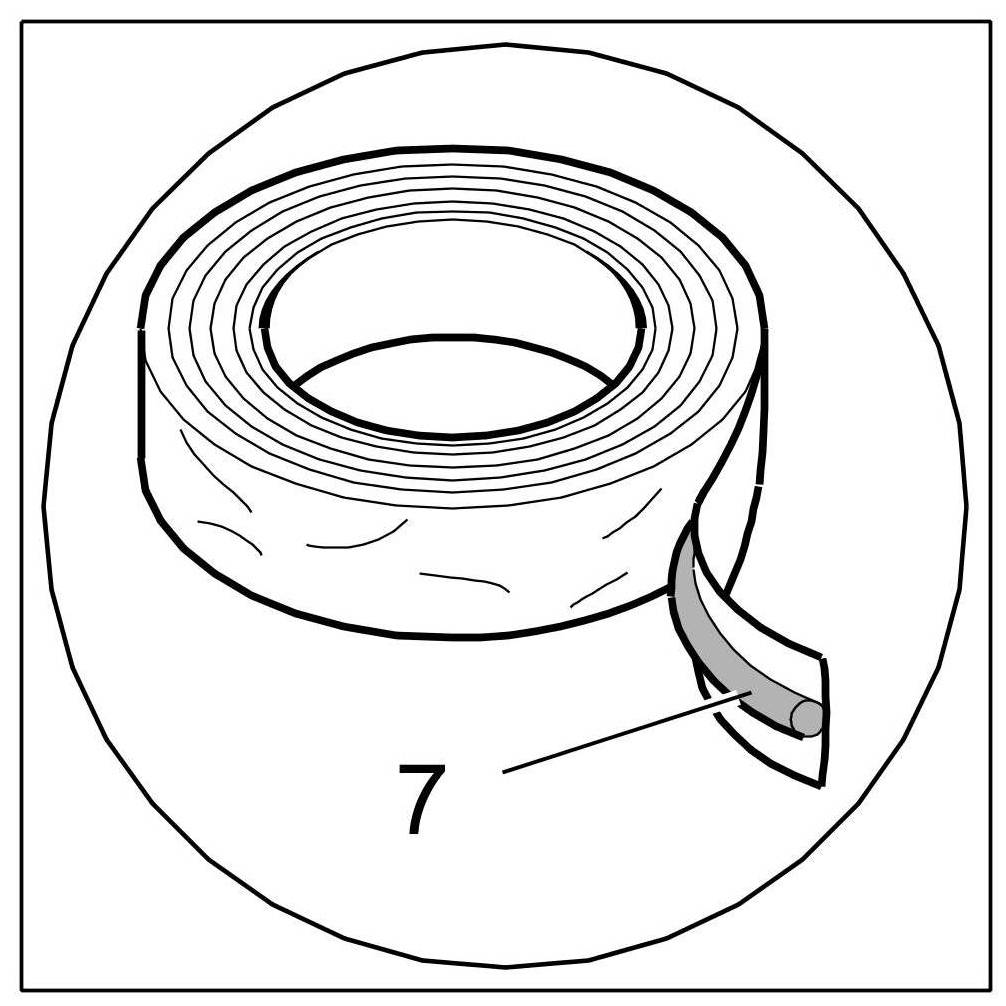
4. Prepare foam part for installation.
4.1. Place a butyl sealing cord -7- on the underside of the foam part -2- in the areas shown.
Preparing foam part for installation
Fitting butyl sealing cord
Butyl sealing cord
5. Install foam part.
5.1. Turn foam part -2- over ( -arrow C- ), place it on trailer hitch -1- according to the contour and press down firmly ( -arrow D- ).
Installing foam part
Removing and installing trailer hitch on vehicles with trailer hitch that can be lowered electrically and vehicles with externally fitted spare wheel
Removing and installing wiring harness in vehicles with trailer hitch that can be lowered electrically
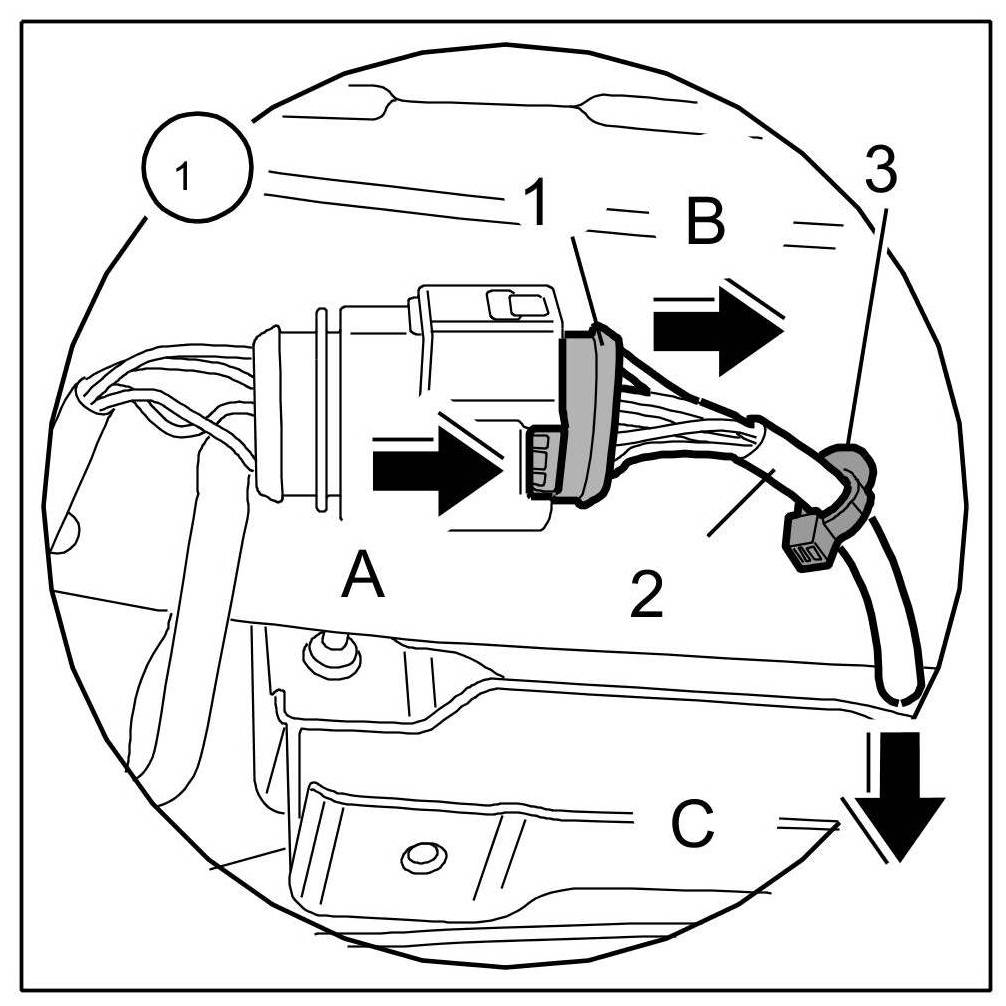
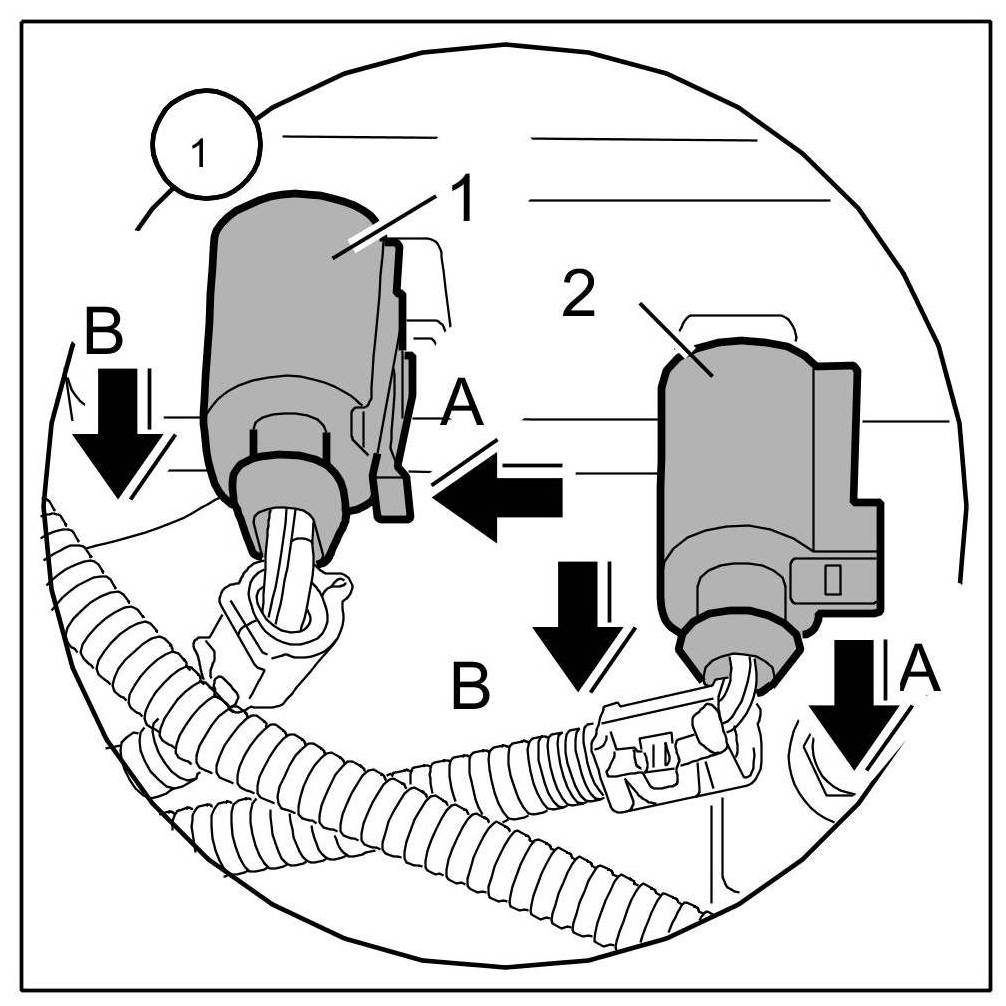
1. Pull off connector from servomotor.
1.1. Release connector -1- ( -Arrow A- ) and pull off ( -Arrow B- ).
2. Release wiring harness.
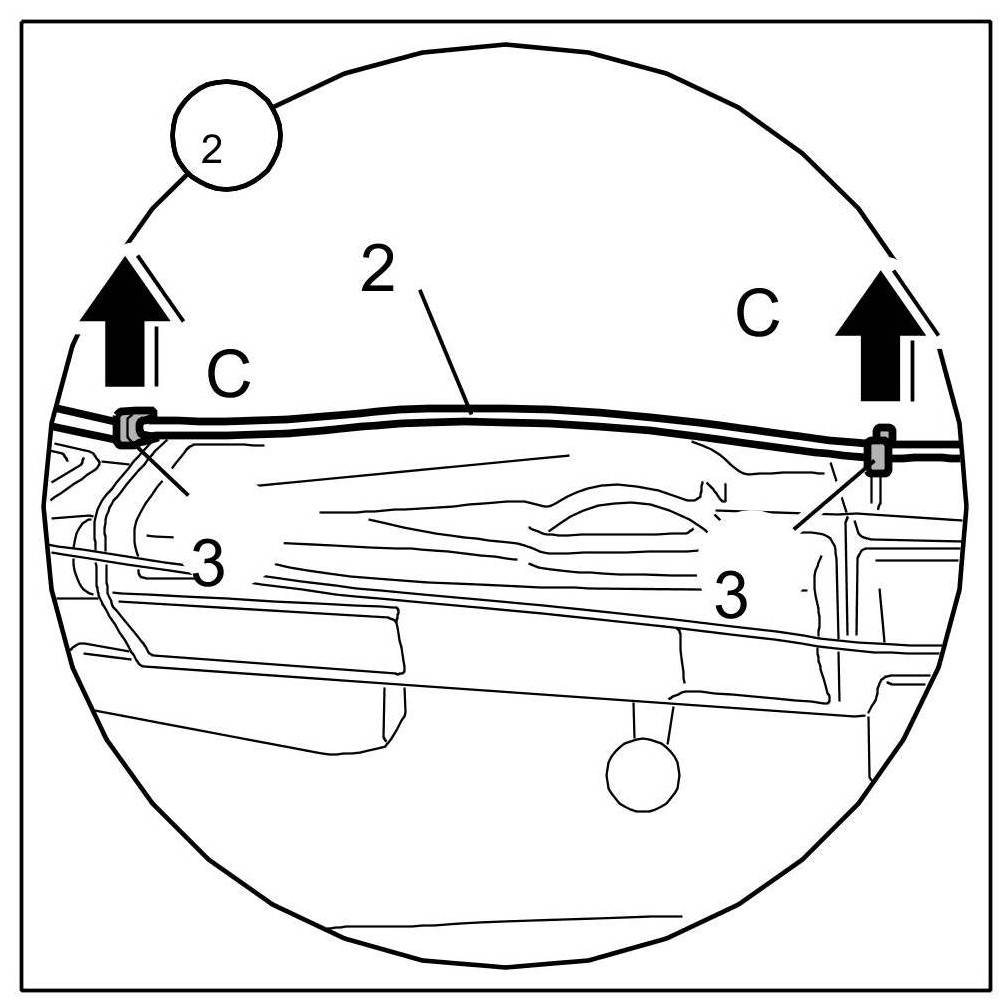
2.1. Pull out trailer hitch until the wiring harness -2- is accessible.
2.2. Unclip wiring harness -2- from fixing clips -3- ( -Arrows C- ).
Installation is performed in reverse order.
Removing and installing foam part in vehicle with externally fitted spare wheel

1. Pull connector off lock for spare wheel mount.
1.1. Release connector -1, 2- ( -Arrows A- ) and pull off ( -Arrows B- ).
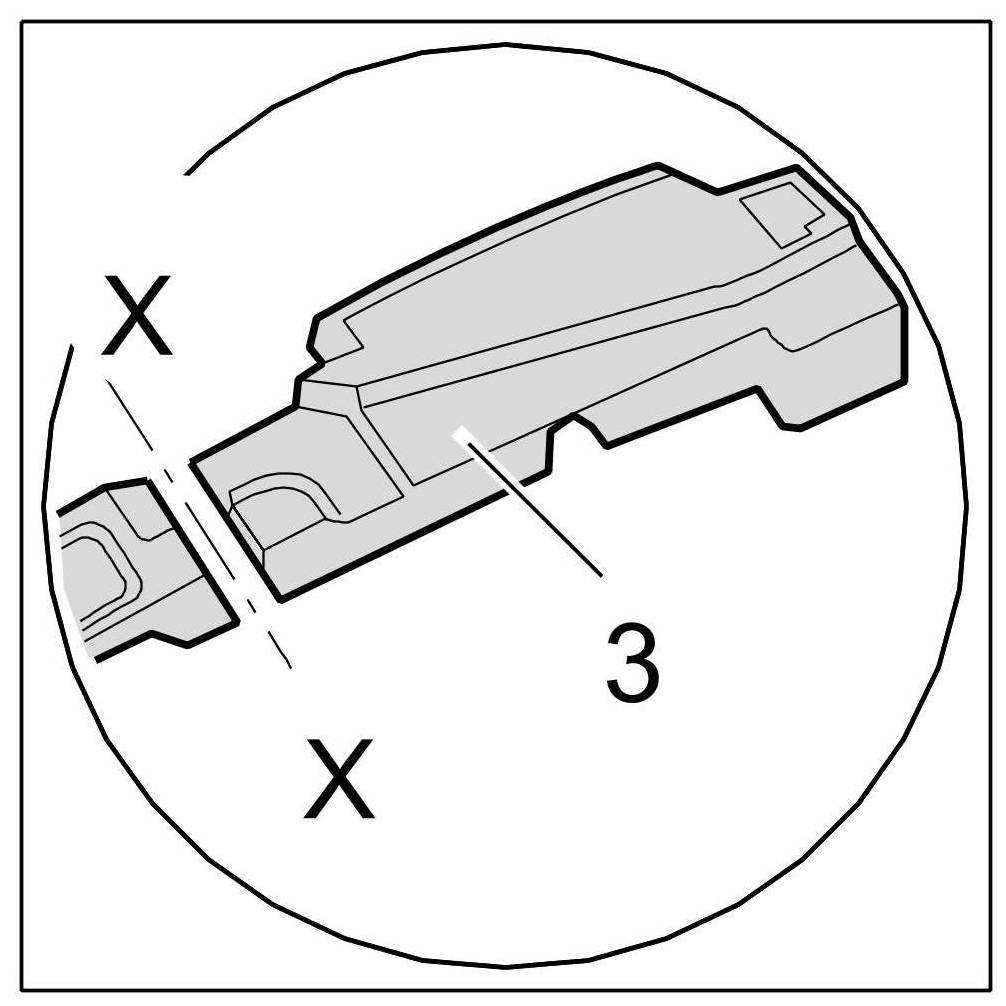
2. Replace foam part.
2.1. If the foam part -3- was damaged during removal, the new part must be shortened at the cutting line -X-.

Installation is performed in reverse order.
Subsequent work
Information
- Only for vehicles with Kessy.
1. Install rear Kessy antennas. => 966719 Removing and installing Kessy antenna - section on "Installing"
2. Install socket for trailer hitch. => 972419 Removing and installing wiring harness for removable trailer hitch - section on "Installing"
3. Install rear spoiler. => 635519 Removing and installing rear spoiler - section on "Installing"