Removal
2AZ-FE FUEL: FUEL TANK: REMOVAL
1. REMOVE FUEL SUCTION WITH PUMP AND GAUGE TUBE ASSEMBLY
Removal
2. DRAIN FUEL
3. DISCONNECT FUEL TANK VENT HOSE SUB-ASSEMBLY
Removal.
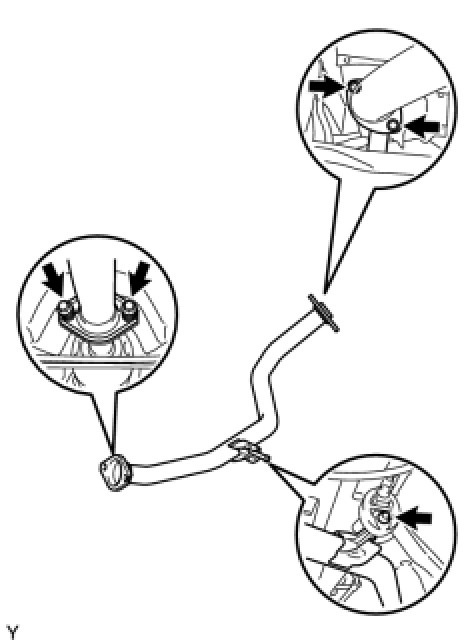
4. REMOVE NO. 2 CENTER EXHAUST PIPE ASSEMBLY
(a) Remove the 4 bolts and 2 compression springs and remove the No. 2 center exhaust pipe assembly.
5. REMOVE REAR FLOOR SIDE MEMBER COVER RH
(a) Remove the nut, grommet and 2 bolts, then remove the rear floor side member cover RH.

6. REMOVE REAR FLOOR SIDE MEMBER COVER LH
(a) Remove the nut, grommet and 2 bolts, then remove the rear floor side member cover LH.
7. REMOVE REAR FLOOR SIDE MEMBER BRACE SUB-ASSEMBLY Removal
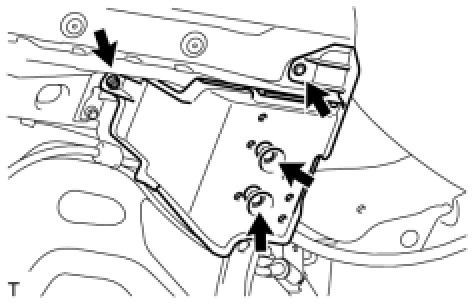
8. REMOVE NO. 1 FUEL TANK PROTECTOR SUB-ASSEMBLY
(a) Remove the 3 bolts, the nut, and then remove the No. 1 fuel tank protector sub-assembly.

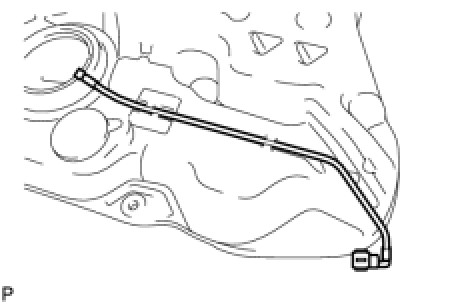
9. DISCONNECT FUEL TANK MAIN TUBE SUB-ASSEMBLY
(a) Release the lock as shown in the illustration, then pull and remove the fuel tank main tube.

NOTICE:
* Remove any dirt and foreign matter from the clip before performing this work.
* Avoid getting any scratches or foreign matter on the parts when disconnecting, as the quick connector has an O-ring that seals the plug.
* Perform this work by hand. Do not use any tools.
* Do not forcibly bend, twist or turn the nylon tube.
* Protect the disconnected parts by covering them with a plastic bag.
* If the connector and pipe are stuck, disconnect the nylon tube by turning it by hand to release it.
10. DISCONNECT FUEL TANK TO FILLER PIPE HOSE
(a) Disconnect the fuel tank to filler pipe hose.
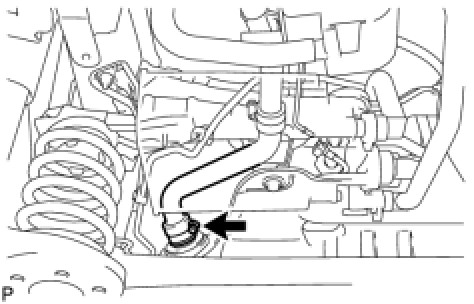
11. DISCONNECT NO. 6 FUEL TANK BREATHER TUBE
(a) Release the lock as shown in the illustration, then pull and remove the No. 6 fuel tank breather tube.

NOTICE:
* Remove any dirt and foreign matter from the clip before performing this work.
* Avoid getting any scratches or foreign matter on the parts when disconnecting, as the quick connector has an O-ring that seals the plug.
* Perform this work by hand. Do not use any tools.
* Do not forcibly bend, twist or turn the nylon tube.
* Protect the disconnected parts by covering them with a plastic bag.
* If the connector and pipe are stuck, disconnect the nylon tube by turning it by hand to release it.
12. REMOVE FUEL TANK ASSEMBLY
(a) Remove the 2 bolts and separate the parking brake cable assembly.
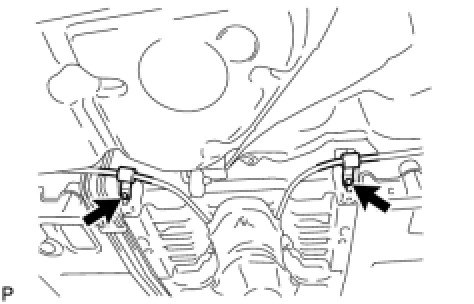
(b) Set the mission jack under the fuel tank.

(c) Remove the 4 bolts and remove the fuel tank assembly.
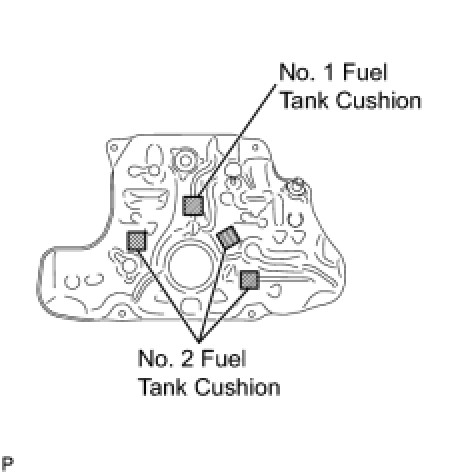
13. REMOVE FUEL TANK CUSHION
(a) Remove the No. 1 fuel tank cushion and 3 No. 2 fuel tank cushions.
14. REMOVE FUEL TANK MAIN TUBE SUB-ASSEMBLY
(a) Remove the fuel tank main tube sub-assembly from the fuel tank.