Troubleshooting Procedure Using Manifold Gauge Set
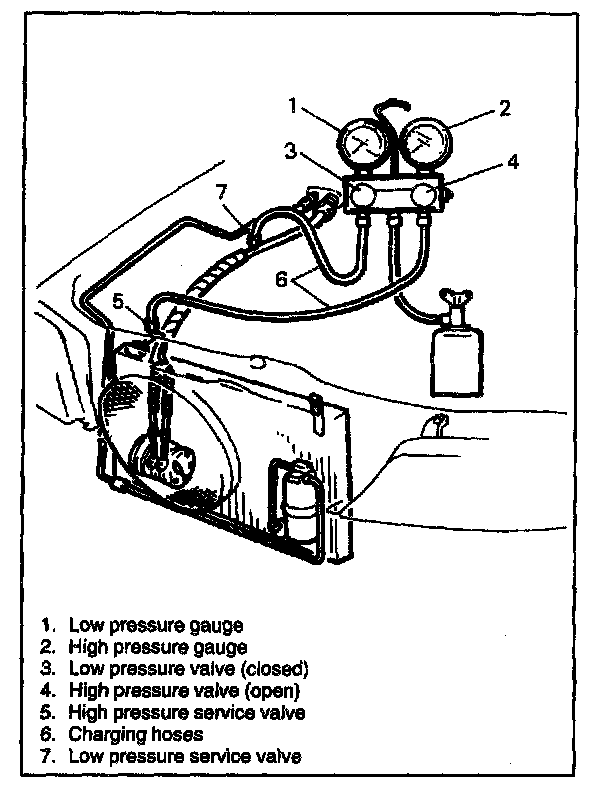
TROUBLESHOOTING PROCEDURE USING MANIFOLD GAUGE SET
This procedure enables the technician to discover and repair cooling problems by having the pressure of both the high and low pressure sides indicated on the respective gauges of the manifold gauge set.
ATTACHING MANIFOLD GAUGE SET
1. Make sure that high pressure and low pressure valves of manifold gauge are firmly closed.
2. Connect high pressure charging hose to high pressure service valve on vehicle, and connect low pressure charging hose to low pressure service valve on vehicle.
3. Bleed the air in charging hoses by loosening their respective nuts on manifold gauge, utilizing the refrigerant pressure. When a hiss is heard, immediately tighten nut.
CAUTION: Do not interchange high and low pressure charging hoses by mistake.
If the compressor is equipped with service valves with different thread diameters, the smaller Is the high pressure side, and the larger the low pressure side.
TROUBLESHOOTING INFORMATION
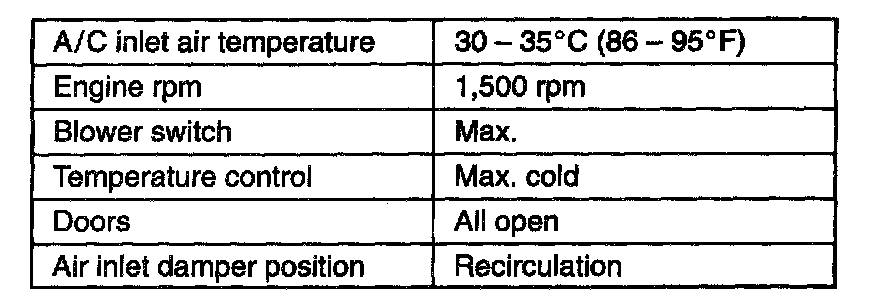
1. The manifold gauge pressure values shown have been obtained under conditions listed. However, keep in mind that the actual on-the-vehicle readings are somewhat affected by the ambient temperature.
2. Since the operating pressure for the HFC134a refrigerant at high temperatures is higher than that of the R12, the gauge readings will be slightly higher.

CORRECTIVE MEASURES FOR MALFUNCTION SYMPTOMS
Gauge readings, conditions, causes, and measures (classified according to malfunction symptoms) will be discussed.