Rear Wheel Alignment
NOTICE: For Zero Point Calibration information, please refer to: TSB T-SB-0020-8 (3/25/08).INSPECTION

1. MEASURE VEHICLE HEIGHT

*1: Front measuring point
Measure from the ground to the center of the front side lower suspension arm mounting bolt.

*2: Rear measuring point
Measure from the ground to the center of the strut rod mounting bolt.
NOTICE: Before inspecting the wheel alignment, adjust the vehicle height to the specification.
If the vehicle height is not within the specification, try to adjust it by pushing down on or lifting the body.
NOTICE: Before inspecting the wheel alignment, adjust the vehicle height to specification.
2. INSTALL CAMBER - CASTER - KINGPIN GAUGE ONTO VEHICLE OR POSITION VEHICLE ON WHEEL ALIGNMENT TESTER
Follow the specific instructions on the equipment manufacturer.

3. INSPECT CAMBER
HINT: Camber in not adjustable, it measurement is not within the specifications, inspect the suspension parts for damaged and/ or worn-out parts and replace them as necessary.
Measuring Point Reference:


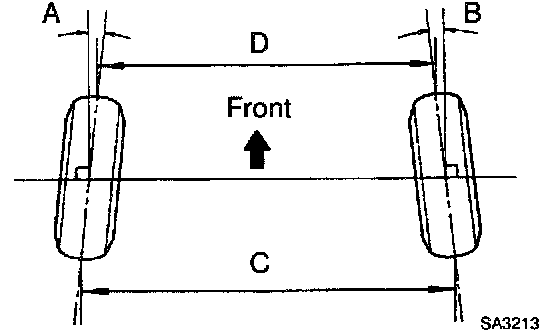
4. INSPECT TOE-IN
If the toe-in is not within the specification, adjust it at the No. 2 lower suspension arm.
5. ADJUST TOE-IN

a. Measure the length of the left and right No.2 lower suspension arms.
No.2 lower suspension arm length difference: 1 mm (0.04 inch) or less
If the left-right difference is larger than the specification, adjust the length.

b. Loosen the lock nuts.
c. Turn the left and right lower suspension arms an equal amount to adjust toe-in.
HINT:
- Try to adjust the toe-in to the center value.
- One turn of the each adjusting tube will adjust the toe-in about 36' (0.6°, 6.7 mm, 0.264 inch).
d. Torque the lock nuts.
Torque: 56 Nm (570 kgf.cm, 41 ft. lbs.)