Expansion Valve: Service and Repair
Expansion Valve, Removing/Assembly
NOTE:
- Before carrying out any work on the A/C refrigerant system, refer to A/C refrigerant system safety measures.
- Except where indicated with *, all components illustrated must only be serviced or replaced after discharging refrigerant system. Use Kent Moore ACR4 or equivalent.
- O-rings used on R-134a systems may be red, green, violet or black.
- Always plug open refrigerant line connections to prevent dirt and moisture contamination.
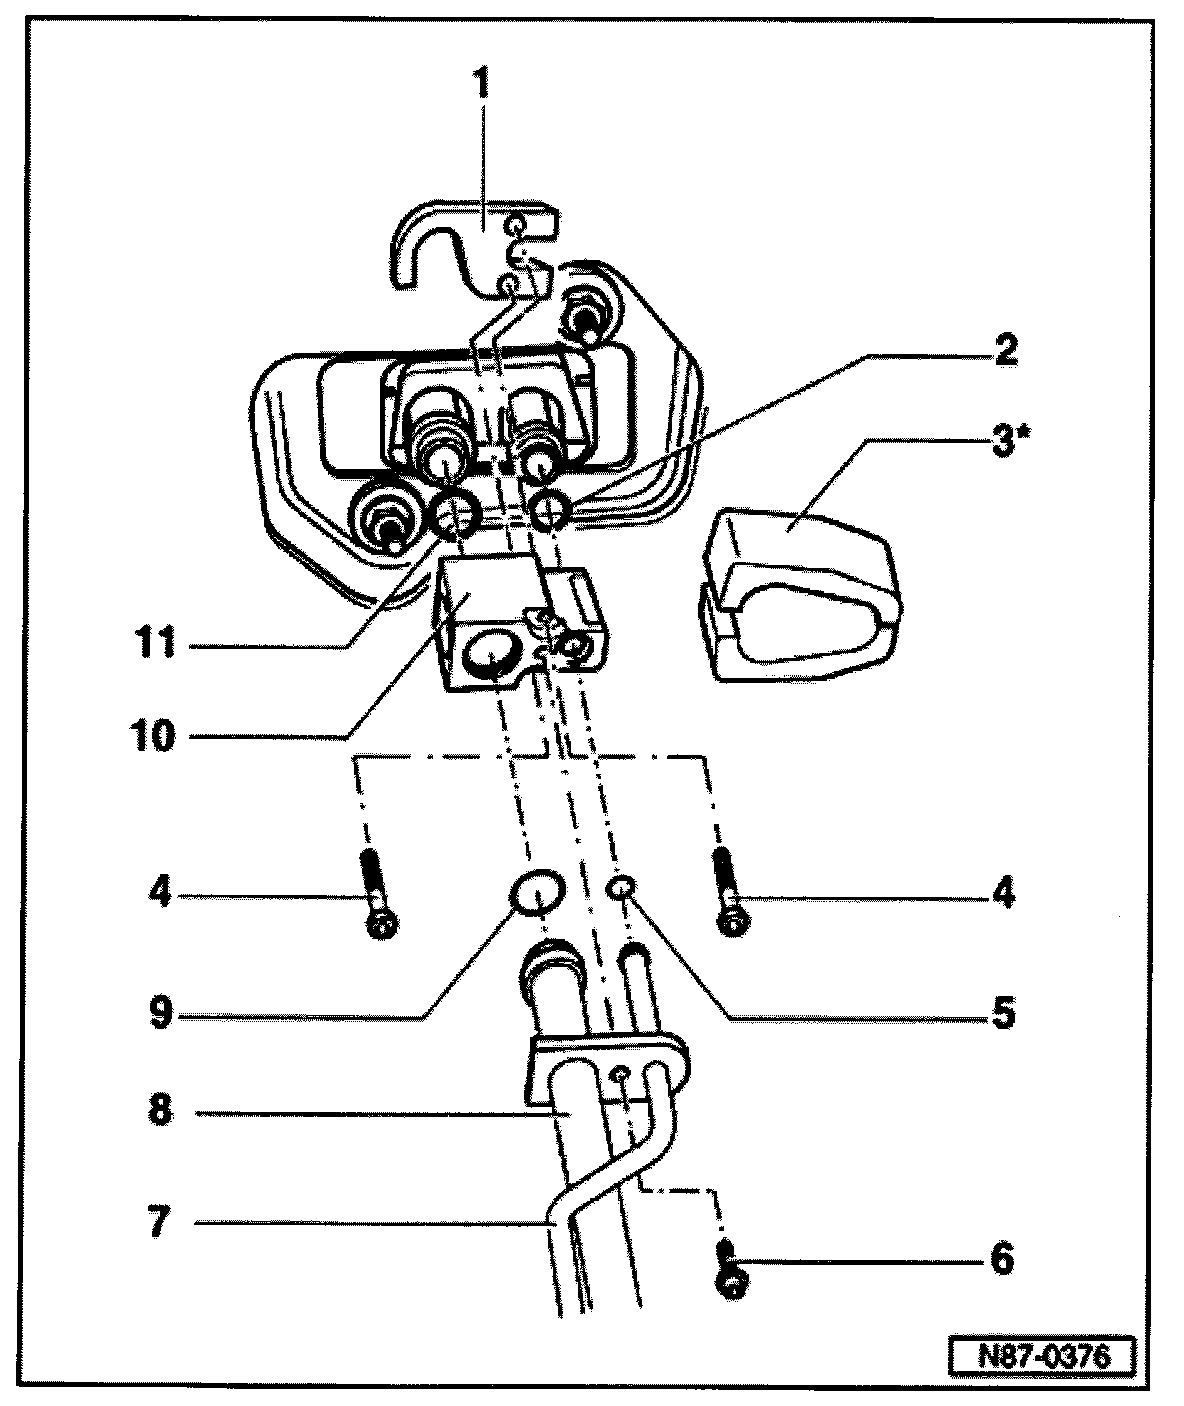
Assembly
1 - Threaded plate
2 - O-ring
- Always replace
- 10.8 mm; 1.8 mm
3 - Insulator*
4 - Bolt
- 8 Nm (71 in. lb)
- Qty.: 2
5 - O-Ring
- Always replace
- 7.6 mm; 1.8 mm
6 - Bolt
- 8 Nm (71 in. lb)
7 - Refrigerant line
- From receiver drier to expansion valve
8 - Refrigerant hose
- From expansion valve to compressor
- With damper
9 - O-ring
- Always replace
- 16.7 mm; 1.8 mm
10 - Expansion valve
- Located in right side of engine compartment
- Hole for refrigerant lines at bulkhead must be must be sealed against splash water
11 - O-ring
- Always replace
- 14 mm; 1.8 mm
Removing
- Discharge refrigerant system.
- Remove insulator -3-.
- Remove retaining screw -6-.
- Pull out refrigerant lines -7- and -8- and move aside.
- Remove bolts -4-.
- Remove expansion valve -10-
NOTE: When replacing expansion valve, always replace 0 rings - 5- & -9-, -2- & -11-.