Disassembly
Fig. 1 Cross-sectional View Of Rear Axle Assembly:
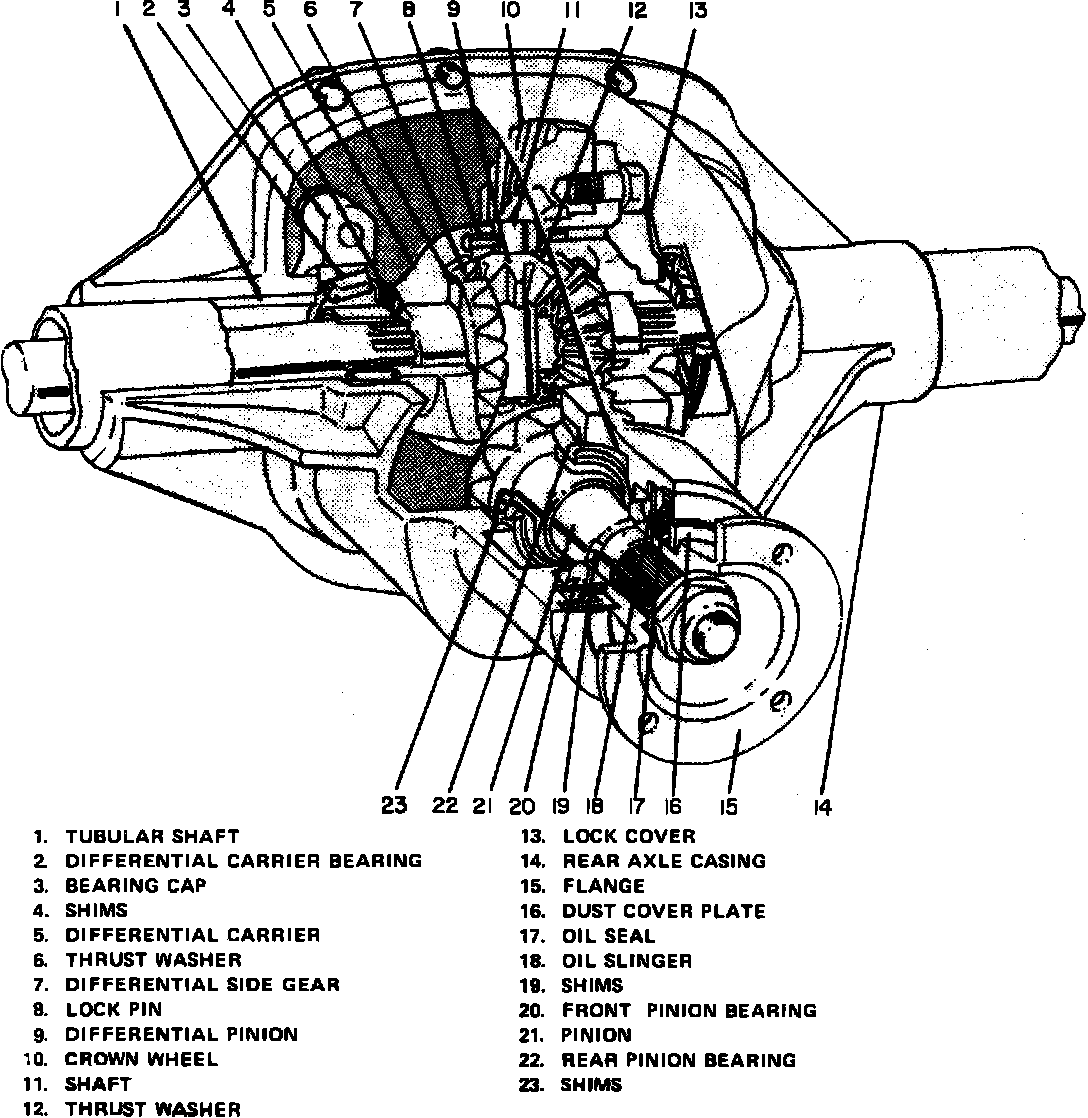
1. Remove rear axle assembly from vehicle, Fig. 1, and install in a suitable holding fixture with pinion flange facing downward.
2. Remove axle shafts.
3. Remove differential cover. If the unit is being reconditioned because of noise, the contact pattern should be checked before disassembly.
4. Before disassembly, check markings on carrier and caps. If marks are difficult to read, mark caps with a punch to insure proper assembly. Remove caps.
Fig. 2 Expanding Rear Axle Housing:
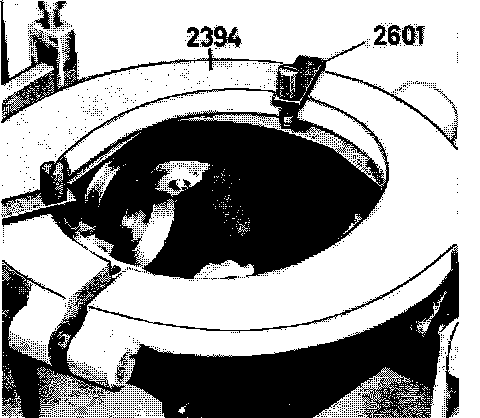
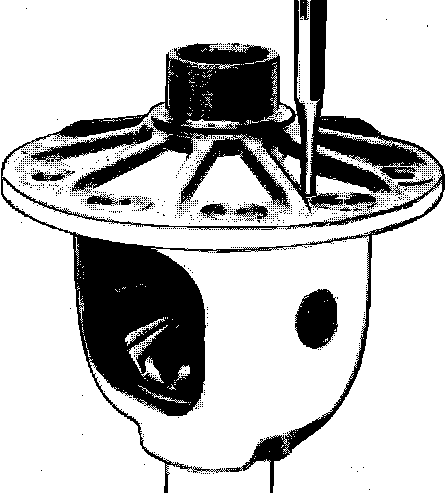
Fig. 3 Removing Differential Lockpin:
5. Install tool No. 2394 or other suitable spreader in holes in carrier housing. Hold tool in place with retainers 2601, Fig. 2, Tighten tool tension bolt until all freeplay is eliminated. Turn tension bolt 3 to 3-1/2 additional turns. Do not turn tension bolt more than 3-1/2 turns.
6. Using tool No. 2337 or equivalent, remove differential assembly from housing. Loosen tension bolt of tool 2394 and remove tool.
7. Invert axle case and drain oil.
8. Using tool No. 5149 or equivalent and a suitable socket, remove flange nut.
9. Using tool No. 2261 or equivalent, remove flange.
10. Using a plastic mallet, drive out pinion from [1][2]differential housing. Hold pinion with one hand to prevent damage while pinion is driven out.
11. Using tool Nos. 1801 and 2599 or equivalents, remove front pinion bearing, washer and oil seal from axle case.
12. Remove rear pinion bearing outer race. On type 1030 axle, use tool Nos. 1801 and 2598 or equivalents, to remove rear pinion bearing outer race. On type 1031 axle, use tool Nos. 1801 and 2843 or equivalents, to remove outer race.
13. On type 1030 axle, use tool No. 5215 to remove rear pinion bearing. On type 1031 axle, use tool Nos. 5214 and 5216 to remove rear pinion bearing.
14. Using tool No. 2483 or equivalent, remove differential carrier bearings. Record position of shims and bearings for reassembly.
15. On vehicles without limited slip [1][2]differential, remove lock plate from ring gear bolts, loosen ring gear bolts about halfway and tap on bolt heads to loosen ring gear, then remove bolts and ring gear. Drive out lock pin, Fig. 3, and push out shaft for differential gears. Lift out block, differential gears and thrust washers.
16. On vehicles with limited slip [1][2]differential, place marks on differential gear shafts and differential carrier to ensure parts are installed in the same manner as when removed. Remove differential carrier bolts. Limited slip differential model type 1030, has bolts with lefthand threads.
17. Remove differential carrier and gear plates.
18. Remove ring gear bolts and ring gear. Discard old bolts.