Windshield Assembly Overview
Windshield Assembly Overview
• On vehicles equipped with lane assist, the camera must be re-calibrated if the windshield has been replaced.
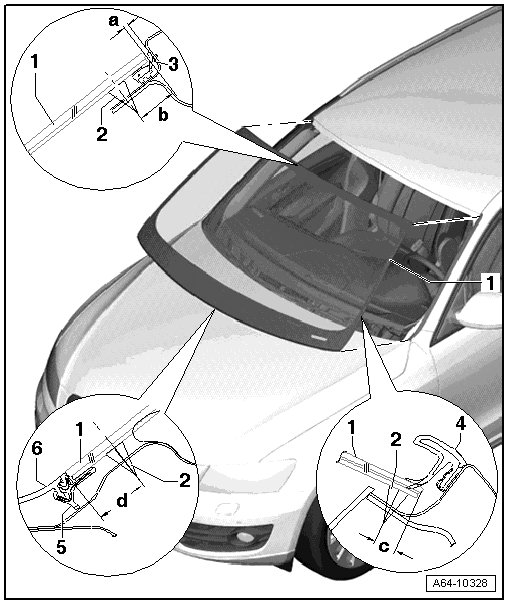
1 Windshield
• Distance to roof dimension - a - = 2 mm.
• Align the side distance - c -.
2 Adhesive Sealing Material
• Observe minimum curing time, refer to => [ Minimum Curing Times ] Flush-Bonded Windows.
• Dimension - b - = 17 mm ±2 mm
• Dimension - c - = 8 mm ±2 mm
• Dimension - d - = 12 mm ±2 mm
3 Gap Cover
• No replacement part
4 Drip Rail
5 Plenum Chamber Cover Molding
• No replacement part
• With a new window, protective piping must first be removed before installing plenum chamber cover.
6 Plenum Chamber Cover
• Press into retaining strip only after window adhesive curing time is complete (3 hours).
Water Deflector, Removing
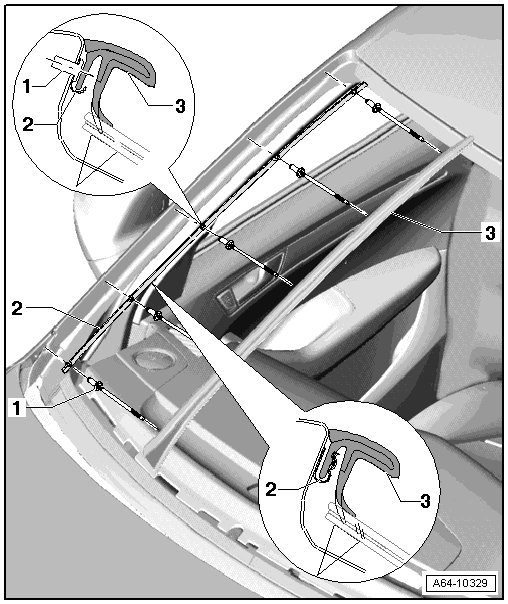
1 Pop Rivet
• Quantity: 5
• Rivet the guide rails beginning at the top.
2 Guide Rail
• To remove, drill out rivet heads - 4 - and drive out rivet shafts.
3 Drip Rail
• Press into the guide rail as far as the stop, beginning at the top and working toward the bottom.
• Check for flushness at the transition to the A-pillar.
Removing Protective Piping
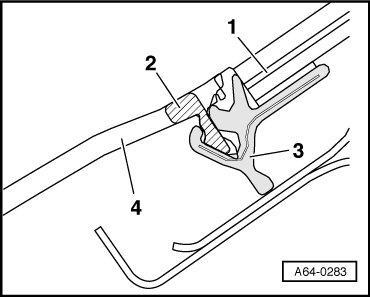
- With a new windshield - 1 -, protective tubing - 2 - must be removed from molding - 3 - before installing plenum chamber cover - 4 -.