Ignition Coil: Service and Repair
Ignition Coils
Special tools, testers and auxiliary items required
• Ignition Coil Puller (T40039)
Removing

- Remove the engine covers - 1 and 2 - upward.
- Free up the fuel line - 4 - and hose connection - 1 - from the Evaporative Emission (EVAP) canister on the air filter housing and on the air guide tube.
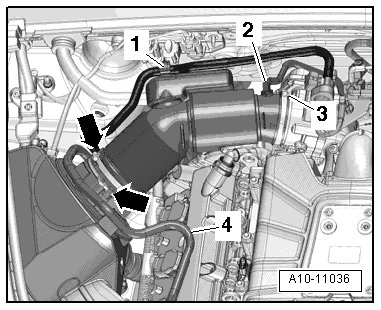
- Remove the vacuum hose - 2 - from the air guide hose connection.
- Remove the air guide pipe by loosening the hose clamp - 3 - and opening the clips - arrows -.
- Remove the air filter housing.
- Remove the bolts - arrows - and disconnect the connectors on the ignition coils.

- Lay the electrical wiring harness down slightly.
• Ignore - 1 and 2 -.
Cylinder Bank 2 (left)
- Remove bolt - arrow -.
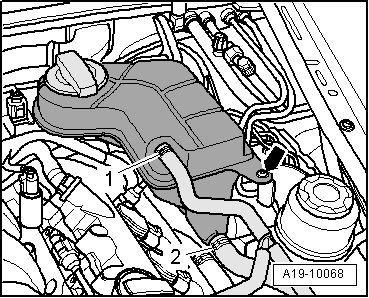
- Disconnect the electrical connector to the engine coolant level warning switch (F66) on the bottom of the coolant reservoir and lay the reservoir aside with the coolant hoses - 1 and 2 - attached.
- Remove the bolts - arrows - and disconnect the connectors on the ignition coils.

- Lay the electrical wiring harness down slightly.
• Ignore - 1, 2 and 3 -.
Continued for Both Sides

- Remove the ignition coils with the (T40039).
Installing
• Tightening specifications, refer to => [ Air Filter Overview ] Air Filter Overview and => [ Ignition Overview ] Service and Repair.
Install in reverse order of removal.