Oil Pan: Service and Repair
Oil Pan Replacement
Removal Procedure
1. Drain the engine oil. Refer to Engine Oil and Oil Filter Replacement (Service and Repair).
2. Remove the front exhaust pipe. Refer to Front Pipe Replacement (Service and Repair).
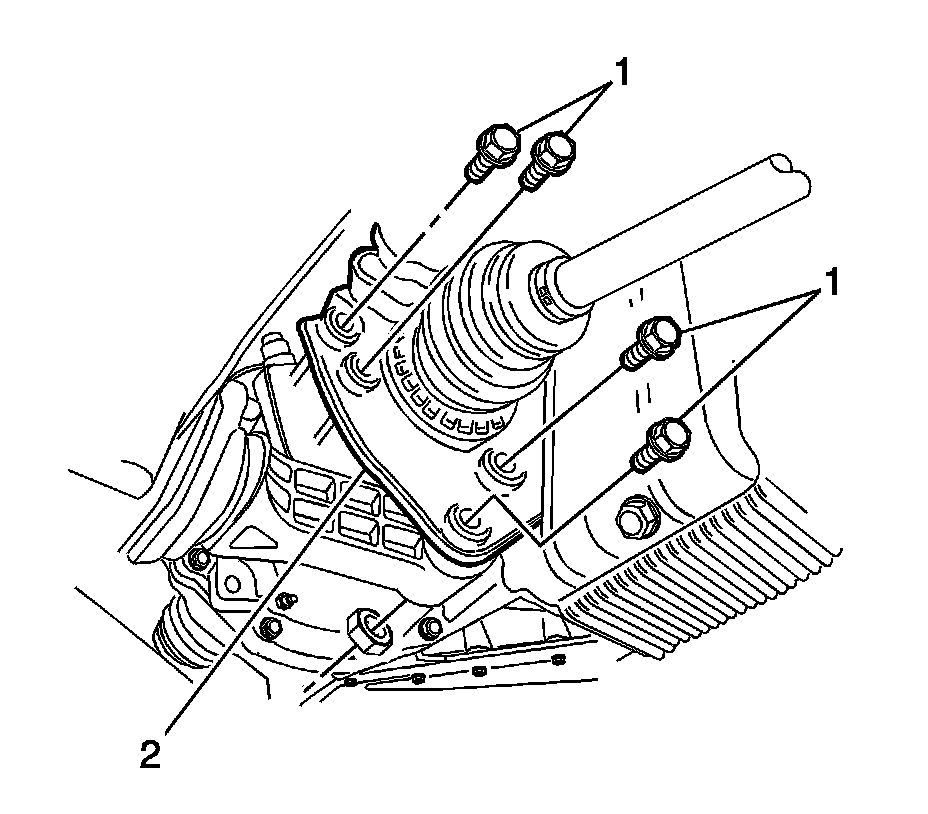
3. Remove the transmission rear mounting bracket (2), for automatic transmission only.
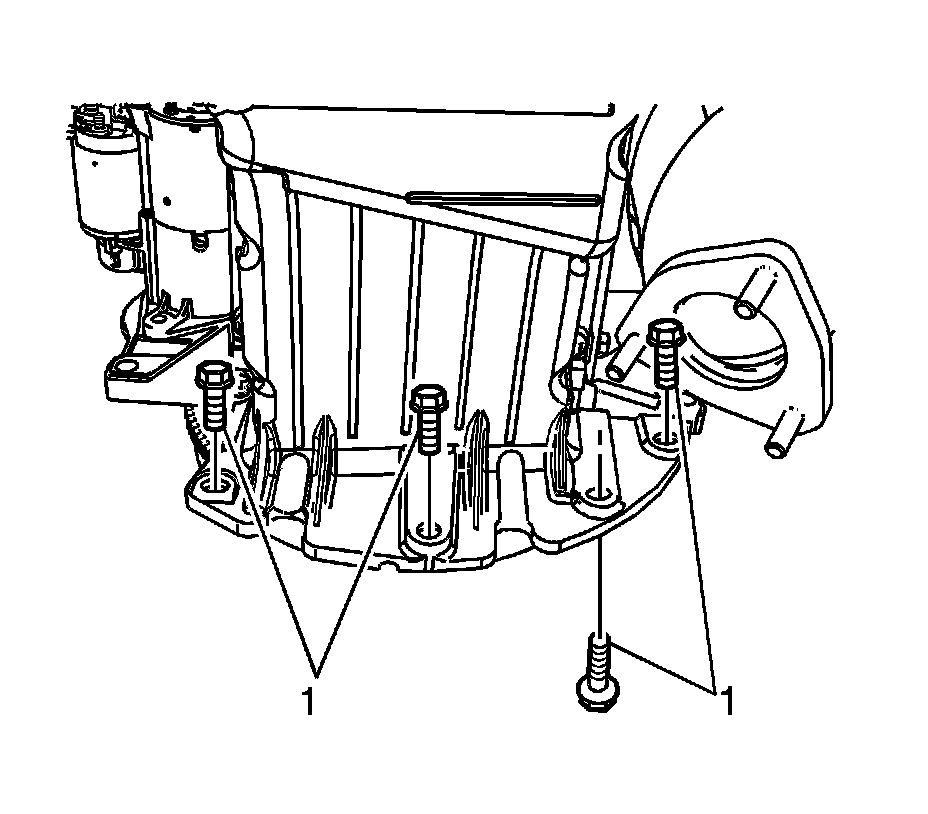
4. Remove the oil pan-to-transmission bolts (1).
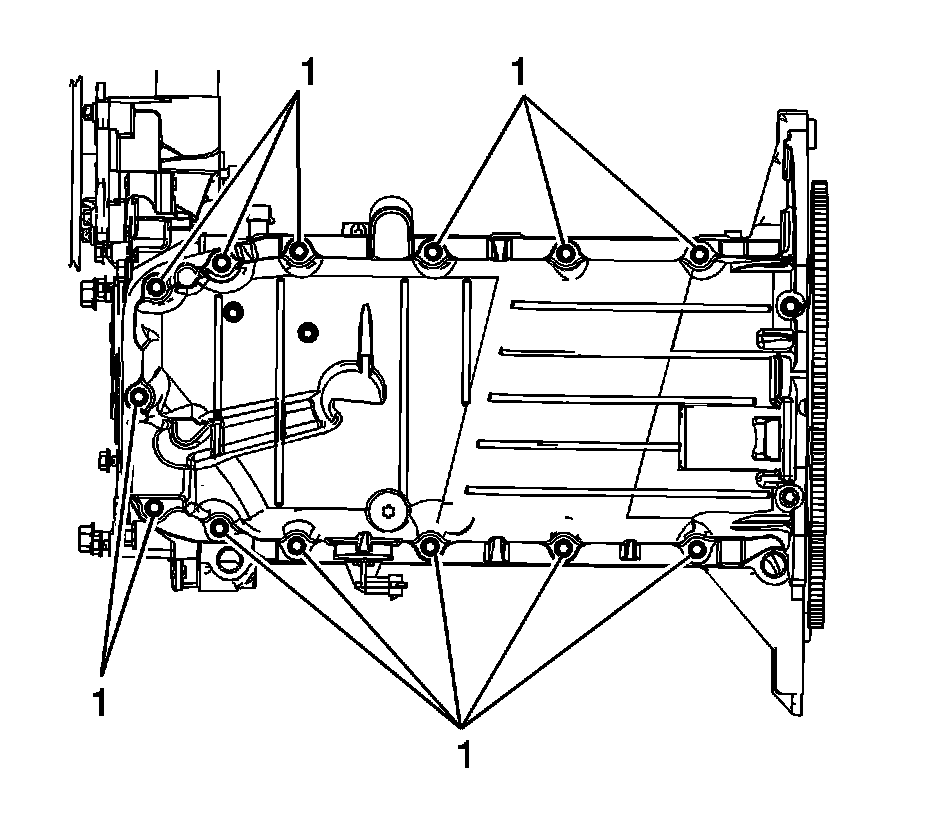
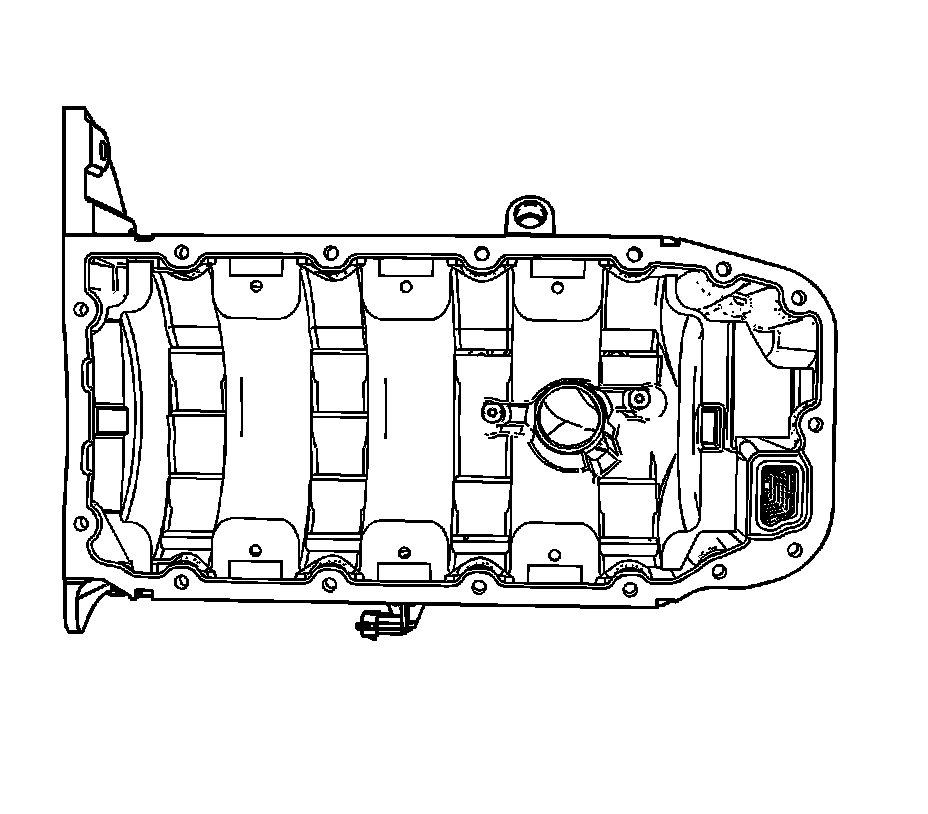
5. Remove the oil pan bolts (1).
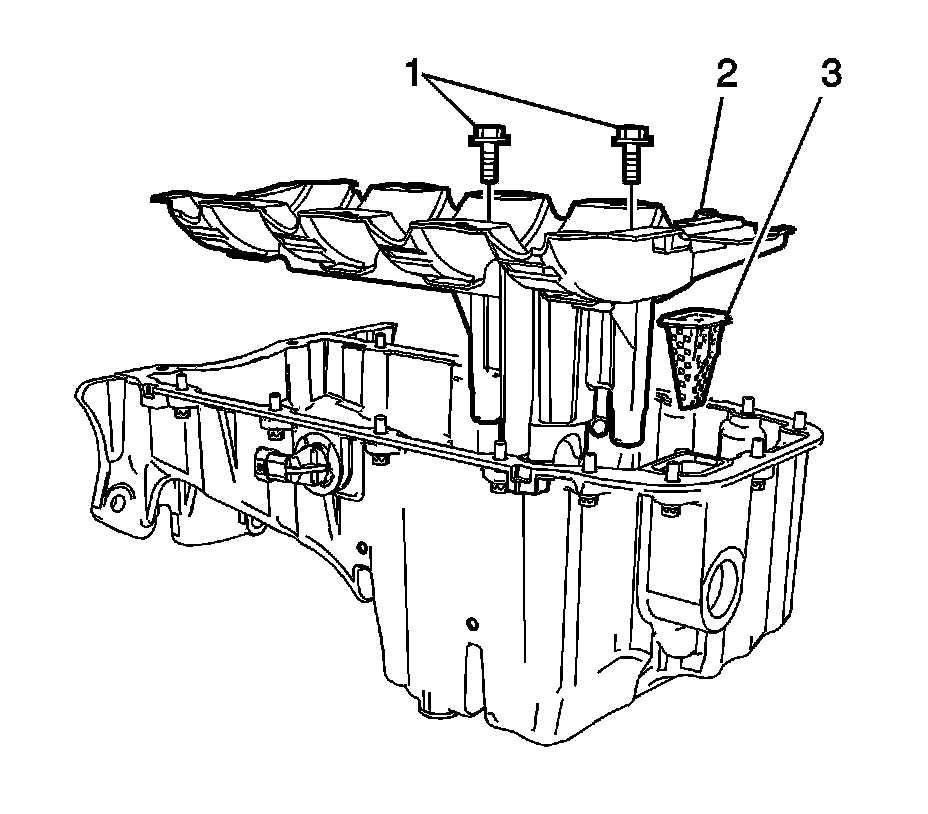
6. Remove the oil pan baffle (2).
7. Remove the oil suction filter (3).
Installation Procedure
1. Install the oil suction filter (3) to the oil pan.
Caution: Refer to Fastener Caution (Fastener Caution).
2. Install the oil pan baffle (2).
Tighten the oil pan baffle bolts (1) to 10 Nm (7.3 lb ft).
3. Clean the oil pan sealing surface.
4. Apply the oil pan sealant LOCTITE 5900 on the sealing surface.
5. Install the oil pan bolts (1).
Tighten the oil pan bolts (1) to 14 Nm (10.3 lb ft).
6. Install the oil pan-to-transmission bolts (1).
Tighten the oil pan-to-transmission bolts (1) to 40 Nm (29.5 lb ft).
7. Install the transmission rear mounting bracket (2), for automatic transmission only.
Tighten the transmission rear mounting bracket bolts and nut to 80 Nm (59 lb ft).