Brake Fluid Reservoir: Service and Repair
Master Cylinder Reservoir Replacement (without RPO LAT)
Warning: Refer to Brake Fluid Irritant Warning (Brake Fluid Irritant Warning).
Caution: Refer to Brake Fluid Effects on Paint and Electrical Components Caution (Brake Fluid Effects on Paint and Electrical Components Caution).
Removal Procedure

1. Without draining the cooling system or disconnecting the hoses, remove and position aside the radiator surge tank. Refer to Radiator Surge Tank Replacement (Radiator Surge Tank Replacement).
2. Disconnect the brake fluid level indicator switch electrical connector.
3. Remove and discard the brake fluid from the master cylinder reservoir.
4. Remove the master cylinder reservoir bolt (1).

5. Remove the reservoir (1) from the master cylinder.
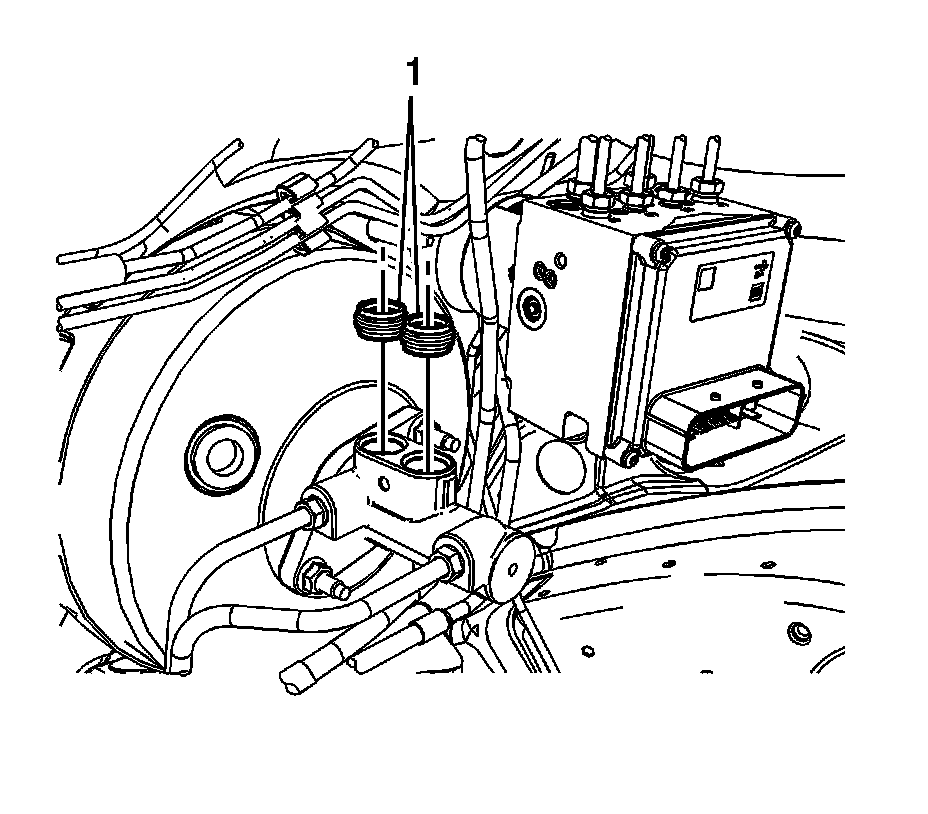
6. Remove the reservoir seals (1) from the master cylinder.
Installation Procedure
1. Inspect the master cylinder reservoir for damage and replace, if necessary.
2. Clean the reservoir with denatured alcohol.
3. Dry the reservoir with filtered, non-lubricated compressed air.
4. Lubricate the seals and the reservoir bayonets with GM approved or equivalent brake fluid from a clean, sealed brake fluid container.
5. Install the reservoir seals (1) to the master cylinder.
6. Install the reservoir (1) to the master cylinder.
Caution: Refer to Fastener Caution (Fastener Caution).
7. Install the master cylinder reservoir bolt (1) and tighten to 8 Nm (71 lb in).
8. Connect the brake fluid level indicator switch electrical connector.
9. Install the radiator surge tank. Refer to Radiator Surge Tank Replacement (Radiator Surge Tank Replacement).
10. Fill the master cylinder reservoir. Refer to Master Cylinder Reservoir Filling (Master Cylinder Reservoir Filling).