Removal and Replacement
Fuel Tank Replacement
1. Drain the fuel tank until it is less than half full Service and Repair.
2. Reinstall the fuel tank unit without connecting the fuel tank unit 4P connector and the quick-connect fitting (feed line) Fuel Tank Unit Removal/Installation.
3. Raise the vehicle on a lift Service and Repair.
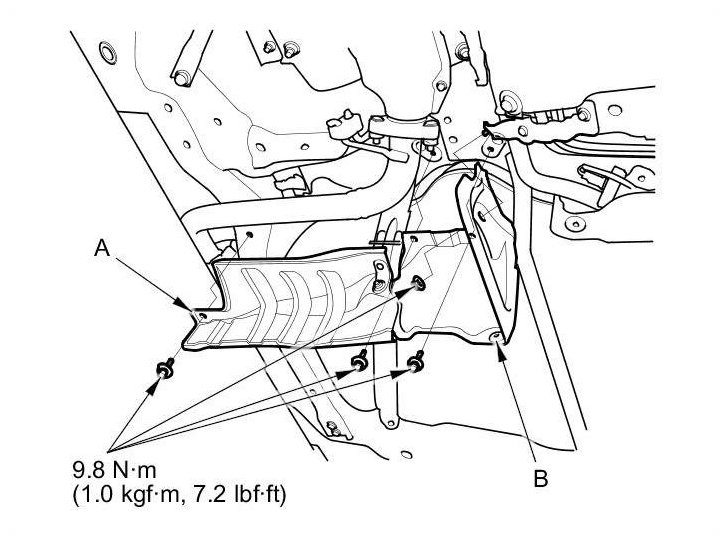
4. Remove the fuel tank guard (A), and the fuel tank protector (B).
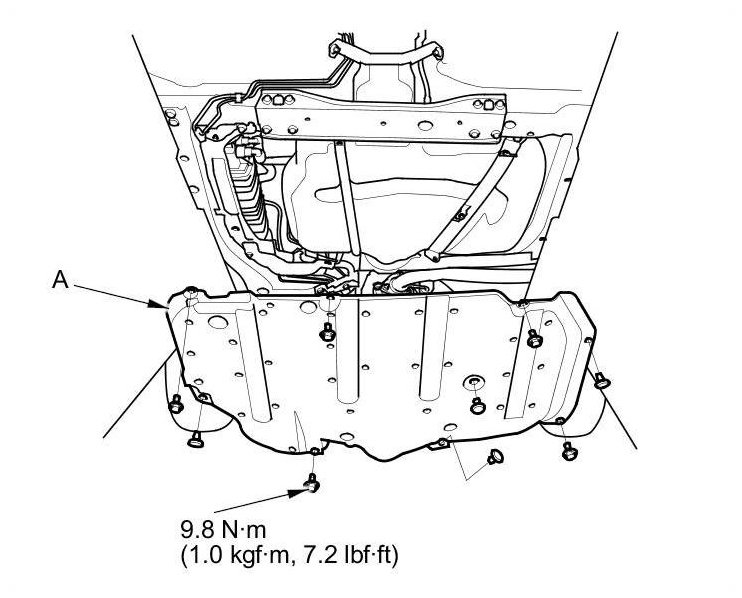
5. Except LX (A/T model): Remove the fuel tank cover (A).
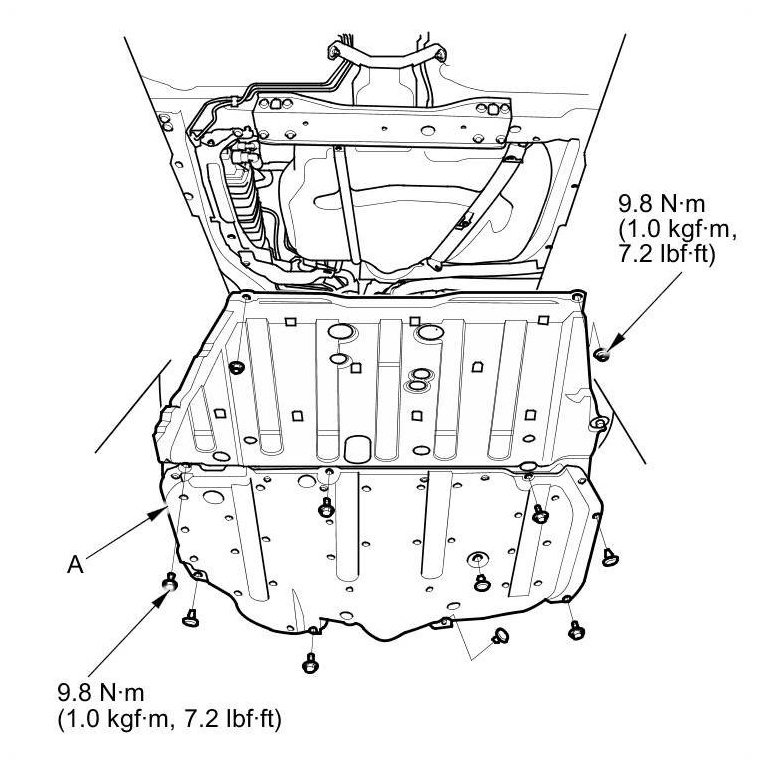
6. LX (A/T model): Remove the floor under cover assembly (A).
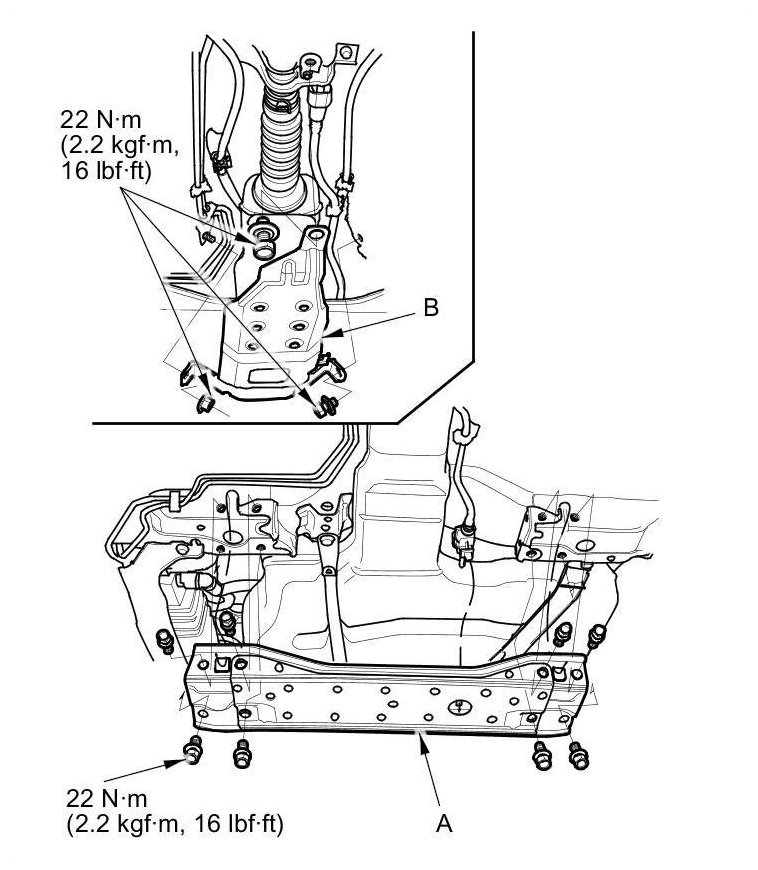
7. Remove the front floor cross beam (A), and the tank mount bracket (B).
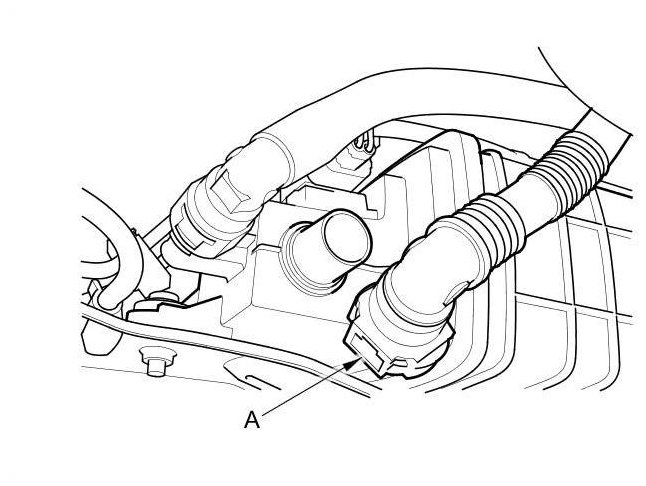
8. Disconnect the fuel fill hose (A), and the quick-connect fitting (fuel suction tube) (B).
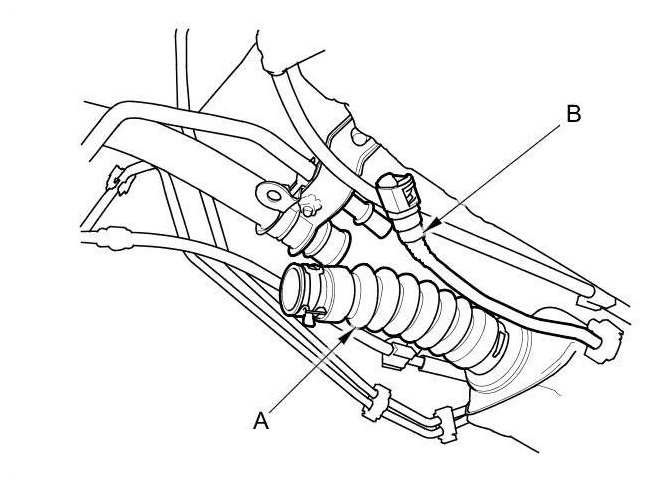
9. Disconnect the fuel tank vapor control valve hose (A).
10. Place a jack or other support under the fuel tank (A), then remove the strap bolts (B).

11. Remove the fuel tank.
12. Install the parts in the reverse order of removal.
NOTE: When you replacing the fuel tank with a new one, make sure you remove the ring pull upwards after you confirm the connection is secure Fuel Line/Quick-Connect Fitting Installation.