Trunk / Liftgate Shock / Support: Service and Repair
Liftgate Strut Replacement
Removal Procedure
Warning: Refer to Hood Hold-Open Device Warning (Service Precautions).
Caution: Apply pressure only at the end of the liftgate/hood assist rod that you are removing or attaching. Do NOT apply pressure to the middle of the rod because damage or bending will result.
1. Open the liftgate.
2. Support the liftgate.
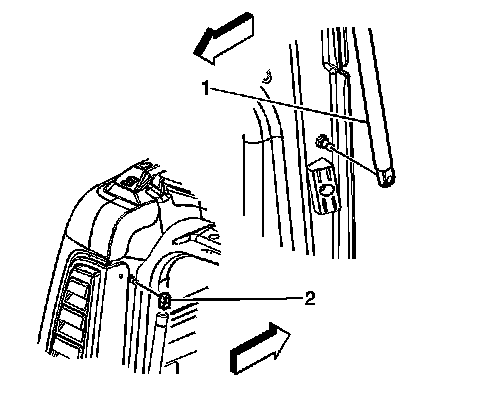
3. Carefully pry the retaining clip in order to remove the lower end of the liftgate strut (1) from the ball stud on the body.
4. Carefully pry the retaining clip in order to remove the upper end of the liftgate strut (2) from the ball stud on the liftgate.
5. Remove the liftgate strut from the vehicle.
6. If needed, remove the ball stud(s).
Installation Procedure
Caution: Refer to Component Fastener Tightening Caution (Component Fastener Tightening Caution).
1. If removed, install the ball stud(s).
Tighten the ball stud to 15 Nm (11 lb ft).
2. Install the liftgate strut to the vehicle ball studs.
3. Push on the end of the strut in order to install the upper end of the liftgate strut (2) to the ball stud of the liftgate.
4. Push on the end of the strut in order to install the lower the end of the liftgate strut (1) to the ball stud on the body.
5. Close the liftgate.