Air Spring Leveling Sensor Replacement
Air Spring Leveling Sensor Replacement
Removal Procedure
1. Raise and support the vehicle. Refer to Lifting and Jacking the Vehicle (Service and Repair).
2. Remove the rear tire and wheel. Refer to Tire and Wheel Removal and Installation (Service and Repair).
3. Support the rear axle at the proper D height. Refer to Trim Height Specifications (Trim Height Specifications).
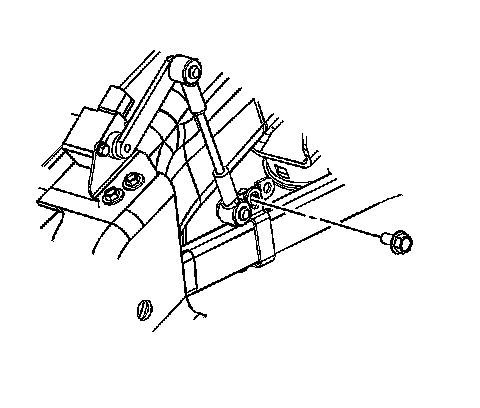
4. Disconnect the air spring level sensor link from the upper control arm.
5. Disconnect the air spring level sensor electrical connector located on the frame. Do not attempt to separate the connection at the sensor.
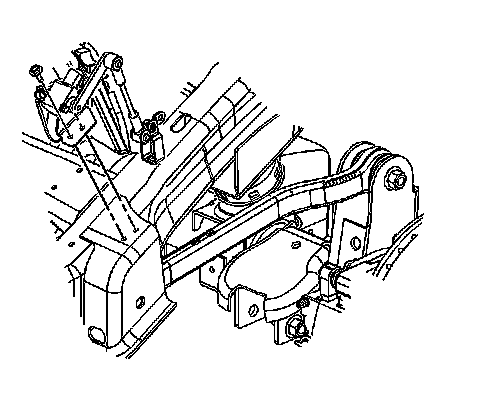
6. Remove the air spring level sensor to the frame mounting bolts.
7. Remove the air spring level sensor.
Installation Procedure
1. Install the air spring level sensor to the frame.
Caution: Refer to Fastener Caution (Fastener Caution).
2. Install the air spring level sensor to the frame mounting bolts.
Tighten the air spring level sensor to the frame mounting bolts to 8.5 Nm (75 lb in).
3. Connect the air spring level sensor electrical connector located on the frame.
4. Install the air spring level sensor link to the upper control arm.
Tighten the bolt to 17 Nm (13 lb ft).
5. Remove the rear axle support.
6. Install the rear tire and wheels. Refer to Tire and Wheel Removal and Installation (Service and Repair).
7. Perform the suspension position calibration procedure. Refer to Suspension Position Calibration (Suspension Position Calibration).