Coolant Line/Hose: Service and Repair
Coolant Manifold
Removal
CAUTION: Engine coolant will damage the paint finished surfaces. If spilt, immediately remove the coolant and clean the area with water.
1 Remove the cover and disconnect the battery ground cable. For additional information, refer to Specifications [1][2]Battery
2
WARNING: Do not work on or under a vehicle supported only by a jack. Always support the vehicle on safety stands.
Raise and support the vehicle.
3 Drain the cooling system. For additional information, refer to Cooling System Draining, Filling and Bleeding - Vehicles With: Supercharger Cooling System Draining, Filling and Bleeding
4 Remove the supercharger belt. For additional information, refer to Supercharger Belt Supercharger Belt
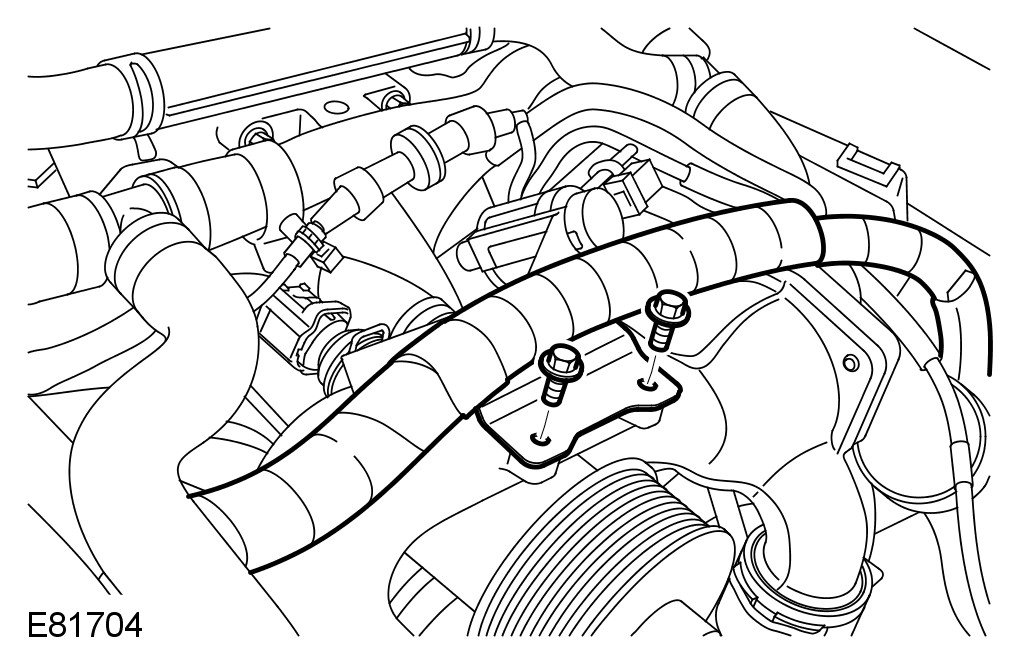
5 Release the engine wiring harness.
- Remove the 2 bolts.
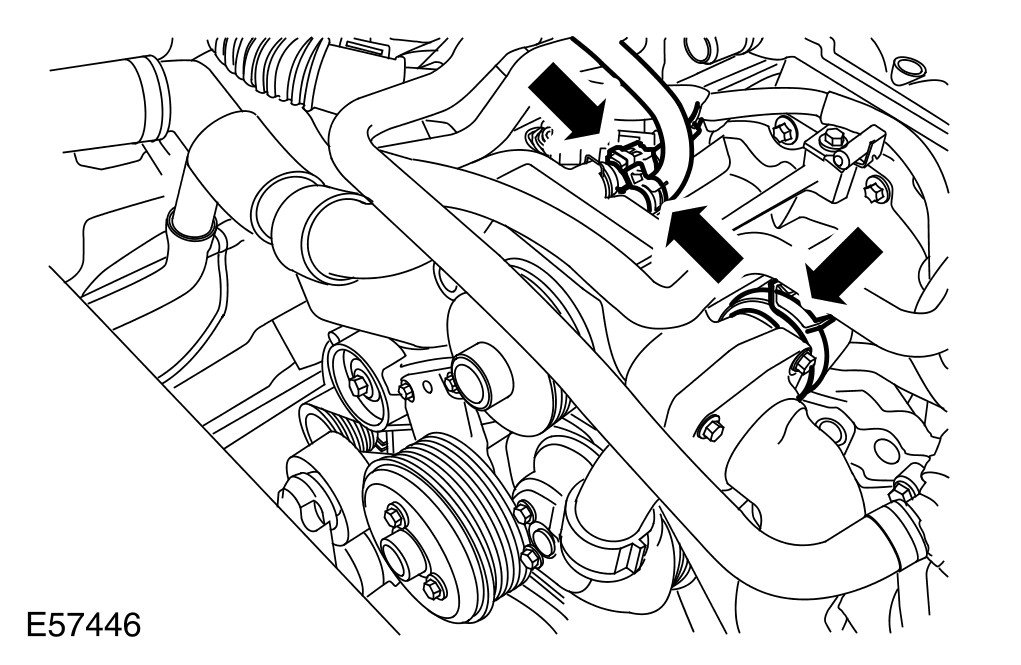
6 Disconnect the coolant manifold to radiator hose.
- Remove the clip.
7 Disconnect the thermostat housing to radiator hose.
- Release the clip.

8 Disconnect the coolant manifold to coolant reservoir hose.
- Release the clip.
9 Disconnect the coolant manifold bleed hose.
- Release the clip.
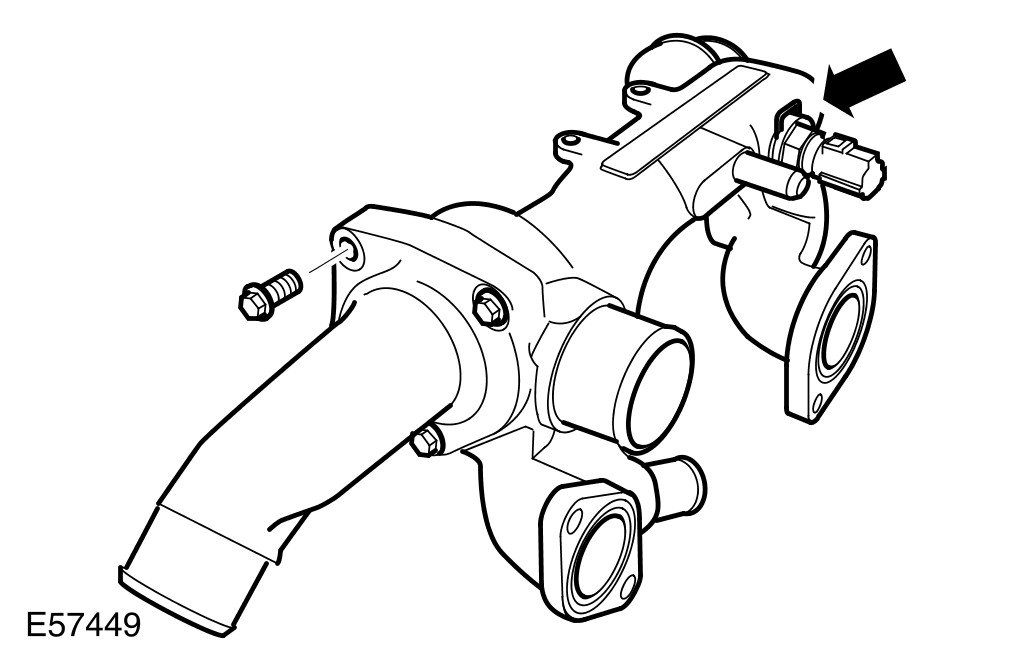
10 Disconnect the engine coolant temperature (ECT) sensor electrical connector.
11 Disconnect the cylinder block coolant hose.
- Release the clip.
12
CAUTION: Before the disconnection or removal of any components, ensure the area around joint faces and connections are clean. Plug any open connections to prevent contamination.
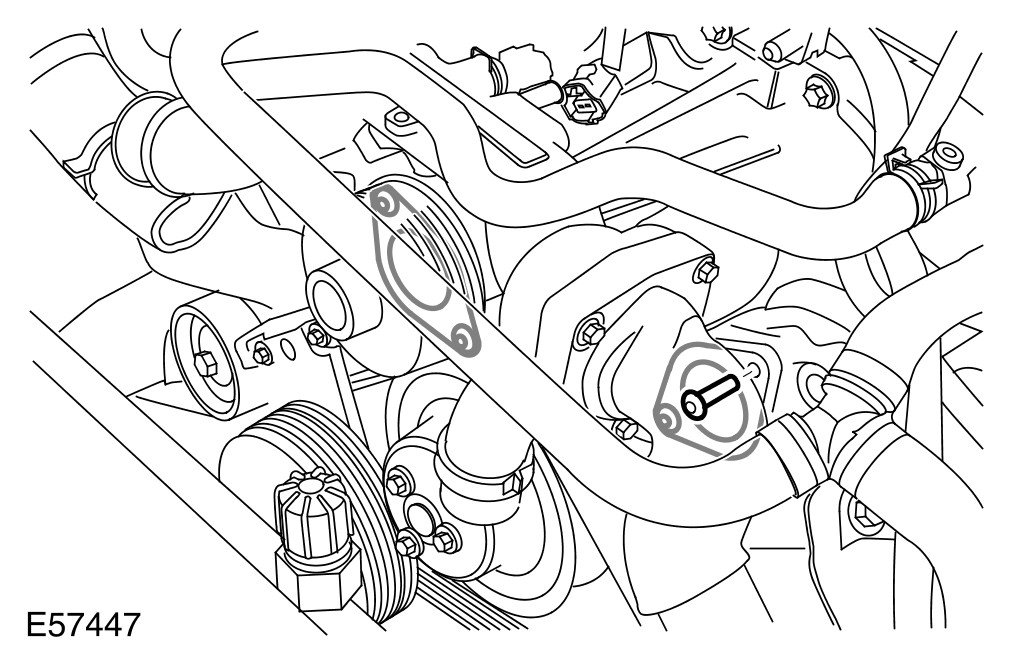
Release the coolant manifold.
- Remove the 4 Torx screws.
- Position the wiring harness bracket aside.
- Remove and discard the 2 O-ring seals.
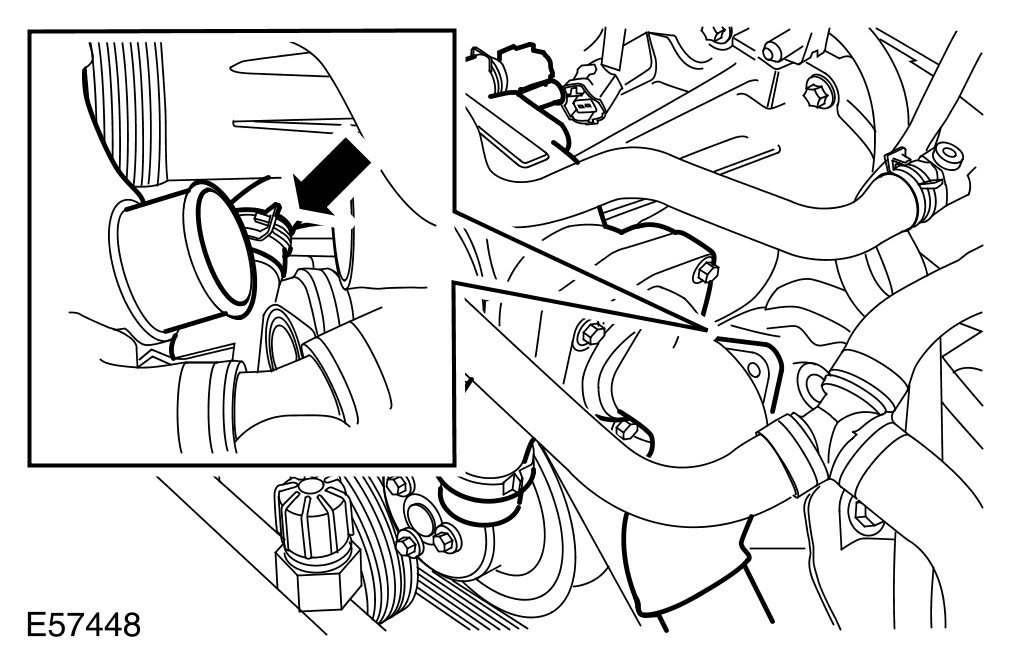
13 Disconnect the coolant manifold rear hose.
- Rotate the coolant manifold.
- Release the clip.
14 Remove the coolant manifold.
15
NOTE:
Do not disassemble further if the component is removed for access only.
Remove the ECT sensor.
- Remove the clip.
- Remove and discard the O-ring seal.
16 Remove the thermostat housing.
- Remove the 3 bolts.
- Discard the O-ring seal.
Installation
1 Install the thermostat housing.
- Clean the components.
- Install a new O-ring seal.
- Tighten the bolts to 10 Nm (7 lb.ft).
2 Install the ECT sensor.
- Clean the component mating faces.
- Install a new O-ring seal.
- Secure with the clip.
3 Install the coolant manifold.
- Clean the components.
- Install new O-ring seals.
- Connect the rear hose and secure with the clip.
- Connect the cylinder block hose and secure with the clip.
- Attach the wiring harness bracket.
- Tighten the Torx screws to 10 Nm (7 lb.ft).
4 Connect the remaining coolant hoses.
- Secure with the clips.
5 Connect the ECT sensor electrical connector.
6 Attach the engine wiring harness.
- Tighten the bolts to 6 Nm (4 lb.ft).
7 Install the supercharger belt. For additional information, refer to Engine Cover Service and Repair
8 Connect the battery ground cable and install the cover. For additional information, refer to Specifications [1][2]Battery
9 Refill and bleed the cooling system. For additional information, refer to Cooling System Draining, Filling and Bleeding - Vehicles With: Supercharger Cooling System Draining, Filling and Bleeding