Air Duct: Service and Repair
Fascia Duct Bezel ReplacementRemove

1. Lever under each bottom corner and remove cold air vents from bezel.
2. Remove screw securing underside of bezel to panel.
3. Remove 3 screws securing inside of bezel to panel.

4. Lift bezel away from evaporator casing.
5. Withdraw capillary tube from evaporator fins.
6. Disconnect multiplug from fan interlock relay.
7. Remove 2 screws securing cover to rear of bezel.
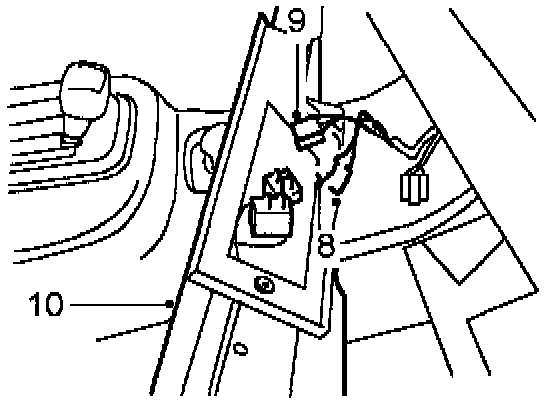
8. Disconnect 2 Lucars from temperature control switch.
9. Disconnect multiplug from fan switch.
10. Remove bezel assembly.
Do not carry out further dismantling if component is removed for access only.
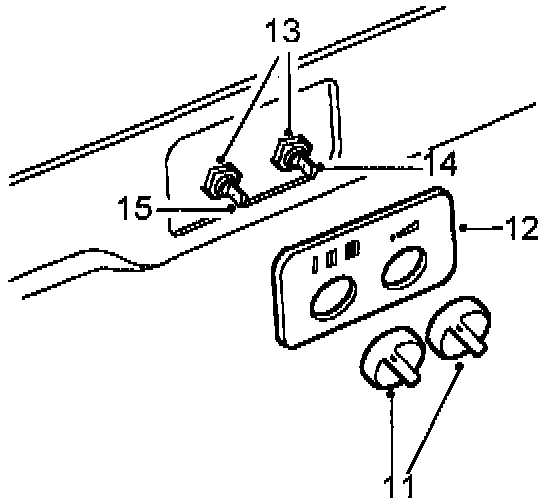
11. Pull control knobs from switches.
12. Remove switch panel.
13. Remove nuts securing switches to bezel.
14. Remove temperature control switch.
15. Remove fan switch.
16. Transfer components to new panel.
Refit
17. Position bezel assembly and connect multiplug to fan switch.
18. Connect Lucars to temperature control switch.
19. Position capillary tube to RH side of bezel.
20. Fit screws securing cover to rear of bezel.
21. Connect multiplug to fan interlock relay.
22. Position bezel assembly and insert capillary tube 60 mm, 2.5 in into evaporator fins
23. Fit bezel assembly to panel and above evaporator casing, secure with screws.
24. Fit cold air vents.
25. Carry out system test. Refer to: Testing and Inspection.