Shifter M/T: Service and Repair
MANUAL TRANSAXLE SHIFT MECHANISM REMOVAL/INSTALLATION [G66M-R]
Shift Lever Component Removal/Installation
1. Disconnect the negative battery cable.
2. Remove the side wall. Side Wall Removal/Installation
3. Remove the center console box. Center Console Box Removal/Installation
4. Remove the console panel. Console Panel Removal/Installation
5. Remove the center console. Center Console Removal/Installation
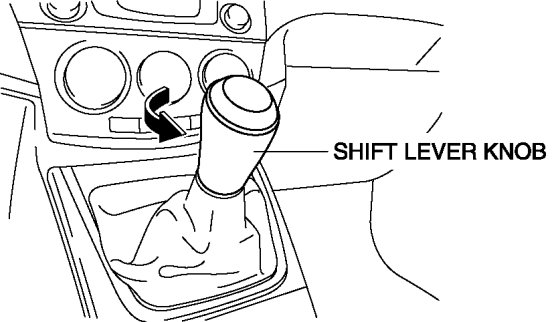
6. Remove the shift lever knob.
7. Remove the shift panel. Shift Panel Removal/Installation
8. Remove the front console. Front Console Removal/Installation
9. Remove the rear blower unit. Rear Blower Unit Removal/Installation
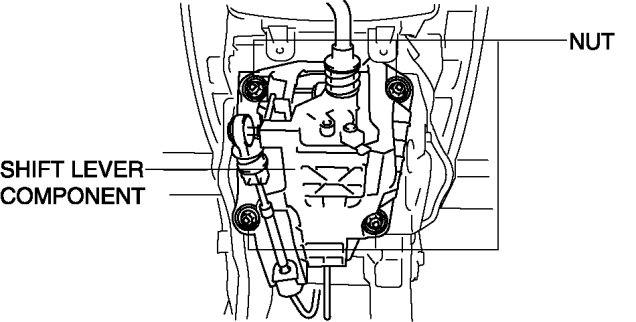
10. Remove the shift lever component.
a. Remove the shift lever component installation nuts.
Tightening torque
- 16-22 Nm {1.7-2.2 kgf-m, 12-16 ft-lbf}
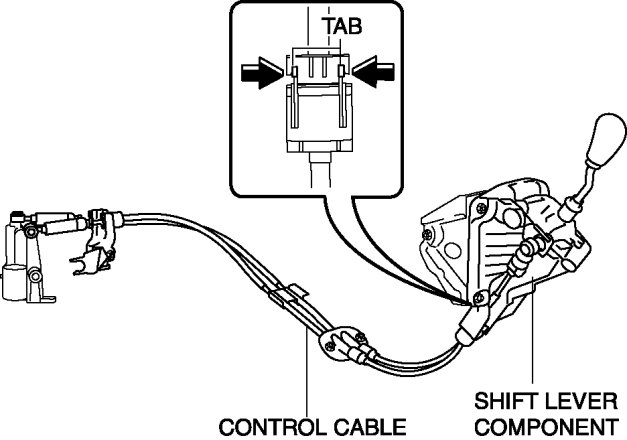
b. Remove the control cable end using a fastener remover.

c. Press the tabs on the control cable as shown in the figure and remove the shift lever component from the control cable.
11. Install in the reverse order of removal.
Control Cable Removal/Installation
1. Disconnect the negative battery cable.
2. Remove the battery component. (ex: battery, battery tray) Removal and Replacement
3. Remove the fastener retaining insulator (No.5) and set insulator (No.5) aside. Service and Repair
4. Remove the side wall. Side Wall Removal/Installation
5. Remove the center console box. Center Console Box Removal/Installation
6. Remove the console panel. Console Panel Removal/Installation
7. Remove the center console. Center Console Removal/Installation
8. Remove the shift lever knob.
9. Remove the shift panel. Shift Panel Removal/Installation
10. Remove the front console. Front Console Removal/Installation
11. Remove the rear blower unit. Rear Blower Unit Removal/Installation
12. Disconnect the drain hose connected to A/C unit.

13. Remove the shift lever component installation nuts.
Tightening torque
- 16-22 Nm {1.7-2.2 kgf-m, 12-16 ft-lbf}
14. Remove the control cable end using a fastener remover.
15. Press the tabs on the control cable as shown in the figure and disconnect the control cable from the shift lever component.
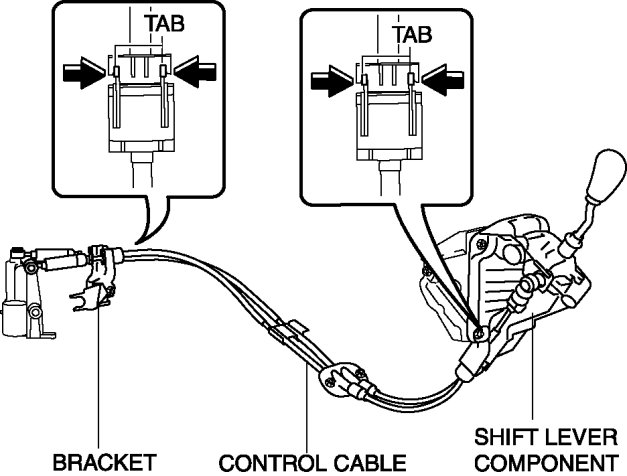
16. Press the tabs on the control cable and disconnect the control cable from the bracket.
17. Remove the bracket as shown in the figure.
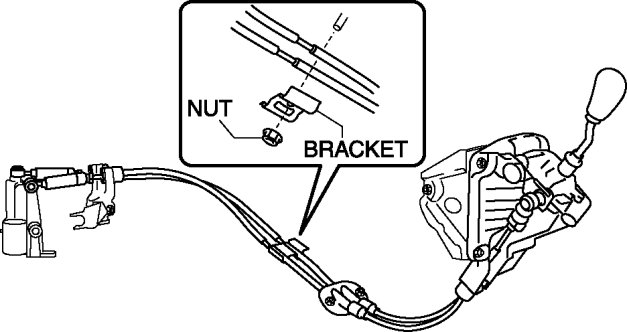
Tightening torque
- 19-25 Nm {2.0-2.5 kgf-m, 15-18 ft-lbf}
18. Remove the fastening nuts for the grommet.
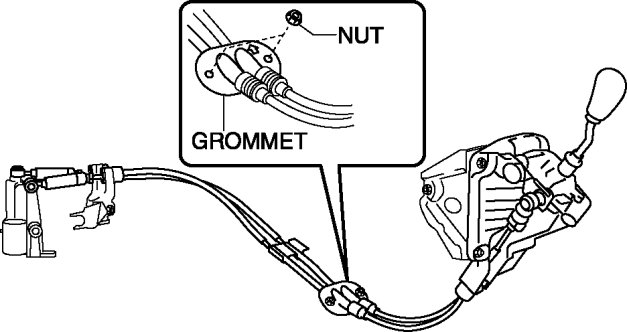
Tightening torque
- 6.9-9.8 Nm {71-99 kgf-cm, 62-86 in-lbf}
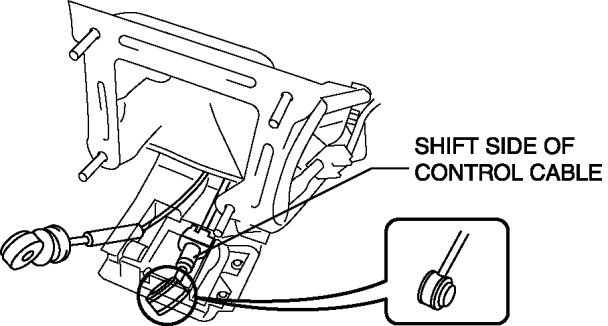
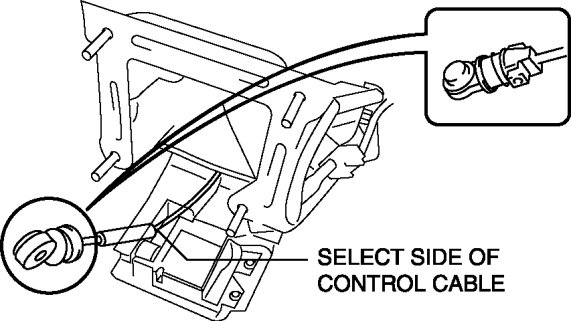
19. Remove the control cable using two people.
a. While pressing the shift side of the control cable from the cabin, pull it out to the engine compartment.
b. While pressing the select side of the control cable from the cabin, pull it out to the engine compartment.
20. Install in the reverse order of removal.