Convertible Top Removal/Installation
CONVERTIBLE TOP REMOVAL/INSTALLATION
1. Cover both sides of the rear window glass with thick cloth to protect the window.
2. Disconnect the negative battery cable. (See Removal and Replacement)
3. Remove the following parts:
a. Console Console Removal/Installation
b. Quarter trim Quarter Trim Removal/Installation
c. Scuff plate Service and Repair
d. Tire house trim Tire House Trim Removal/Installation
e. Aeroboard Service and Repair
f. Front seat back bar garnish Seat Back Bar Garnish Removal/Installation
g. Back trim Back Trim Removal/Installation
h. Seat belt set plate Service and Repair
i. Seat back crossmember assembly Service and Repair
j. Rear side trim Rear Side Trim Removal/Installation
k. Rear package trim Rear Package Trim Removal/Installation
l. Side shelf Side Shelf Removal/Installation
m. Seat belt upper anchor installation bolt Service and Repair
4. Disconnect the rear window defroster connector.
5. Remove in the order indicated in the table.
6. Install in the reverse order of removal.
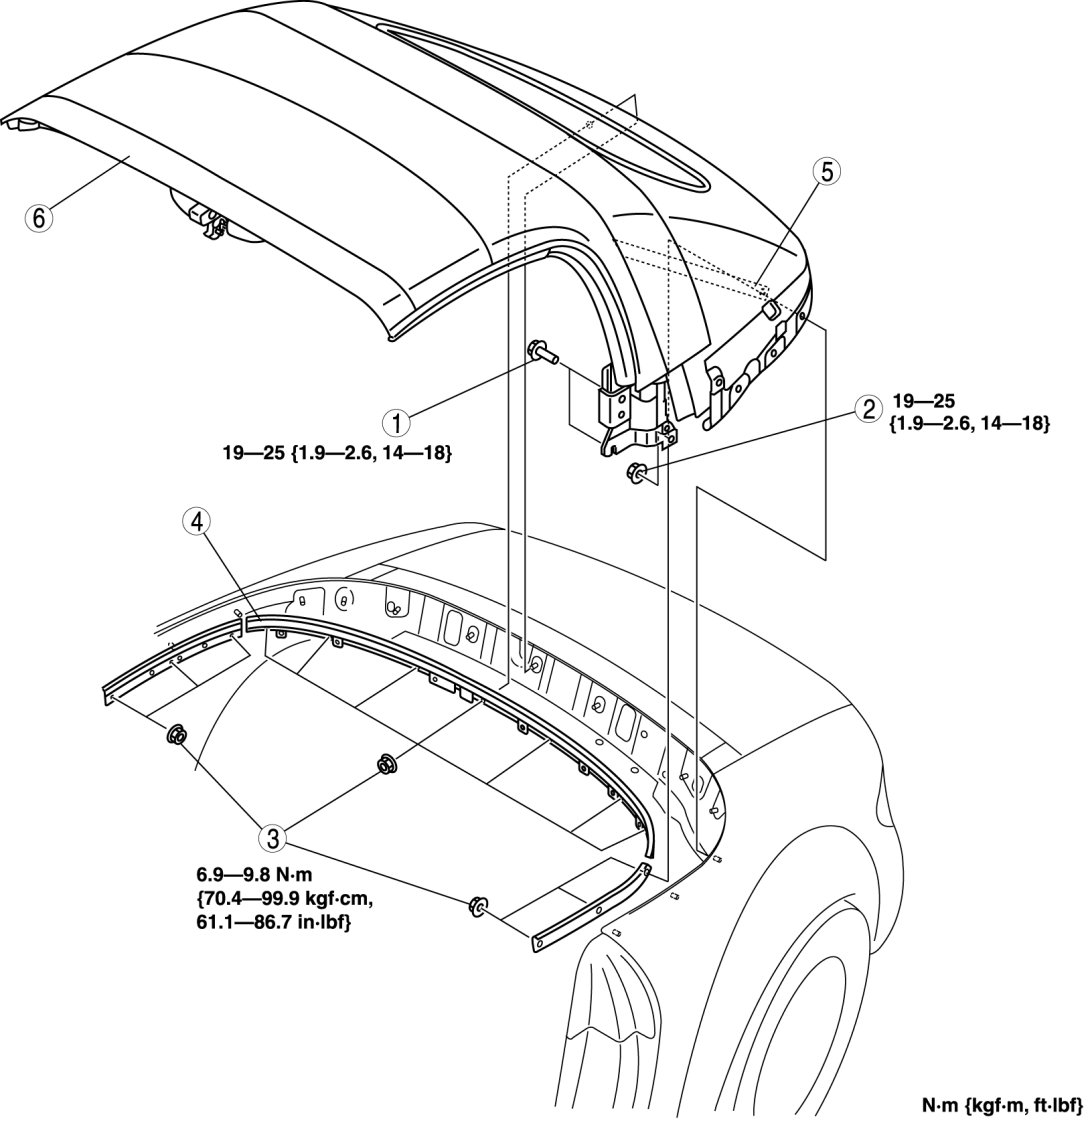
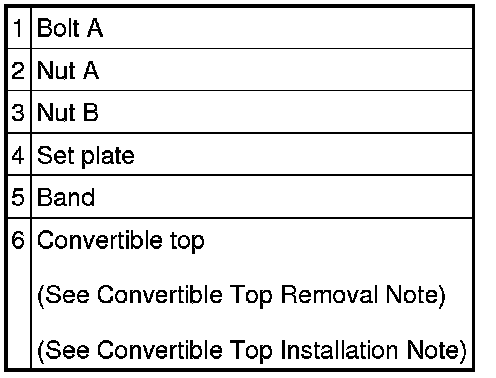
Convertible Top Removal Note
1. Unlock the top lock.
Convertible Top Installation Note
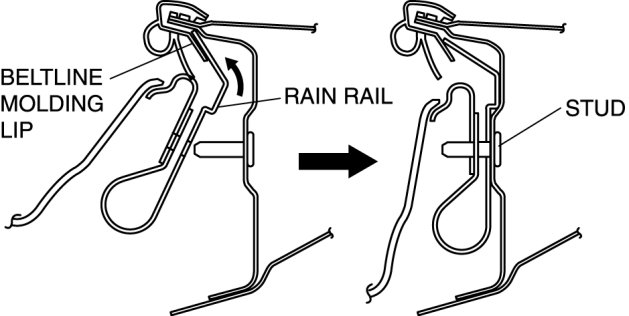
1. Insert the rain rail into the beltline molding lip, and install it over the studs.
2. Install the link bracket to the stud bolts with no gaps (a) on the mating surfaces, then tighten the bolts and nut.
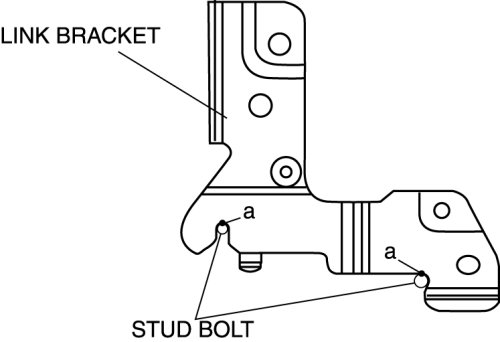
Tightening torque
- 19-25 Nm {1.9-2.6 kgf-m, 14-18 ft-lbf}