Installation
FA20 COOLING: RADIATOR: INSTALLATION; 2013 MY FR-S [03/2012 -]
1. INSTALL RADIATOR PACKING (LOWER)
(a) Install the new radiator packing.
2. INSTALL NO. 2 RADIATOR PACKING
(a) Install the new No. 2 radiator packing.
3. INSTALL NO. 1 RADIATOR PACKING
(a) Install the new No. 1 radiator packing.
4. INSTALL RADIATOR PACKING (UPPER)
(a) Install the new radiator packing.

HINT
Cut the radiator packing at the same position in the removal.
5. INSTALL OUTLET RADIATOR HOSE
(a) Since the radiator hose must be attached in the correct position, apply matchmarks before removing it.
(b) Install the outlet radiator hose to the radiator assembly and secure it with the clamp.
6. INSTALL NO. 1 RADIATOR HOSE
(a) Since the radiator hose must be attached in the correct position, apply matchmarks before removing it.
(b) Install the No. 1 radiator hose to the water filler sub-assembly and secure it with the clamp.
7. INSTALL INLET RADIATOR HOSE
(a) Since the radiator hose must be attached in the correct position, apply matchmarks before removing it.
(b) Install the inlet radiator hose to the radiator assembly and secure it with the clamp.
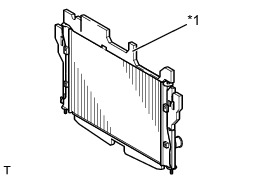
8. INSTALL RADIATOR ASSEMBLY
(a) Install the 2 radiator support cushions to the radiator assembly.
(b) While lifting the outlet radiator hose, install the radiator assembly.
NOTICE:
Push a blanket or a cardboard against the cooler condenser assembly to protect it.
(c) Attach the claw and install the thermistor assembly.
(d) Install the radiator support RH with the 2 bolts.
Torque : 7.5 Nm (76 kgf-cm, 66 in-lbf)
(e) Install the radiator support LH with the 2 bolts.
Torque : 7.5 Nm (76 kgf-cm, 66 in-lbf)
9. INSTALL FAN SHROUD Installation
10. INSTALL COOLER CONDENSER ASSEMBLY
(a) Install the cooler condenser assembly to the radiator assembly with the 5 bolts.
Torque : 6.0 Nm (61 kgf-cm, 53 in-lbf)
11. INSTALL RADIATOR SUPPORT SUB-ASSEMBLY
(a) Install the 6 bolts and radiator support sub-assembly.
Torque : 18 Nm (184 kgf-cm, 13 ft-lbf)
12. INSTALL HOOD LOCK ASSEMBLY Installation
13. INSTALL WATER FILLER SUB-ASSEMBLY
(a) Install the water filler sub-assembly and water filler bracket with the 4 bolts.
Torque : 7.5 Nm (76 kgf-cm, 66 in-lbf)
(b) Connect the inlet radiator hose and No. 1 radiator hose to the radiator assembly with the 2 clamps.
(c) Connect the radiator cap hose to the water filler sub-assembly.
14. INSTALL RADIATOR COVER PLATE
(a) Install the radiator cover plate with the 6 clips.
15. INSTALL AIR CLEANER DUCT
(a) Install the air cleaner duct with the 2 bolts.
Torque : 6.0 Nm (61 kgf-cm, 53 in-lbf)
16. INSTALL RADIATOR RESERVE TANK ASSEMBLY
(a) Install the radiator reserve tank assembly with the 2 bolts.
Torque : 7.5 Nm (76 kgf-cm, 66 in-lbf)
17. CONNECT OUTLET RADIATOR HOSE Installation
18. ADD ENGINE COOLANT Service and Repair
19. INSPECT FOR COOLANT LEAK Testing and Inspection
20. INSTALL NO. 1 ENGINE UNDER COVER Installation
21. INSTALL FRONT BUMPER COVER
Installation
22. INSTALL AIR CLEANER CASE SUB-ASSEMBLY
(a) Install the air cleaner case sub-assembly with the 3 bolts.
Torque : 6.0 Nm (61 kgf-cm, 53 in-lbf)
(b) Connect the air cleaner duct and air intake boot with the 2 hose clamps.
(c) Engage the clamp to connect the wire harness.
(d) Connect the mass air flow meter connector.
(e) Connect the hose clamp with the clamp.