Removal
AIR CONDITIONING: ELECTRIC INVERTER COMPRESSOR: REMOVAL
REMOVAL
1. RECOVER REFRIGERANT FROM REFRIGERATION SYSTEM Service and Repair
2. DRAIN ENGINE COOLANT Testing and Inspection
3. DISCONNECT NEGATIVE BATTERY TERMINAL
4. REMOVE SERVICE PLUG GRIP Removal
5. REMOVE NO. 2 ENGINE ROOM SIDE RH COVER Removal
6. REMOVE CONNECTOR COVER ASSEMBLY Removal
7. CHECK TERMINAL VOLTAGE Removal
8. INSTALL CONNECTOR COVER ASSEMBLY Installation
9. INSTALL NO. 2 ENGINE ROOM SIDE RH COVER Installation
10. DISCONNECT RADIATOR HOSE OUTLET

(a) Using pliers, grip the claws of the clip and slide the clip to disconnect the radiator hose outlet.
11. DISCONNECT NO. 1 COOLER REFRIGERANT SUCTION HOSE

(a) Remove the bolt and disconnect the No. 1 cooler refrigerant suction hose from the compressor and pulley.
(b) Remove the O-ring from the No. 1 cooler refrigerant suction hose.
NOTICE: Seal the openings of the disconnected parts using vinyl tape to prevent entry of moisture and foreign matter.
12. DISCONNECT NO. 1 COOLER REFRIGERANT DISCHARGE HOSE

(a) Remove the bolt and disconnect the No. 1 cooler refrigerant discharge hose from the compressor and pulley.
(b) Remove the O-ring from the No. 1 cooler refrigerant discharge hose.
NOTICE: Seal the openings of the disconnected parts using vinyl tape to prevent entry of moisture and foreign matter.
13. REMOVE ELECTRIC INVERTER COMPRESSOR
(a) Disconnect the connector (A).
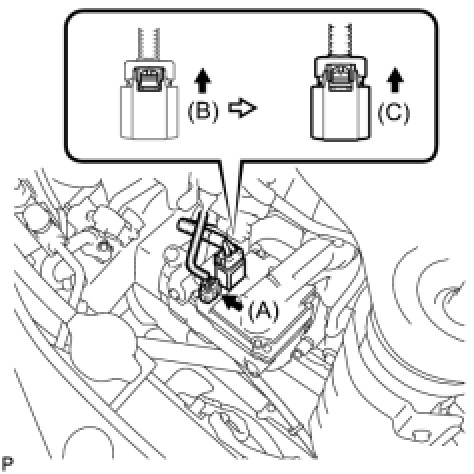
(b) Release the green-colored lock (B).
CAUTION: Wear insulated gloves when performing this procedure.
(c) Disconnect the connector (C).
NOTICE: Insulate the connector by sealing it with tape.
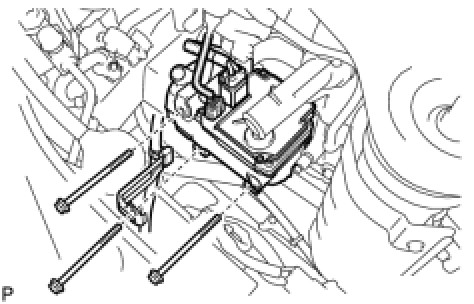
(d) Remove the 3 bolts and electric inverter compressor.