Installation
U250E AUTOMATIC TRANSMISSION / TRANSAXLE: VALVE BODY ASSEMBLY: INSTALLATION
1. INSTALL MANUAL VALVE
(a) Install the manual valve to the valve body assembly.
2. INSTALL TRANSMISSION VALVE BODY ASSEMBLY
(a) Install the spring and check ball body.

(b) Align the groove of the manual valve with the pin of the lever.
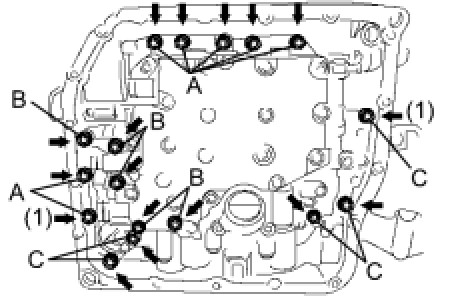
(c) Install the valve body with the 17 bolts.
Torque : 11 Nm (110 kgf-cm, 8 ft-lbf)
NOTICE:
* Push the valve body against the accumulator piston spring and the check ball body to install it.
* Temporarily tighten the bolts marked (1) in the illustration first because they are positioning bolts.
Bolt length:
Bolt A
25 mm (0.984 in.)
Bolt B
57 mm (2.244 in.)
Bolt C
41 mm (1.614 in.)
3. INSTALL VALVE BODY OIL STRAINER ASSEMBLY
(a) Coat a new O-ring with ATF WS.
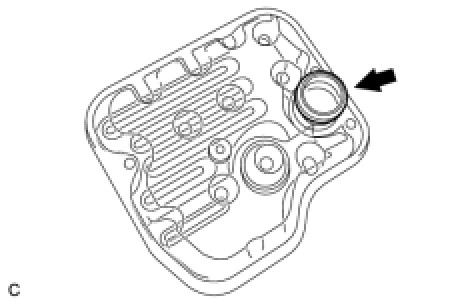
(b) Install the O-ring to the oil strainer.
(c) Install the oil strainer with the 3 bolts.
Torque : 11 Nm (110 kgf-cm, 8 ft-lbf)
4. INSTALL TRANSMISSION WIRE
(a) Coat the O-ring with ATF WS.

(b) Install the ATF temperature sensor with the lock plate and bolt.
Torque : 6.6 Nm (67 kgf-cm, 58 in-lbf)
(c) Connect the transmission wire to the 7 shift solenoid valve connectors.
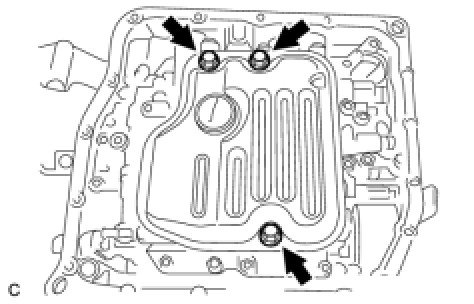
5. INSTALL AUTOMATIC TRANSAXLE OIL PAN SUB-ASSEMBLY Installation
6. INSTALL ENGINE UNDER COVER LH
7. ADD AUTOMATIC TRANSAXLE FLUID
8. INSPECT TRANSAXLE FLUID LEVEL Procedures