Removal
HYBRID / BATTERY CONTROL: HV RELAY ASSEMBLY: REMOVAL
1. PRECAUTION
Service Precautions
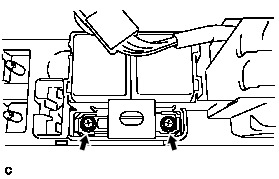
2. REMOVE SERVICE PLUG GRIP
Removal
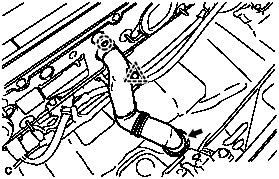
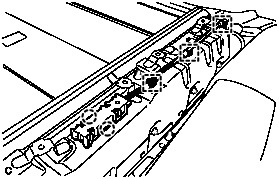
3. REMOVE INVERTER COVER Removal
4. CHECK TERMINAL VOLTAGE Removal
5. INSTALL INVERTER COVER Installation
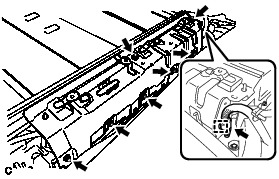
6. REMOVE REAR NO. 2 FLOOR BOARD Removal
7. REMOVE REAR NO. 4 FLOOR BOARD SUB-ASSEMBLY Removal
8. REMOVE DECK FLOOR BOX LH
HINT
Use the same procedure described for the RH side Removal.
9. REMOVE TONNEAU COVER ASSEMBLY (w/ Tonneau Cover) Removal
10. REMOVE REAR NO. 2 FLOOR BOARD SUB-ASSEMBLY Removal
11. REMOVE REAR NO. 1 FLOOR BOARD SUB-ASSEMBLY Removal
12. REMOVE REAR NO. 1 FLOOR BOARD Removal
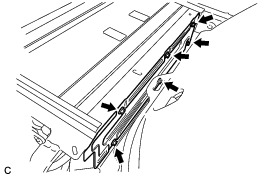
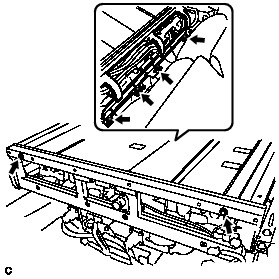
13. REMOVE DECK TRIM SERVICE HOLE COVER Removal
14. REMOVE REAR DECK TRIM COVER Removal
15. REMOVE REAR DOOR SCUFF PLATE RH
HINT
Use the same procedure described for the LH side Removal.
16. REMOVE REAR DOOR OPENING TRIM WEATHERSTRIP RH
HINT
Use the same procedure described for the LH side Installation.
17. REMOVE REAR SEAT CUSHION ASSEMBLY Removal
18. REMOVE REAR SIDE SEAT BACK ASSEMBLY RH Removal
19. REMOVE LUGGAGE HOLD BELT STRIKER ASSEMBLY (for RH Side)
HINT
Use the same procedure described for the LH side Removal.
20. REMOVE TONNEAU COVER HOLDER CAP (for RH Side)
HINT
Use the same procedure described for the LH side Removal.
21. REMOVE DECK TRIM SIDE PANEL ASSEMBLY RH Removal
22. REMOVE BATTERY COOLING BLOWER ASSEMBLY (for RH Side) Removal
23. REMOVE BATTERY COOLING BLOWER ASSEMBLY (for LH Side) Removal
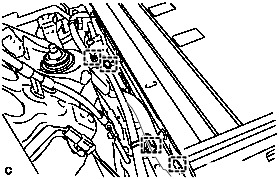
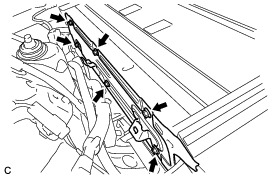
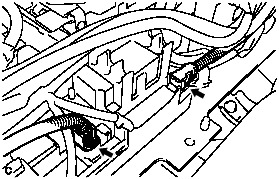
24. REMOVE HYBRID BATTERY HOSE ASSEMBLY
(a) Disconnect the clip.
(b) Disengage the claw.
(c) Disconnect the grommet and remove the hybrid battery hose assembly.
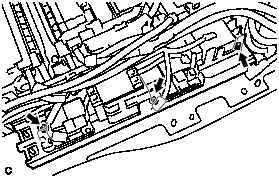
25. REMOVE NO. 3 HYBRID BATTERY EXHAUST DUCT
(a) Remove the 2 clips and No. 3 hybrid battery exhaust duct (for RH side).

(b) Remove the 2 clips and No. 3 hybrid battery exhaust duct (for LH side).

26. REMOVE NO. 4 HYBRID VEHICLE BATTERY CARRIER BRACKET
(a) Remove the bolt and No. 4 hybrid vehicle battery carrier bracket.
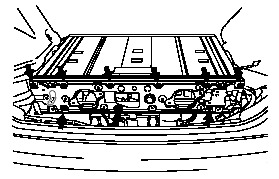
27. REMOVE REAR NO. 1 HYBRID BATTERY SHIELD
CAUTION:
Wear insulated gloves.
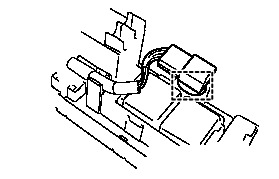
(a) Disconnect the connector and 2 clamps.

(b) Disconnect the clamp.
(c) Using the service plug grip, remove the battery cover lock striker.
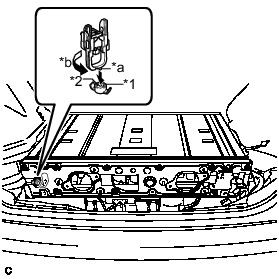
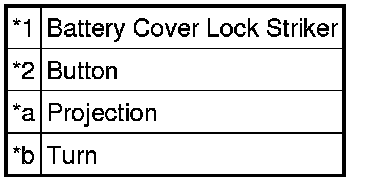
Text in Illustration

HINT
Insert the projection part of the service plug grip, and turn the button of the battery cover lock striker counterclockwise, and release the lock.
(d) Remove the 9 bolts and rear No. 1 hybrid battery shield.
28. REMOVE NO. 2 HYBRID VEHICLE BATTERY SHIELD PANEL
CAUTION:
Wear insulated gloves.
(a) Using the service plug grip, remove the battery cover lock striker.
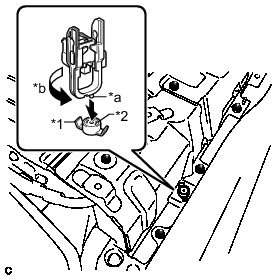
Text in Illustration
HINT
Insert the projection part of the service plug grip, and turn the button of the battery cover lock striker counterclockwise, and release the lock.
(b) Remove the 3 nuts and No. 2 hybrid vehicle battery shield panel.

29. REMOVE NO. 1 HYBRID VEHICLE BATTERY SHIELD PANEL
CAUTION:
Wear insulated gloves.
(a) Disengage the 2 claws and remove the 3 clamps and electrical key oscillator.
(b) Disconnect the connector and clamp.
(c) Remove the 7 nuts and No. 1 hybrid vehicle battery shield panel.
30. REMOVE NO. 1 HYBRID VEHICLE BATTERY COVER PANEL RH
CAUTION:
Wear insulated gloves.
(a) Disconnect the 4 clamps.
(b) Remove the 6 bolts and No. 1 hybrid vehicle battery cover panel RH.
31. REMOVE NO. 1 HYBRID VEHICLE BATTERY COVER PANEL LH
CAUTION:
Wear insulated gloves.
(a) Remove the 6 bolts and No. 1 hybrid vehicle battery cover panel LH.
32. REMOVE UPPER HYBRID BATTERY COVER SUB-ASSEMBLY
CAUTION:
Wear insulated gloves.
(a) Remove the 2 bolts, 4 nuts and upper hybrid battery cover sub-assembly.
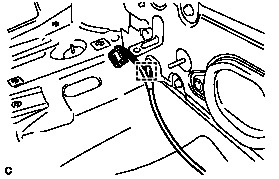
33. DISCONNECT ELECTRIC VEHICLE CHARGER WIRE
CAUTION:
Wear insulated gloves.
(a) Disconnect the connector.

NOTICE:
Insulate the disconnected connector with insulating tape.
(b) Remove the nut and disconnect the electric vehicle charger wire.
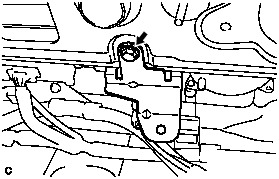
34. DISCONNECT FRAME WIRE
CAUTION:
Wear insulated gloves.
(a) Using an insulated tool, remove the 2 nuts.

(b) Disconnect the shielded wire ground and frame wire.
NOTICE:
Insulate the disconnected terminal with insulating tape.
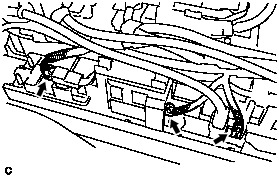
35. REMOVE HYBRID BATTERY JUNCTION BLOCK ASSEMBLY
CAUTION:
Be sure to wear insulated gloves and protective goggles.
(a) Disconnect the 10 clamps.
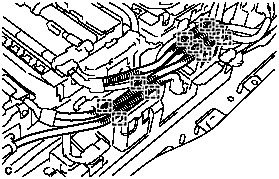
(b) Disconnect the 3 connectors from the hybrid battery junction block assembly.
(c) Disconnect the 2 connectors from the hybrid battery junction block assembly.
NOTICE:
Insulate the disconnected connectors with insulating tape.
(d) Remove the 3 nuts and hybrid battery junction block assembly.
36. REMOVE NO. 4 HYBRID VEHICLE BATTERY PACK WIRE
HINT
Perform this procedure only when replacement of the No. 4 hybrid battery pack wire is necessary.
(a) Disconnect the 2 connectors and 3 clamps and remove the No. 4 hybrid vehicle battery pack wire.

37. REMOVE ELECTRIC VEHICLE FUSE
HINT
Perform this procedure only when replacement of the electric vehicle fuse is necessary.
(a) Disconnect the clamp from the hybrid battery junction block assembly.
(b) Remove the 2 bolts and electric vehicle fuse.