Installation
AXLE AND DIFFERENTIAL: DIFFERENTIAL MOUNT CUSHION: INSTALLATION
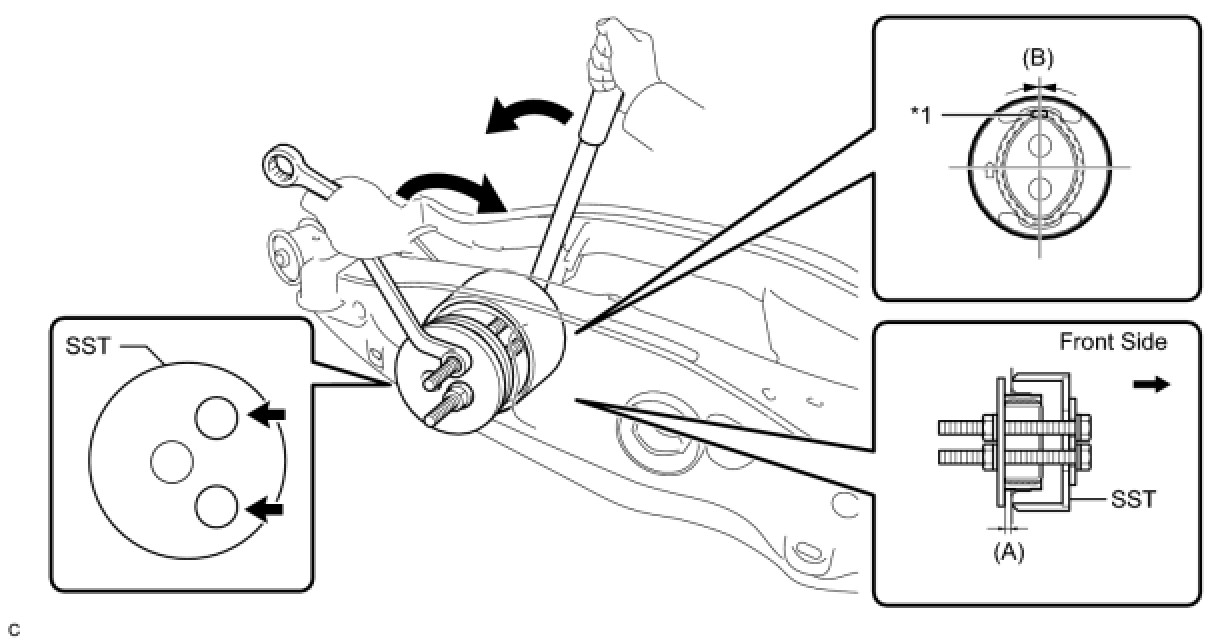
1. INSTALL REAR NO. 1 DIFFERENTIAL MOUNT CUSHION
(a) Using SST, install a new rear No. 1 differential mount cushion.
Text in Illustration

SST : 09570-24011
(A):
5.0 to 6.0 mm (0.197 to 0.236 in.)
(B):
+/- 3°
NOTICE:
* Install the rear No. 1 differential mount cushion so that the protrusion is positioned upward.
* Install the rear No. 1 differential mount cushion within +/- 3° from the center.
* Temporarily install the rear No. 1 differential mount cushion to the rear suspension member before installing SST to prevent the rear No. 1 differential mount cushion from being tilted.
* Apply grease to the threads of the SST bolts before use.
* Be sure to use SST in the correct combination.
* Do not set SST in the wrong direction.
* Make sure that SST contacts the entire rear No. 1 differential mount cushion seating surface.
* Do not slant the SST bolts.
* Tighten the 2 SST bolts equally into the 2 rear No. 1 differential mount cushion holes.
2. INSTALL REAR NO. 2 DIFFERENTIAL MOUNT CUSHION
(a) Using SST, install a new rear No. 2 differential mount cushion.
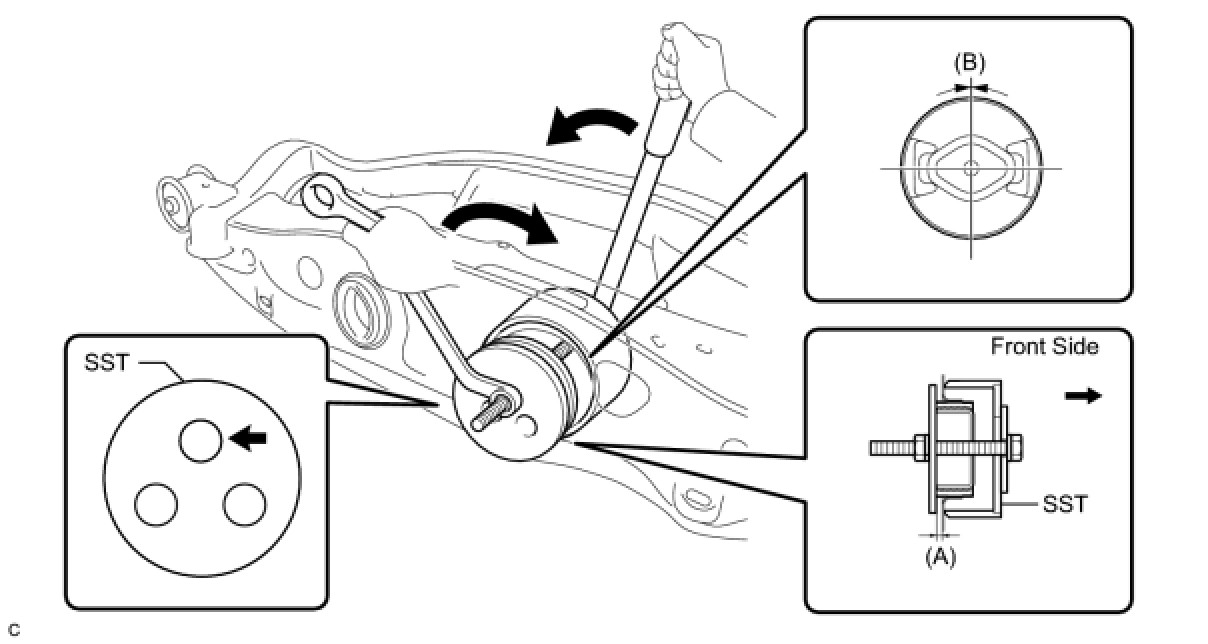
SST : 09570-24011
(A):
5.0 to 6.0 mm (0.197 to 0.236 in.)
(B):
+/- 3°
NOTICE:
* Install the rear No. 2 differential mount cushion within +/- 3° from the center.
* Temporarily install the rear No. 2 differential mount cushion to the rear suspension member before installing SST to prevent the rear No. 2 differential mount cushion from being tilted.
* Apply grease to the threads of the SST bolts before use.
* Be sure to use SST in the correct combination.
* Do not set SST in the wrong direction.
* Make sure that SST contacts the entire rear No. 2 differential mount cushion seating surface.
* Do not slant the SST bolts.
3. INSTALL DIFFERENTIAL CARRIER ASSEMBLY WITH DIFFERENTIAL SUPPORT
HINT
Refer to the procedure from Install Differential Carrier Assembly with Differential Support Installation.