Windshield Installation Instructions
Windshield Installation Instructions
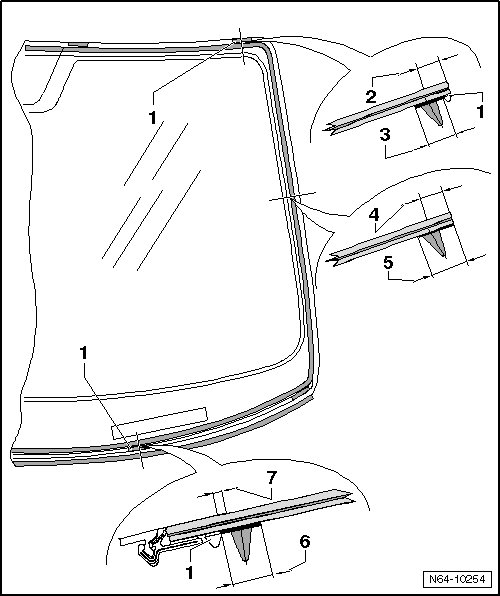
Check whether height stops - 1 - are present.
The windshield has no markings for the primer.
Apply the primer as follows.
• Top edge of the glass: from the height stop - 1 - 12 mm wide - dimension 3 -.
• Side edge of the glass: from the edge of the window 18 mm wide - dimension 5 -.
• Bottom edge of the glass: from the height stop - 1 - 12 mm wide - dimension 6 -.
The windshield does not have markings for the adhesive bead.
The adhesive bead is centered from the top and sides with the following dimensions.
• From the top edge of the window 12 mm - dimension 2 -.
• Side edge of the glass: from the side edge 12 mm - dimension 4 -.
• On the bottom edge of the glass: from the height stop - 1 - 1 mm distance - dimension 7 -.
For the windshield gap and height dimensions, refer to => [ Windshield Assembly Overview ] Windshield Assembly Overview.
Secure windshield using window adjuster (443 845 631 A) - 5 - during the minimum curing time.