Control Arm Bushing: Service and Repair
Control Arm Bonded Rubber Bushing
Special tools, testers and auxiliary items required
• Tube (T10219/1)
• Drift (T10219/2)
• Thrust plate (VW 402)
• Punch (VW 411)
Bonded rubber bushing, pressing out
- Press out bonded rubber bushings as depicted in the illustration.
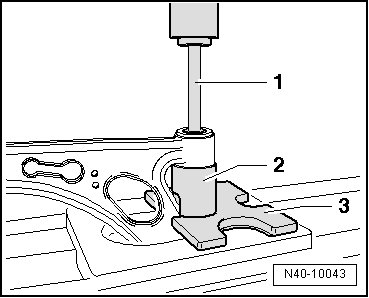
1 - (VW 411)
2 - (T10219/1)
3 - (VW 402)
Bonded rubber bushing, pressing in
Bonded rubber bushing must be installed at an angle to prevent damaging it when pressing in. Bonded rubber bushing settles straight while pressing in.
- Apply installation lubricant (G 294 421 A1) onto outside of bonded rubber bushing.
- Place bonded rubber bushing on at an angle (in direction of control arm), when doing this the lip - arrow - must slip into hole as shown in the illustration.
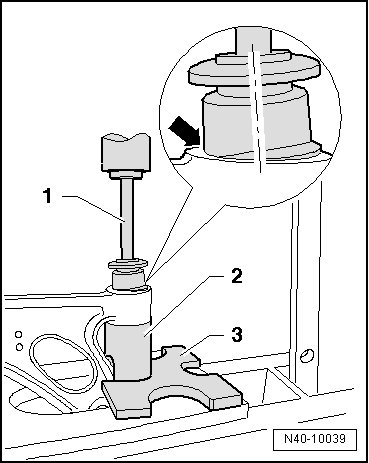
1 - (T10219/2)
2 - (T10219/1)
3 - (VW 402)
- Press in bonded rubber bushings as far until core - 1 - and hole of control arm - 2 - are at the same height.
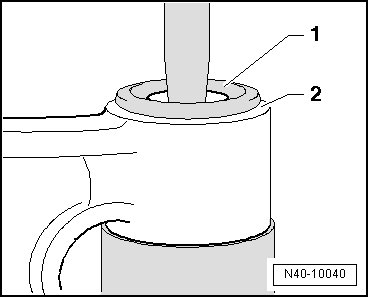
- Press back bearing slightly in control arm.
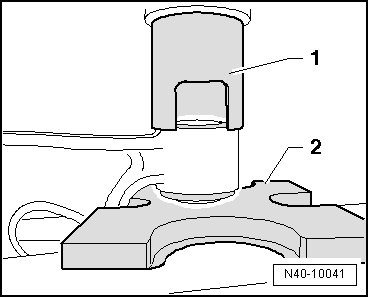
1 - (T10219/1)
2 - (VW 402)
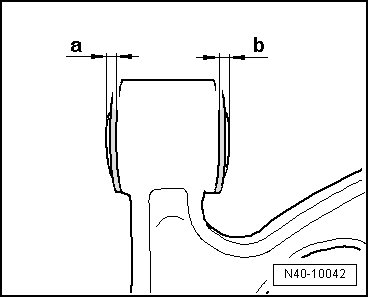
Dimensions - a - and - b - must be identical.