Relay Carrier In Left Instrument Panel
Relay Carrier In Left Instrument Panel
CAUTION!
When disconnecting and connecting battery, the procedure must be followed as described in the Repair Information. Refer to => [ Battery, Disconnecting and Connecting ] Battery, Disconnecting and Connecting.
Removing:
- Disconnect battery. Refer to => [ Battery, Disconnecting and Connecting ] Battery, Disconnecting and Connecting.
- Remove instrument panel.
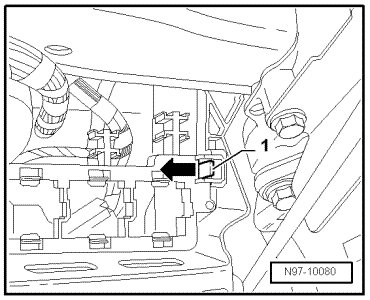
- Remove relays - arrows - from relay carrier.
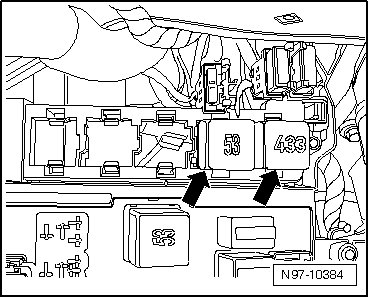
• The number of relays and fuses is dependent on vehicle equipment.
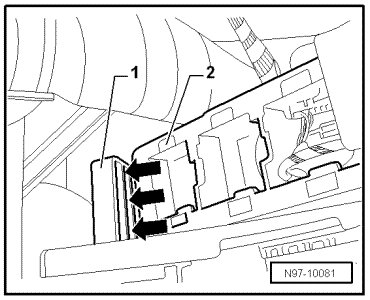
- Clip retaining tabs in - direction of arrow - outward and then press connectors - 1 - through relay carrier.
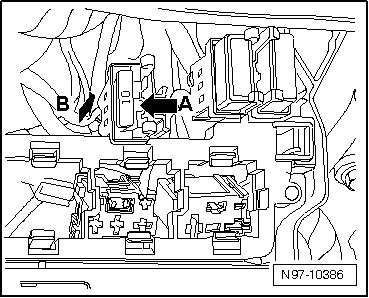
- Disengage bracket - arrow A - and pull off bracket with fuse from relay carrier in - direction of arrow B -.
- Disengage catches in - direction of arrow - and pull thermo-fuses - 1 - out of mounts.

- Release retaining tab - 1 - in - direction of arrow A - and pull off mount from relay carrier in - direction of arrow C -.

- Release retaining tab - 2 - in - direction of arrow B - and pull off mount from relay carrier in - direction of arrow C -.
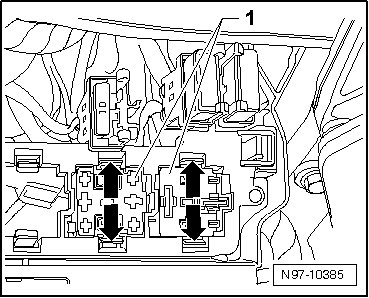
- Release retainer - 1 - for relay panel in direction of - arrow - and remove relay panel.
Installing:
Install in reverse order of removal, noting the following:
- First clip connector (for relay), holder (for fuse) and mounts (for thermo-fuses) into relay carrier.
- Place relay carrier - 2 - into guide - 1 - and then engage relay carrier.