Control Arm Bushing: Service and Repair
Control Arm Bonded Rubber Bushing
Special tools, testers and auxiliary items required
• Tube (T10219/1)
• Drift (T10219/2)
• Thrust Plate (VW 402)
• Punch (VW 411)
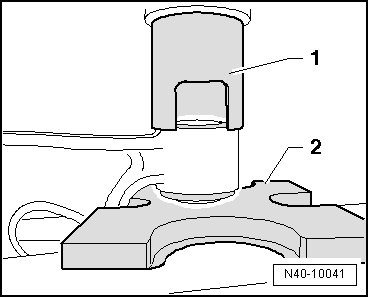
Bonded Rubber Bushing, Pressing Out
- Press out bonded rubber bushings as depicted in the illustration.
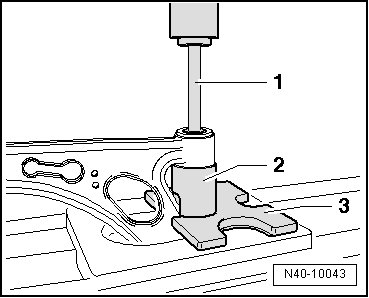
1 - Punch (VW 411)
2 - Tube (T10219/1)
3 - Thrust plate (VW 402)
Bonded Rubber Bushing, Pressing In
Bonded rubber bushing must be installed at an angle to prevent damaging it when pressing in. Bonded rubber bushing settles straight while pressing in.
- Apply installation lubricant (G 294 421 A1) onto outside of bonded rubber bushing.
- Place bonded rubber bushing on at an angle (in direction of control arm), when doing this the lip - arrow - must slip into hole as shown in the illustration.
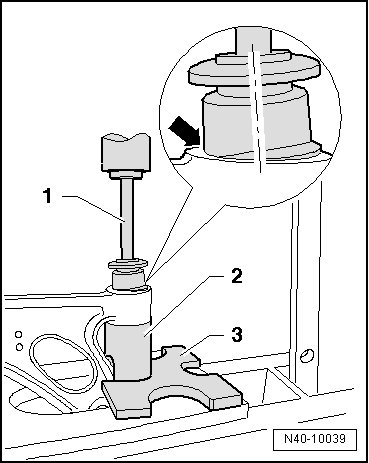
1 - Drift (T10219/2)
2 - Tube (T10219/1)
3 - Thrust plate (VW 402)
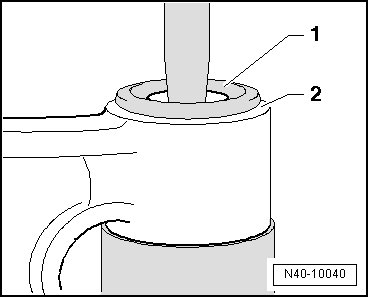
- Press in bonded rubber bushings as far until core - 1 - and hole of control arm - 2 - are at the same height.
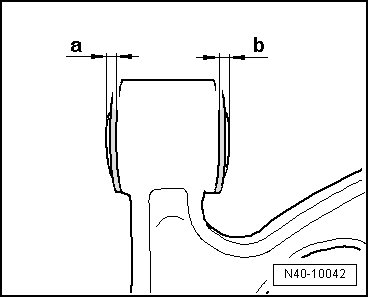
- Press back bearing slightly in control arm.
1 - Tube (T10219/1)
2 - Thrust plate (VW 402)
Dimensions - a - and - b - must be identical.