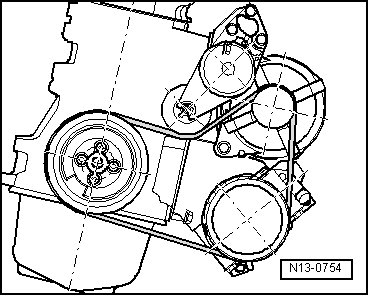
Drive Belt: Service and Repair
Ribbed Belt
Special tools, testers and auxiliary items required
• Locking Pin (T10060 A)
Removing
- Remove the noise insulation.
- Mark the rotation direction of the ribbed belt.
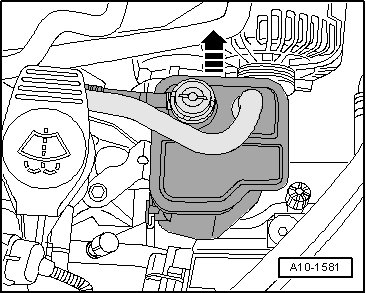
with an Evaporative Emission (EVAP) Canister inside the Engine Compartment
- Release the EVAP canister and remove it upward - arrow - out of the mount with the lines still connected.
Continuation for All
- Rotate the tensioner, in the - direction of the arrow - to release the tension on the belt.

- Secure the tensioner using the locking pin (T10060 A).

- Remove the ribbed belt.
Installing
- Install in reverse order of removal. Note the following:
• When installing the ribbed belt, note the rotation direction of the belt and be sure that the belt is seated correctly on the pulleys.
• Route the ribbed belt over the Air Conditioning (A/C) compressor as last.
After installing the ribbed belt, start the engine and make sure the ribbed belt is running correctly.