Overhaul
Dashboard/Steering Hanger Beam Disassembly/ReassemblyNOTE: Put on gloves to protect your hands.
1. Remove dashboard/steering hanger beam .
2. Remove these items from the dashboard:
- Driver's switch panel
- Center panel
- Heater control panel
- Gauge assembly
- Passenger's airbag
- Sunlight sensor
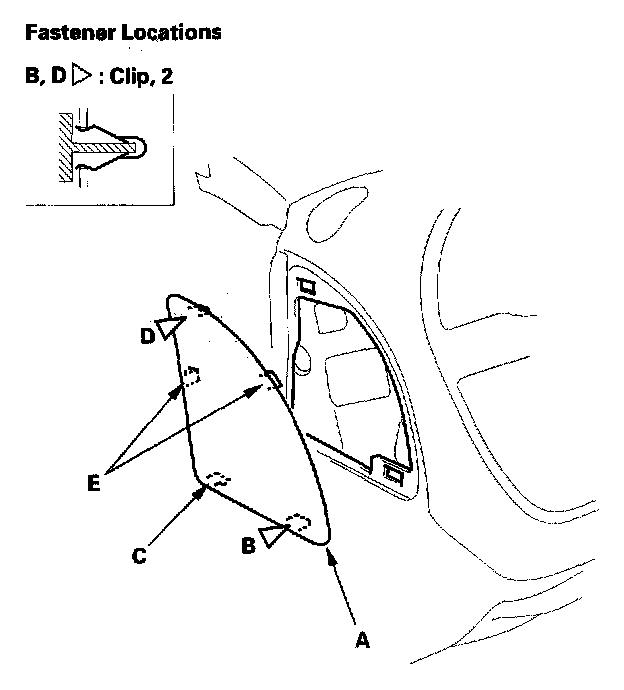
3. From outside of the driver's side, gently pull out on the bottom of the dashboard side cover (A) to release the lower clip (B) and hook (C), then release the remaining clip (D) and hooks (E) to remove the cover.
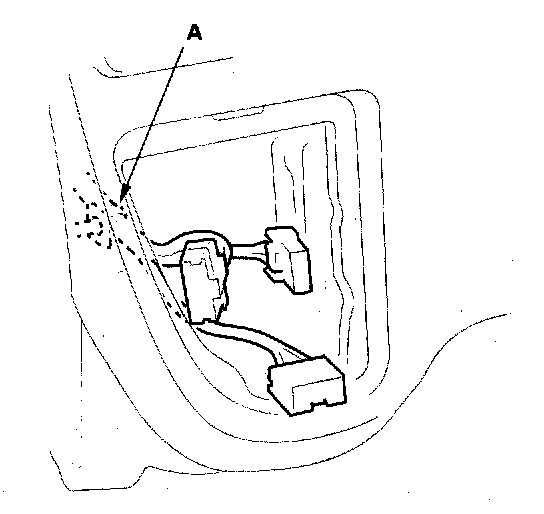
4. Detach the harness holder (A) from the back of the driver's switch panel area.
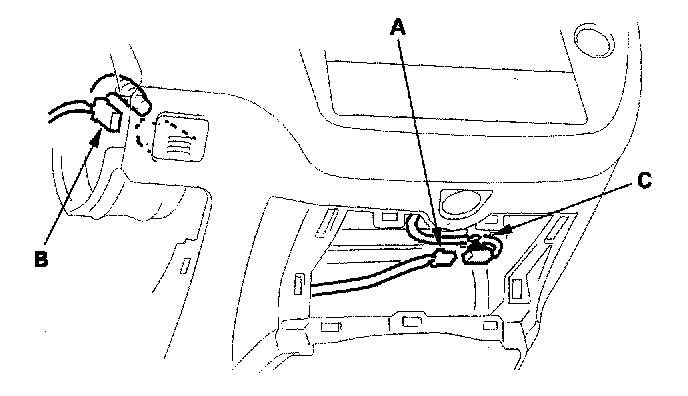
5. Disconnect and detach the center console light connector (A) and in-car temperature sensor connector (B). Unclip the wire harness (C).
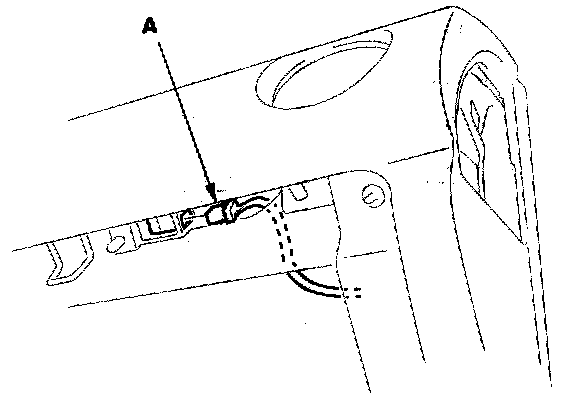
6. If equipped, disconnect the glove box light connector (A) and unclip the harness.
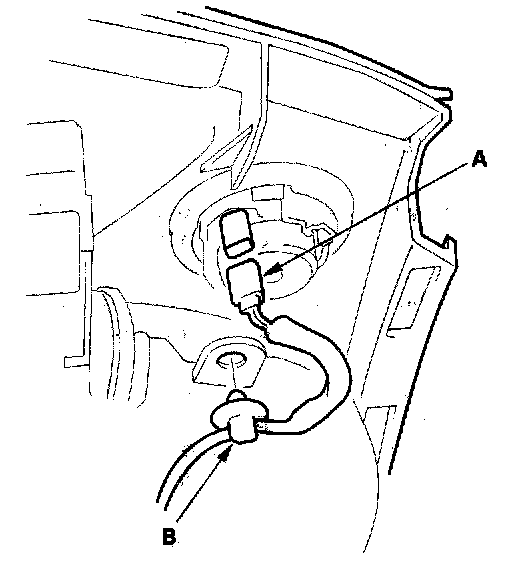
7. If equipped, disconnect the tweeter connector (A), and detach the harness clip (B) from both sides.
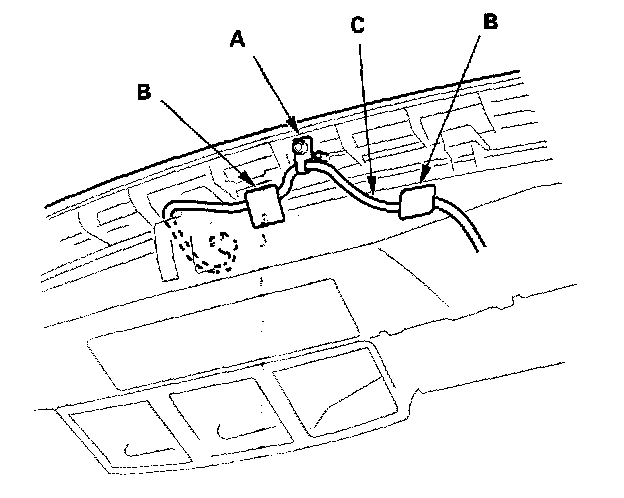
8. Detach the harness holder (A), and remove the cushion tape (B) for the sunlight sensor harness (C).
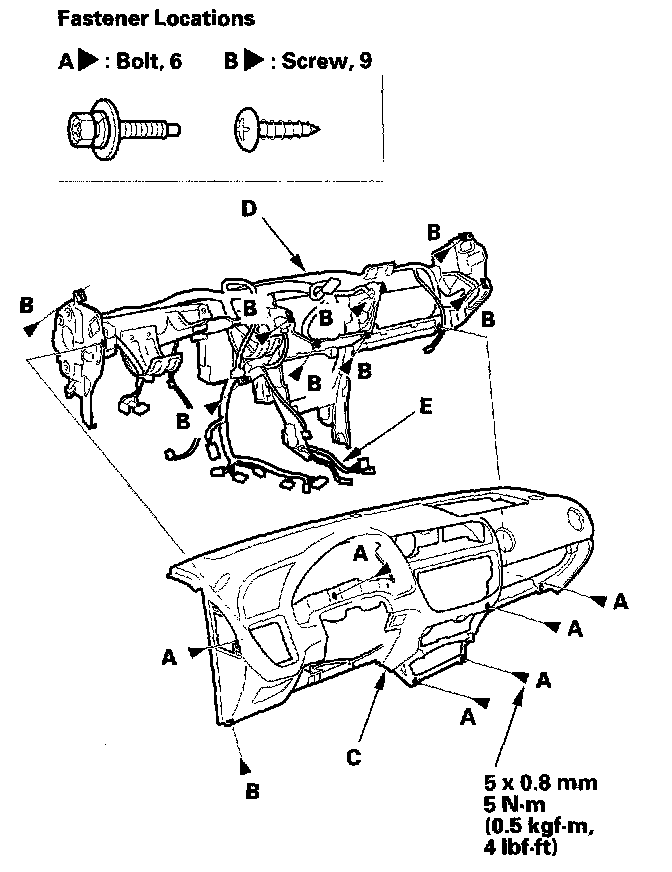
9. Remove the bolts (A) and screws (B) securing the dashboard (C) and steering hanger beam (D), and separate the dashboard and steering hanger beam.
10. Reassemble the dashboard and steering hanger beam in the reverse order of disassembly, and note these items:
- Make sure the dashboard wire harness (E) is not pinched.
- Make sure the connectors are plugged in properly.