Front Seat-Back Cover Replacement
Front Seat-back Cover Replacement
Special Tools Required
- KTC trim tool set SOJATP2014*
*Available through the Acura Tool and Equipment Program.
SRS components are located in this area. Review the SRS component locations Locations and the precautions and procedures Service and Repair before doing repairs or service.
- Check the operation of the driver's seat position sensor after any of these actions. Driver's Seat Position Sensor Operation Check
- Driver's seat position sensor replacement
- Cover plate (front side of driver's seat slide rail) replacement
- Calibrate the ODS unit after any of the these actions. ODS Unit Calibration
- Front passenger's seat replacement (including any seat components)
- Replacement of the seat weight sensors
- After a vehicle collision
NOTE:
- Put on gloves to protect your hands.
- Take care not to tear the seams of damage the seat covers.
- On the passenger's seat, do not touch the OPDS sensor in the seat-back pad, and keep it away from oil. Oil can corrode the sensor causing it to fail.
- Use the appropriate tool from the KTC trim tool set to avoid damage when removing components.
1. Remove the front seat. Front Seat Removal/Installation
2. Remove the seat-back. Front Seat Disassembly/Reassembly
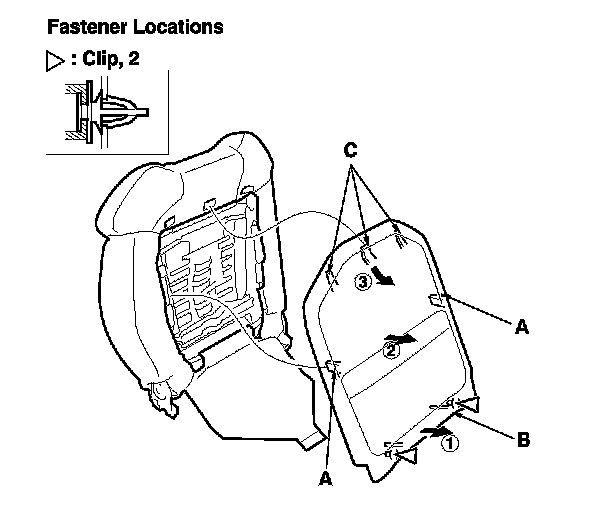
3. Detach the clips, release the hooks (A) by pulling the bottom of the back panel (B) back, then gently pull down the panel to release the hooks (C) from the seat-back frame, and remove the panel.
NOTE: Detach the clips and hooks in the numbered sequence as shown.
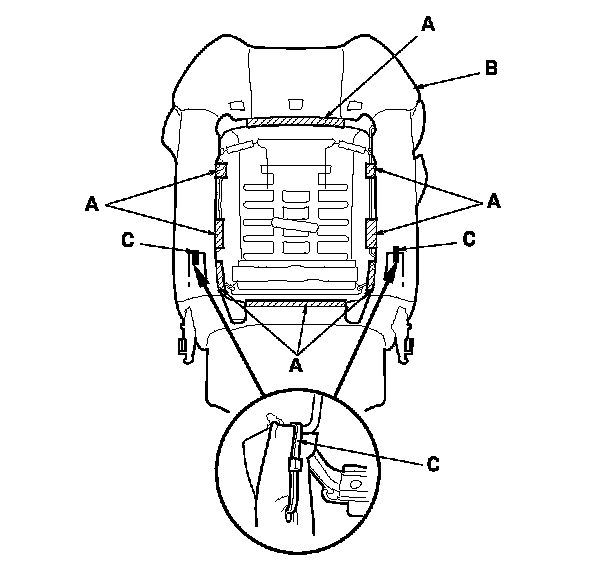
4. Release the hooks (A), then loosen the seat-back cover (B). Remove the wire ties (C).
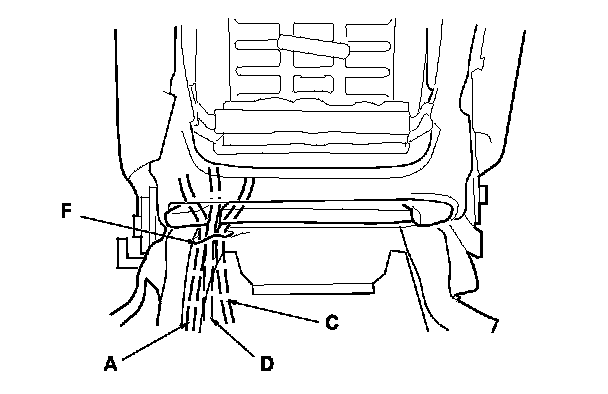
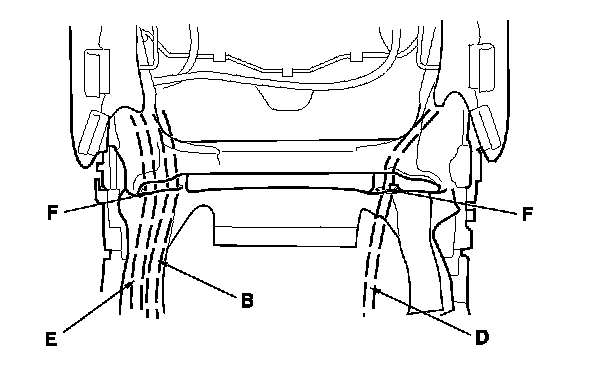
5. Pull the recline motor harness/lumbar support motor harness (A) (driver's seat) or recline motor harness (B) (passenger's seat), seat-back heater harness (C), side airbag harness (D) and the ODS unit harness (E) (passenger's seat) out through the holes (F) in the seat-back cover.
Driver's seat-back
Passenger's seat-back
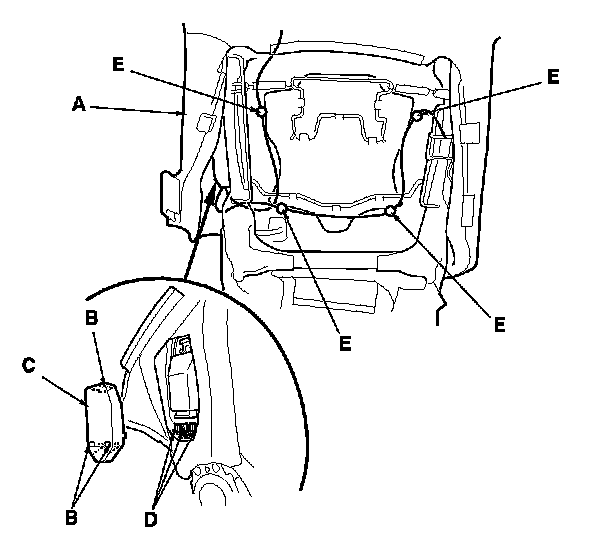
6. Passenger's seat: Turn over the seat-back cover (A), detach the hooks (B), then remove the ODS unit cover (C). Disconnect the OPDS sensor connectors (D), then detach the harness clips (E).
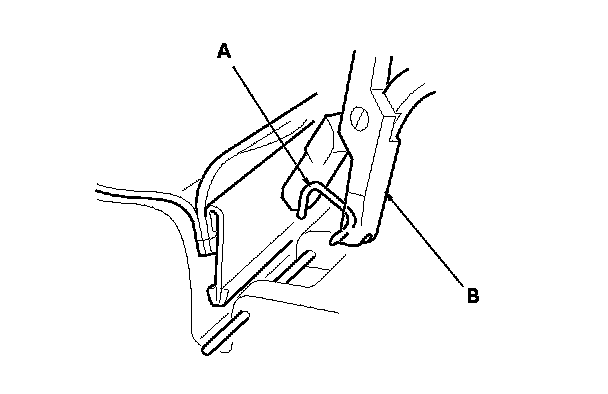
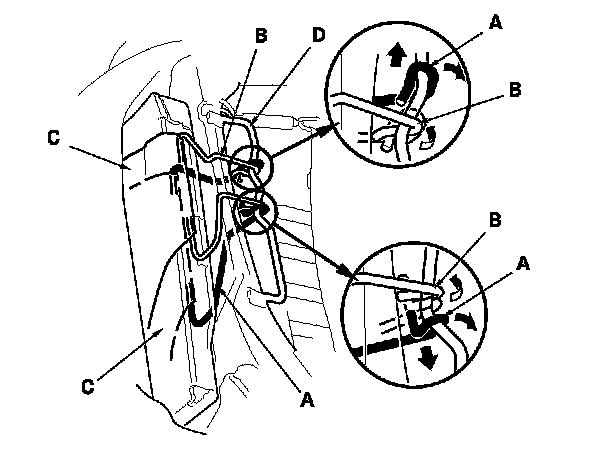
7. Release the front hook (A) and rear hook (B) of the reinforcing cloth (C) from seat-back frame (D).
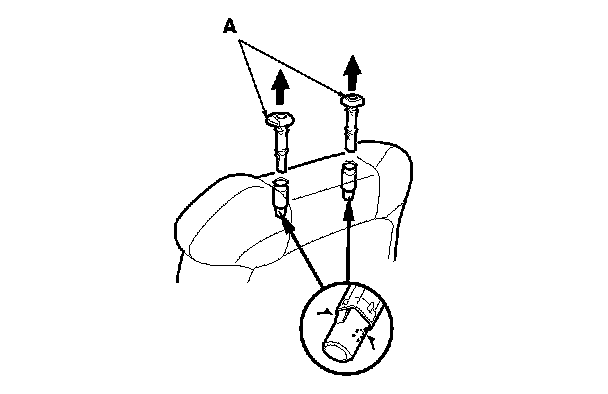
8. Pull out the head restraint guides (A) while pinching the tabs on the end of the guides, and remove them.
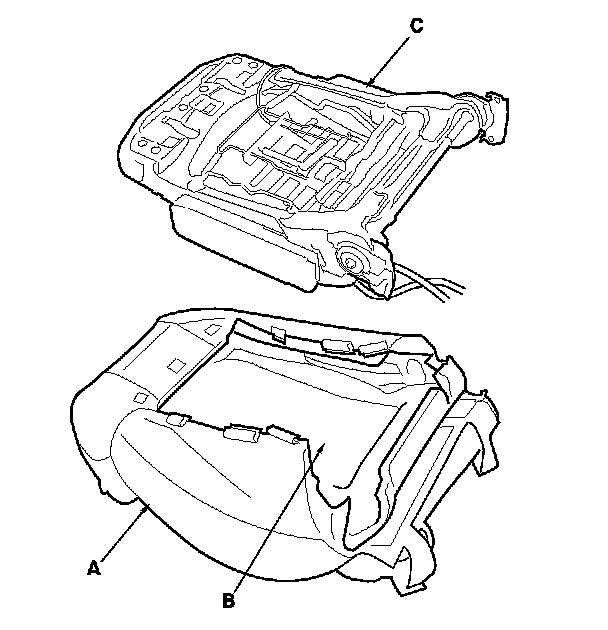
9. Remove the seat-back cover (A) and seat-back pad (B) from the seat-back frame (C).
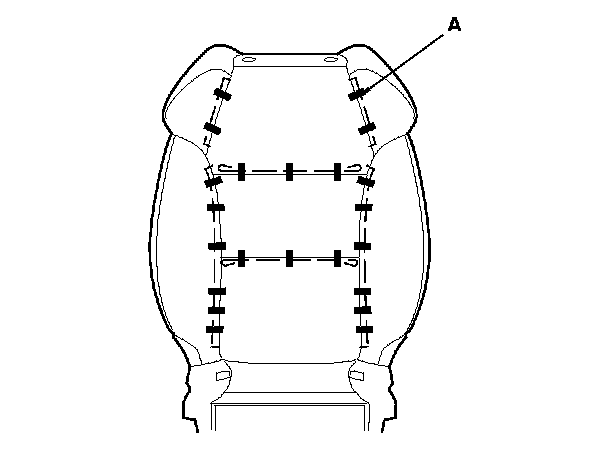
10. Pull back the edge of the seat-back cover all the way around, and release the upholstery ring (A), then remove the seat-back cover.
11. Install the cover in the reverse order of removal, and note these items:
- Reinitialize the ODS unit. ODS Unit Initialization
- To prevent wrinkles when installing a seat-back cover, make sure the material is stretched evenly over the pad before securing the clips, hooks, and hook strips.
- Replace any upholstery ring you removed with new ones (A). Install them with commercially available upholstery ring pliers (B).
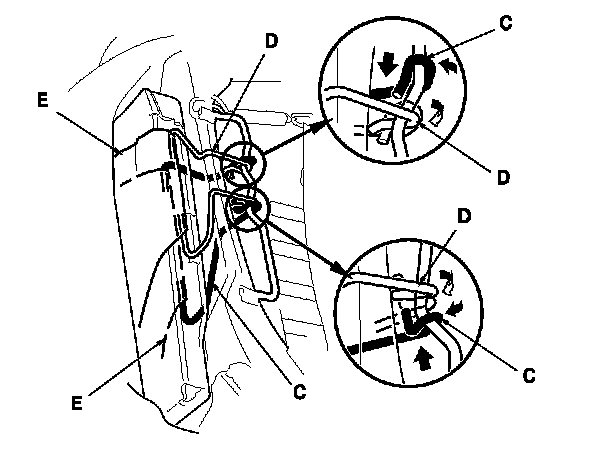
- Reinstall the front hook (C) and rear hook (D) of the reinforcing cloth (E) securely.
- Use only original Acura replacement seat-back covers.
- Make sure the recline motor harness/lumbar support motor harness (driver's seat) or recline motor harness (passenger's seat), side airbag harness, seat-back heater harness, and ODS unit harness (passenger's seat) are routed properly.
- Replace the back panel clips with new ones.