Radiator: Service and Repair
Radiator and Fan Replacement
NOTE:
- Use fender covers to avoid damaging painted surfaces.
- To avoid damaging the wire and terminals, unplug the wiring connectors carefully while holding the connector portion.
- Mark all wiring and hoses to avoid misconnection. Also, be sure that they do not contact any other wiring or hoses, or interfere with any other parts.
1. Do the battery terminal disconnection procedure. Procedures
2. Remove the battery Removal and Replacement and battery base. Engine Removal
3. Remove the air cleaner assembly. Service and Repair
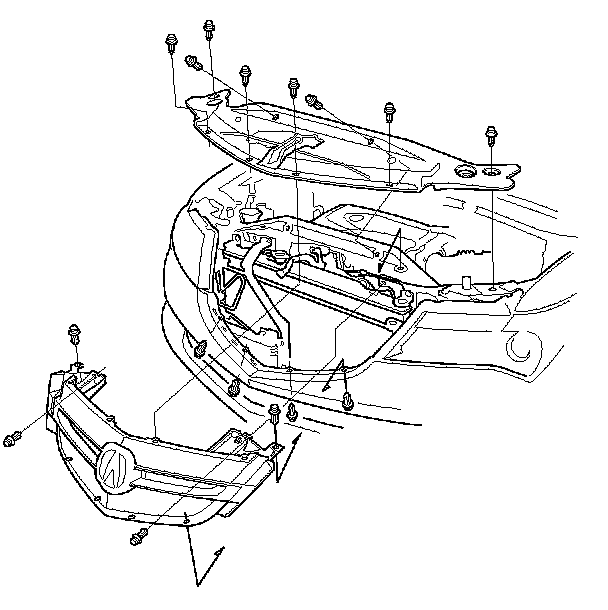
4. Remove the front grille cover, then remove the front grille.
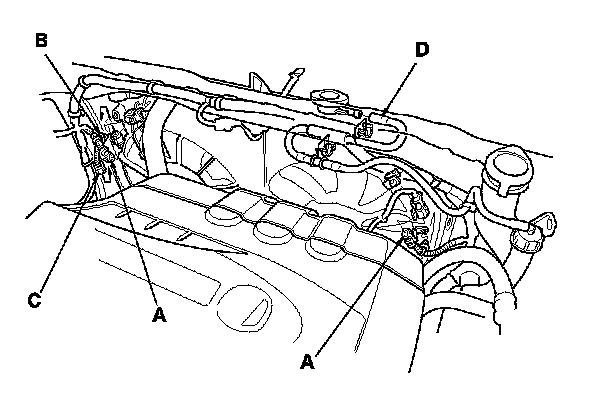
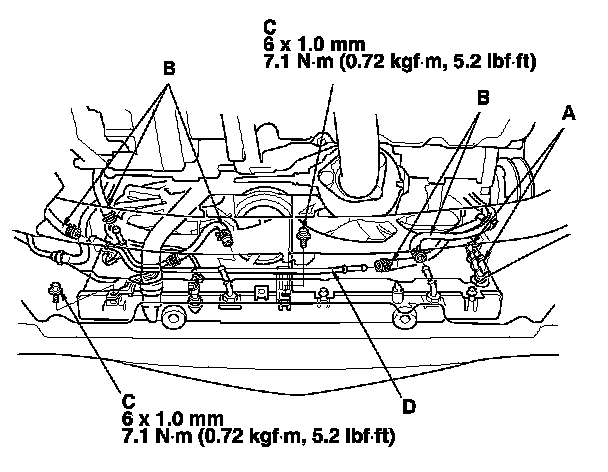
5. Disconnect the fan motor connectors (A), harness clamp (B), engine coolant temperature (ECT) sensor 2 subharness connector (C) and coolant reservoir hose (D).
6. Drain the engine coolant. Service and Repair
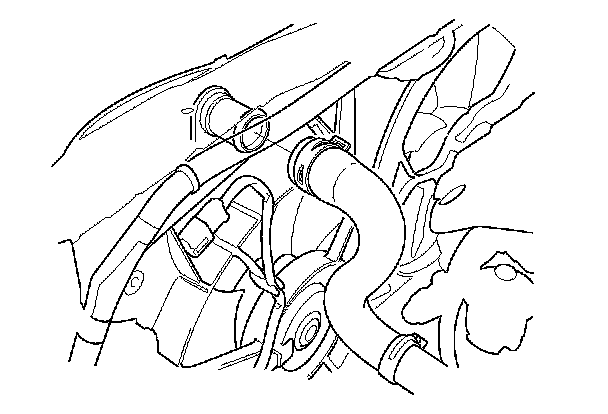
7. Remove the upper radiator hose.
8. Unclamp the hose clamps (A) and remove the ATF cooler hoses (B), then plug the line and hoses.
9. Remove the ATF cooler pipe mount bolts (C), then remove the ATF cooler pipe (D).
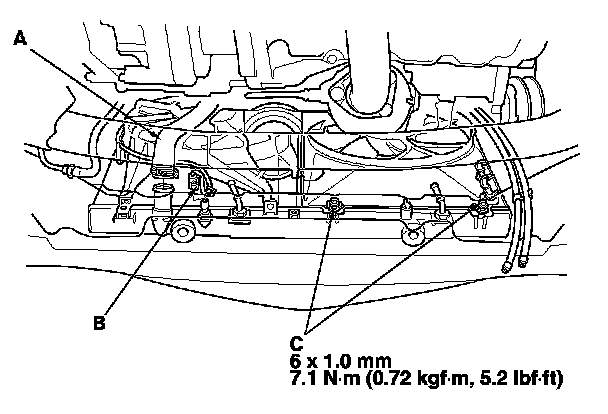
10. Remove the lower radiator hose (A) and disconnect the ECT sensor 2 connector (B) and loosen the two bolts (C).
11. Disconnect the hood latch switch connector (A), clamps (B), then remove the hood latch (C).
12. Remove the bulkhead bracket (D), and radiator and A/C condenser mount upper bracket/cushion (E), then remove the fan shroud mount bolts (F).
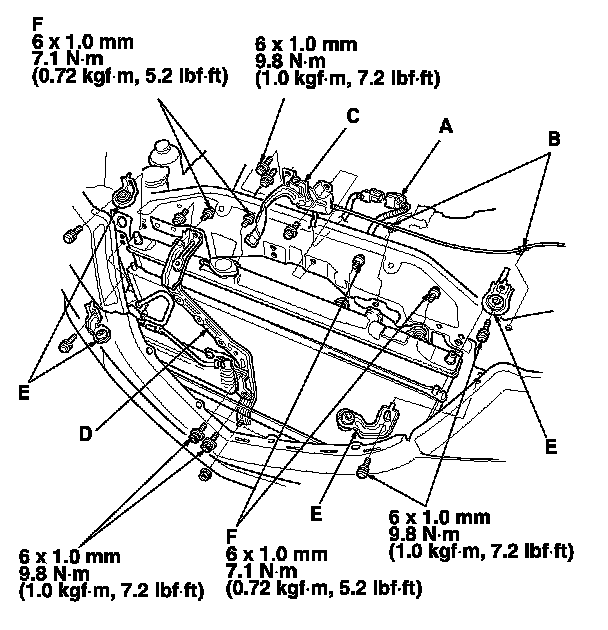
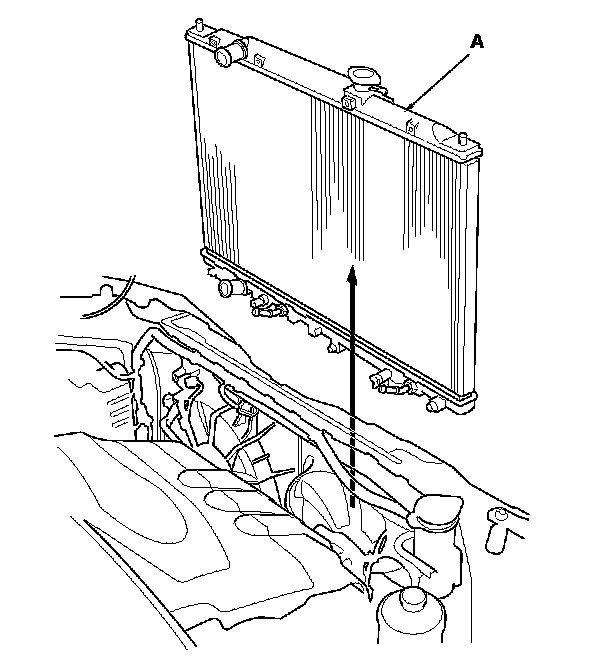
13. Move the fan shroud assemblies toward the engine, then pull up the radiator assembly (A).
14. Remove the fan shroud assemblies.
15. Install the radiator and fans in the reverse order of removal.
16. Install the bulkhead bracket in the reverse order of removal. Apply body paint to the bulkhead bracket mounting bolts.
17. Set the upper and lower cushions securely.
18. Fill the transmission with ATF. ATF Replacement
19. Install the battery. Removal and Replacement Do the battery terminal reconnection procedure. Procedures
20. Fill the radiator with engine coolant and bleed the air from the system. Service and Repair
21. Adjust the engine hood latch. Adjustments