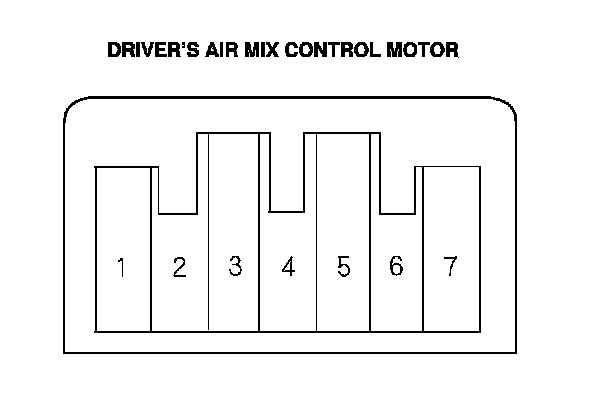
Driver's Air Mix Control Motor Test
Driver's Air Mix Control Motor Test
NOTE: Before testing, check for HVAC DTCs. Initial Inspection and Diagnostic Overview
1. Disconnect the 7P connector from the driver's air mix control motor. Driver's Air Mix Control Motor Replacement
NOTICE
Incorrectly applying power and ground to the driver's air mix control motor will damage it. Follow the instructions carefully.
2. Connect battery power to the terminal No. 1 of the driver's air mix control motor, and ground the terminal No. 2; the driver's air mix control motor should run, and stop at Max Cool. If it doesn't, reverse the connections; the driver's air mix control motor should run, and stop at Max Hot. When the driver's air mix control motor stops running, disconnect battery power immediately.
3. If the driver's air mix control motor did not run in step 2, remove it, then check the driver's air mix control linkage and door for smooth movement.
- If the linkage and door move smoothly, replace the driver's air mix control motor. Driver's Air Mix Control Motor Replacement
- If the linkage or door sticks or binds, repair them as needed.
- If the driver's air mix control motor runs smoothly, go to step 4.
4. Measure the resistance between the terminals No. 5 and No. 7. It should be between 4.2 to 7.8 kOhms.
5. Reconnect the driver's air mix control motor 7P connector, then turn the ignition switch to ON (II).
6. Using the backprobe set, measure the voltage between the terminals No. 3 and No. 5.
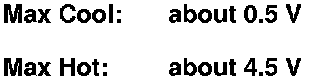
7. If either the resistance or voltage readings are not as specified, replace the driver's air mix control motor. Driver's Air Mix Control Motor Replacement