Timing Belt Removal
Timing Belt Removal
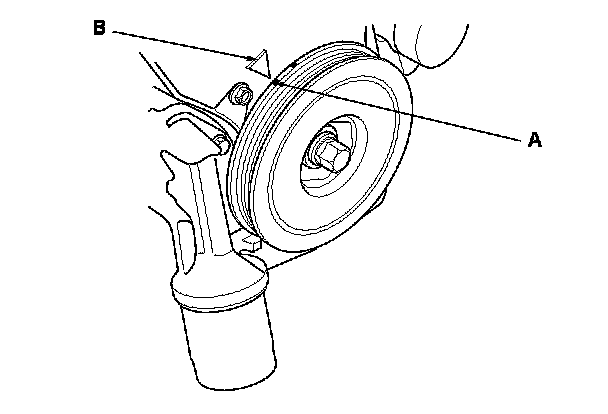
1. Turn the crankshaft so the white mark (A) lines up with the pointer (B).
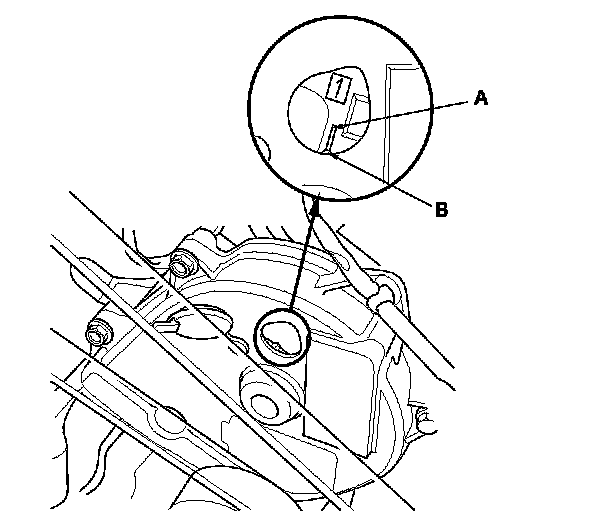
2. Check that the No. 1 piston top dead center (TDC) mark (A) on the front camshaft pulley and the pointer (B) on the front upper cover are aligned.
NOTE: If the marks are not aligned, rotate the crankshaft 360 degrees, and recheck the camshaft pulley mark.
3. Raise the vehicle on the lift, then remove the right front wheel.
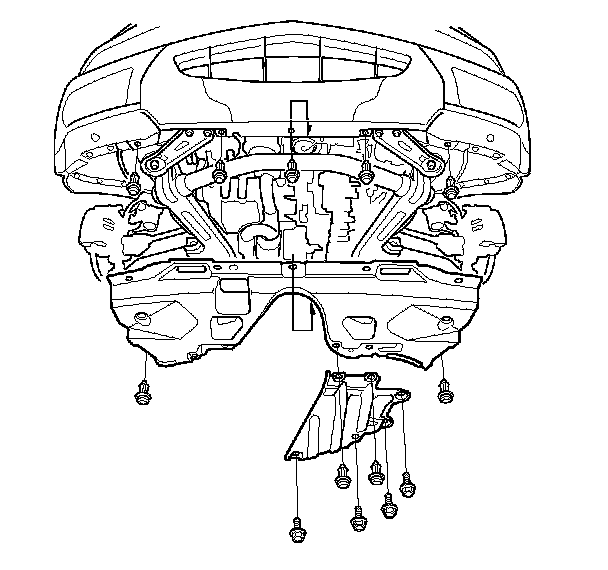
4. Remove the splash shield.
5. Lower the vehicle on the lift.
6. Remove the drive belt. Service and Repair
7. Remove the drive belt auto-tensioner. Drive Belt Auto-Tensioner Replacement
8. Prior to removing the side engine mount, support the engine with a jack and a wood block under the oil pan.
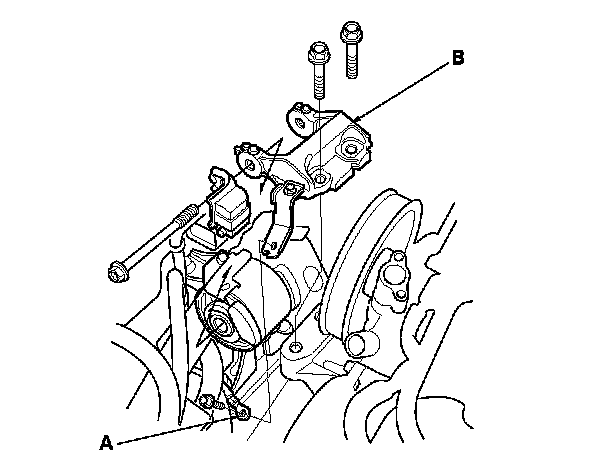
9. Remove the ground cable (A), then remove the upper half of the side engine mount bracket (B).
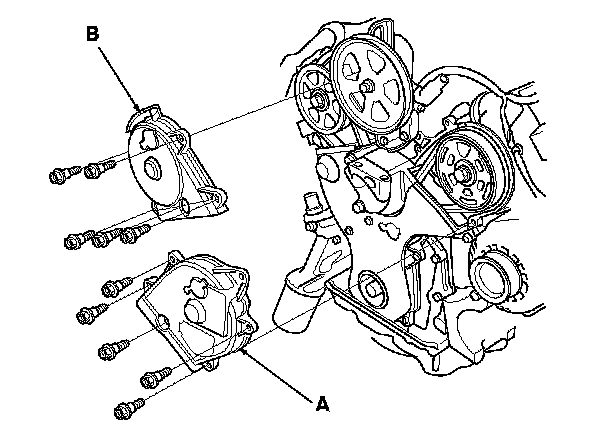
10. Remove the front upper cover (A) and rear upper cover (B).
11. Remove the crankshaft pulley. Service and Repair
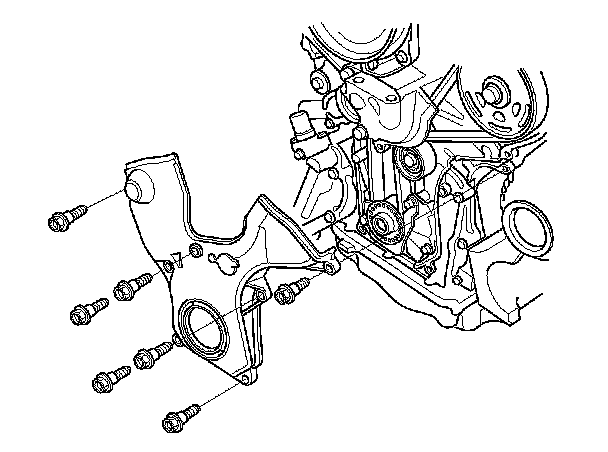
12. Remove the lower cover.
13. Remove one of the battery clamp bolts from the battery tray, and grind the end of it as shown.
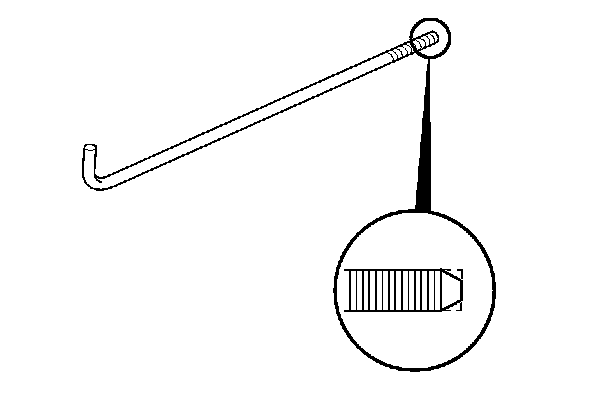
14. Thread in the battery clamp bolt as shown to hold the timing belt adjuster in its current position. Tighten it by hand; do not use a wrench.
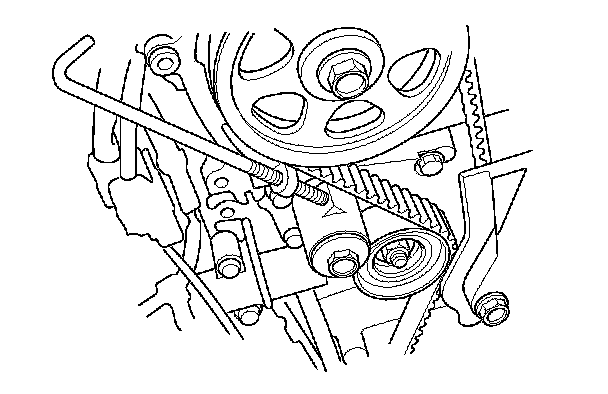
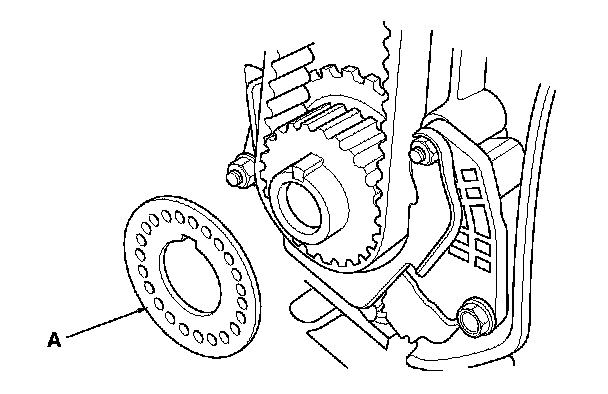
15. Remove the timing belt guide plate (A).
16. Remove the lower half of the side engine mount bracket.
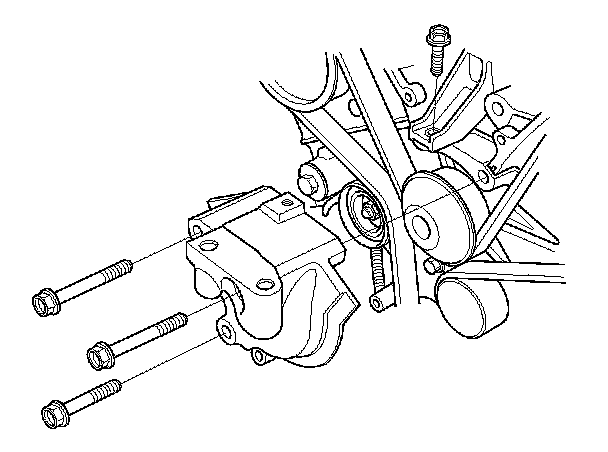
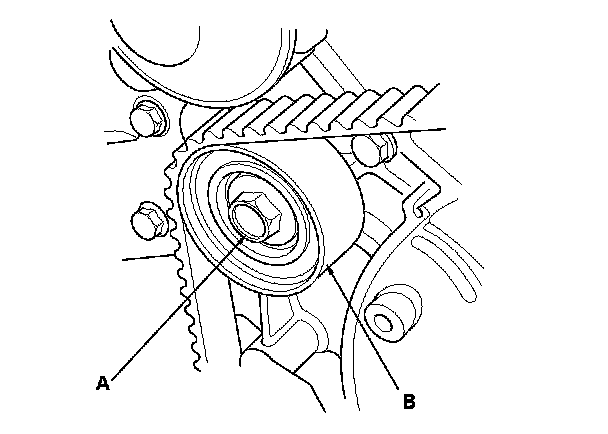
17. Remove the idler pulley bolt (A) and idler pulley (B), then remove the timing belt. Discard the idler pulley bolt.