Center Console Box Replacement
Center Console Box Replacement
Special Tools Required
- KTC Trim Tool Set SOJATP2014
*Available through the Acura Tool and Equipment Program, 888-424-6857
NOTE:
- Take care not to scratch the center console.
- Use the appropriate tool from the KTC trim tool set to avoid damage when removing components.
1. Remove the center console Center Console Removal/Installation.
2. Remove the beverage holder and passenger's console panel as an assembly Center Console Beverage Holder Replacement.
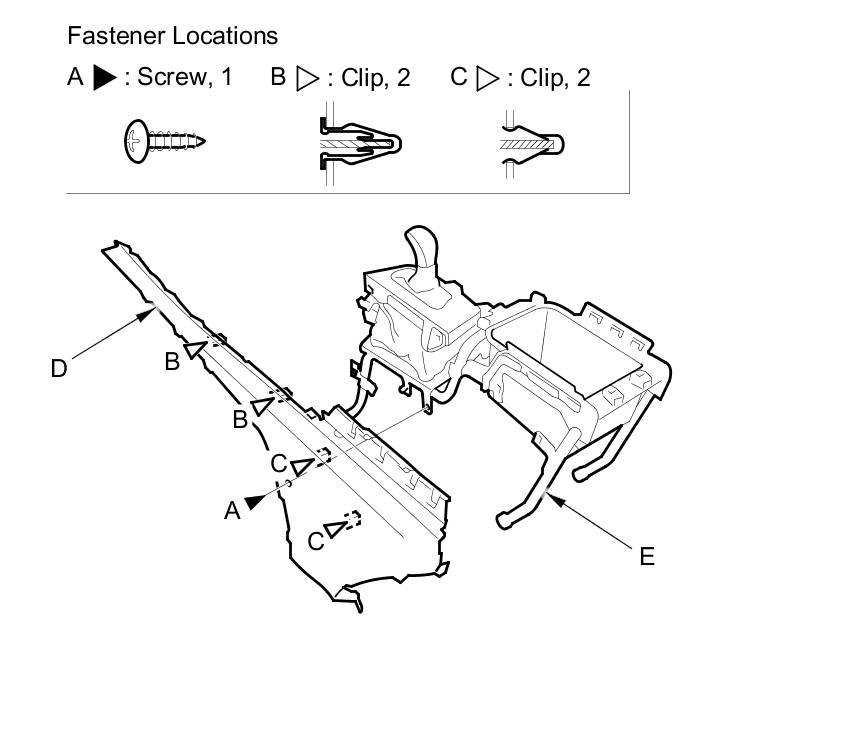
3. Remove the screw (A), and detach the clips (B, C) by pulling the driver's console panel (D) back, then remove if from the console frame (E).
4. Remove the HandsFreeLink control unit Service and Repair.
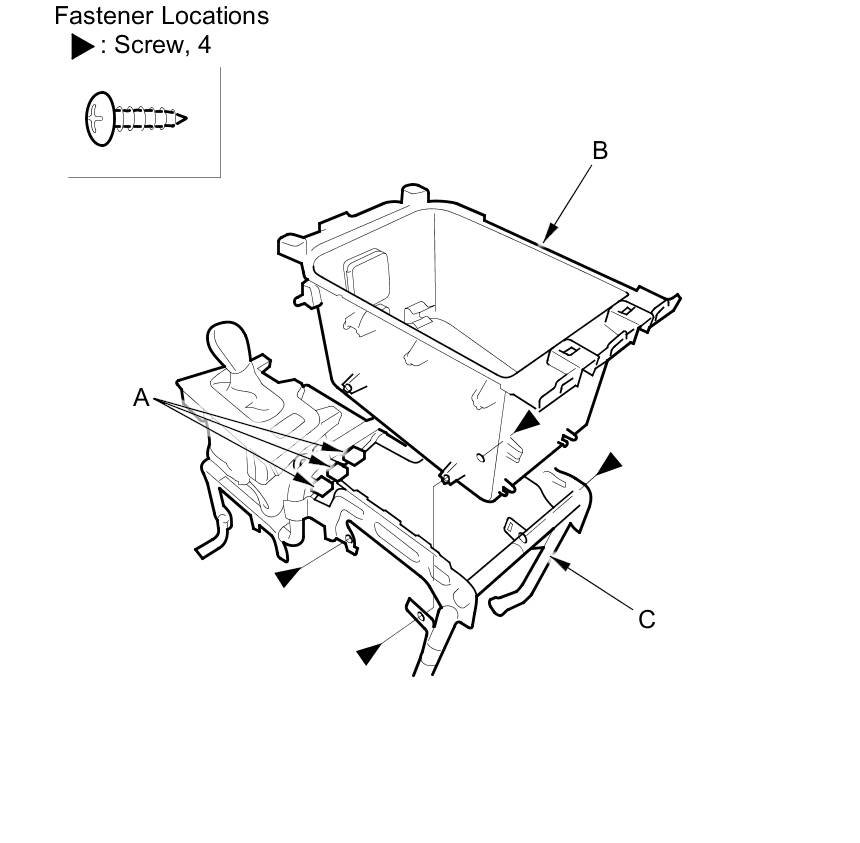
5. Remove the screws, disconnect the auxiliary jack connector, the USB adapter cable connector (with navigation) and the AC power outlet connector (with rear entertainment) (A), then remove the center console box (B) from the console frame (C).
6. Install the box in the reverse order of removal, and note these items:
- Make sure the auxiliary jack connector, the USB adapter cable connector and the AC power outlet connector is plugged in properly.
- If the clips are damaged or stress-whitened, replace them with new ones.
- Push the clips into place securely.