Front Stabilizer Bar Replacement
Front Stabilizer Bar Replacement
1. Raise and support the vehicle Service and Repair.
2. Remove the front wheels.
3. Disconnect both sides of the stabilizer links from the stabilizer bar Front Stabilizer Link Removal/Installation.
4. Remove the front suspension subframe from the body Service and Repair.
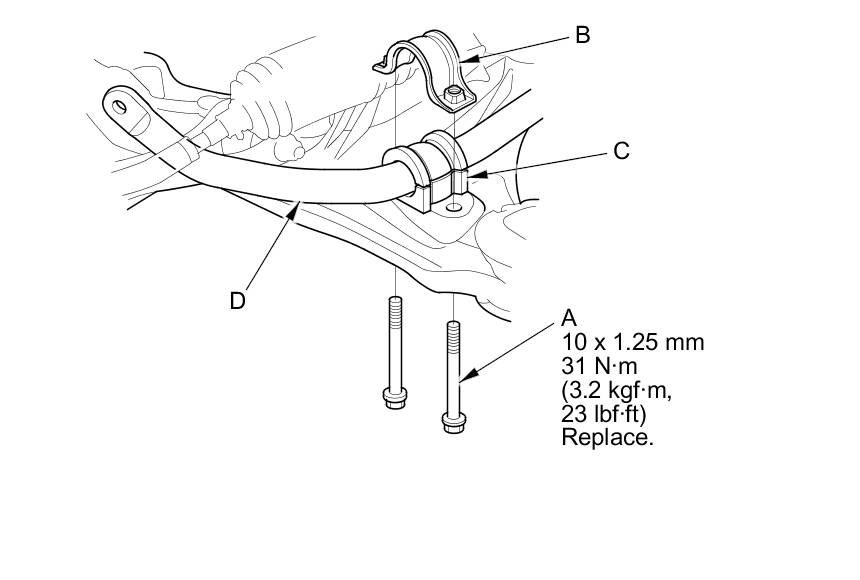
5. Remove the flange bolts (A) and the bushing holders (B), then remove the bushings (C) and the stabilizer bar (D).
NOTE: Use new flange bolts during reassembly.
6. Install the stabilizer bar in the reverse order of removal, and note these items:
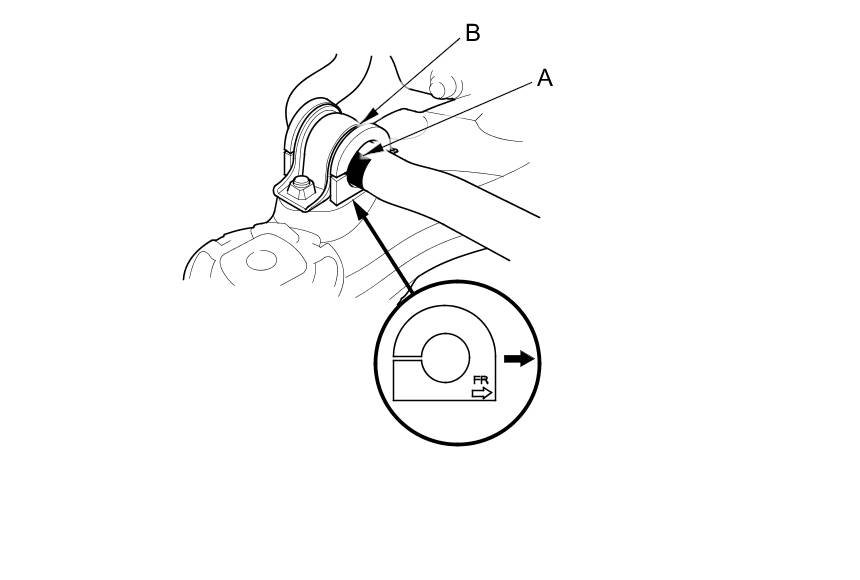
- Note the right and left direction of the stabilizer bar.
- Align the ends of the paint marks (A) on the stabilizer bar with each end of the bushings (B).
- Note the fore/aft direction of the bushing holders.
- Refer to Stabilizer Link Replacement to connect the stabilizer bar to the links Front Stabilizer Link Removal/Installation.
- Clean the mating surface of the brake disc and the inside of wheel, then install the front wheel.
7. Check the wheel alignment, and adjust it if necessary Service and Repair.