Shift Interlock Solenoid: Service and Repair
Shift Lock Solenoid Replacement
NOTE: Make sure not to get any silicone grease on the terminal part of the connectors and switches, especially if you have silicone grease on your hands or gloves.
1. Remove the center console Center Console Removal / Installation.
2. Move the A/T gear position indicator panel (A) up from the shift lever bracket by releasing the locks, and remove the A/T gear position indicator panel light bulb socket (B) from the indicator panel base.
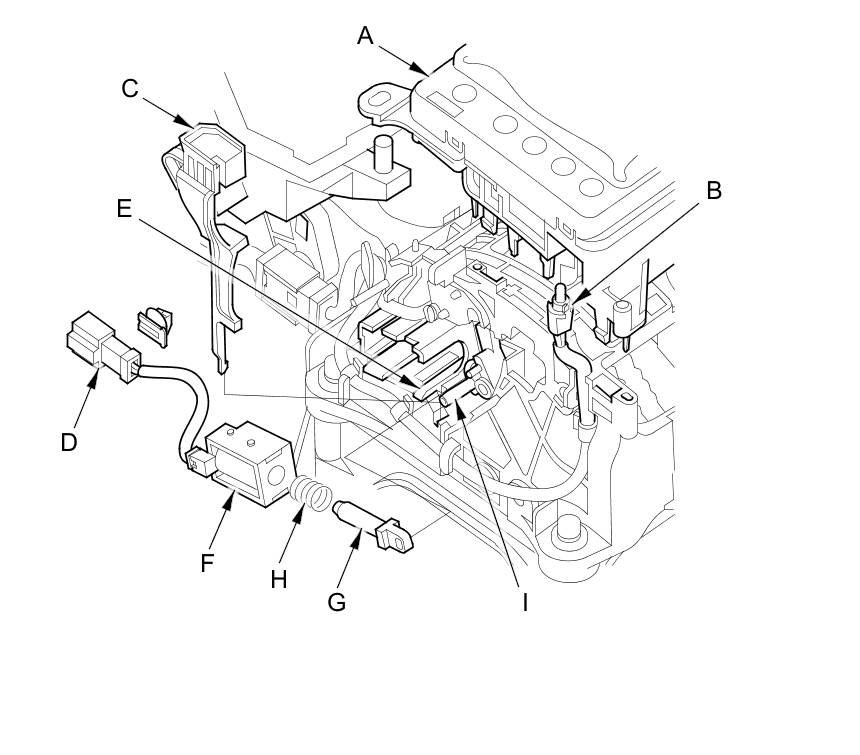
3. Remove the shift lock release (C).
4. Remove the shift lock solenoid connector (D) from the shift lever bracket.
5. Release the lock tab (E) retaining the shift lock solenoid to slide the shift lock solenoid out.
6. Replace the shift lock solenoid (F), the solenoid plunger (G), and the plunger spring (H) assembly.
7. Apply silicone grease to the tip of the shift lock stop (I) and the solenoid plunger.
8. Install the shift lock solenoid by aligning the joint of the shift lock solenoid plunger with the tip of the shift lock stop.
9. Install the shift lock solenoid connector on the shift lever bracket.
10. Install the shift lock release.
11. Install the A/T gear position indicator panel on the shift lever bracket by aligning the positioning holes with the tips on the console panel.
12. Install the A/T gear position indicator panel light bulb socket in the indicator panel base.
13. Install the center console Center Console Removal / Installation.