Nippondenso Compressor
A/C compressor/bracket, removing and installing (6-cylinder engine with Nippondenso compressor)Note:
During the 1996 model year; the new Nippondenso A/C compressor was installed as a running change on all vehicles with 6-cylinder engines.
Removing and installing Zexel A/C compressor, Zexel Compressor
Vehicles with Nippondenso compressors require a different ribbed drive belt than vehicles with Zexel compressors.
The A/C compressor and bracket can be removed and installed without discharging A/C refrigerant system.
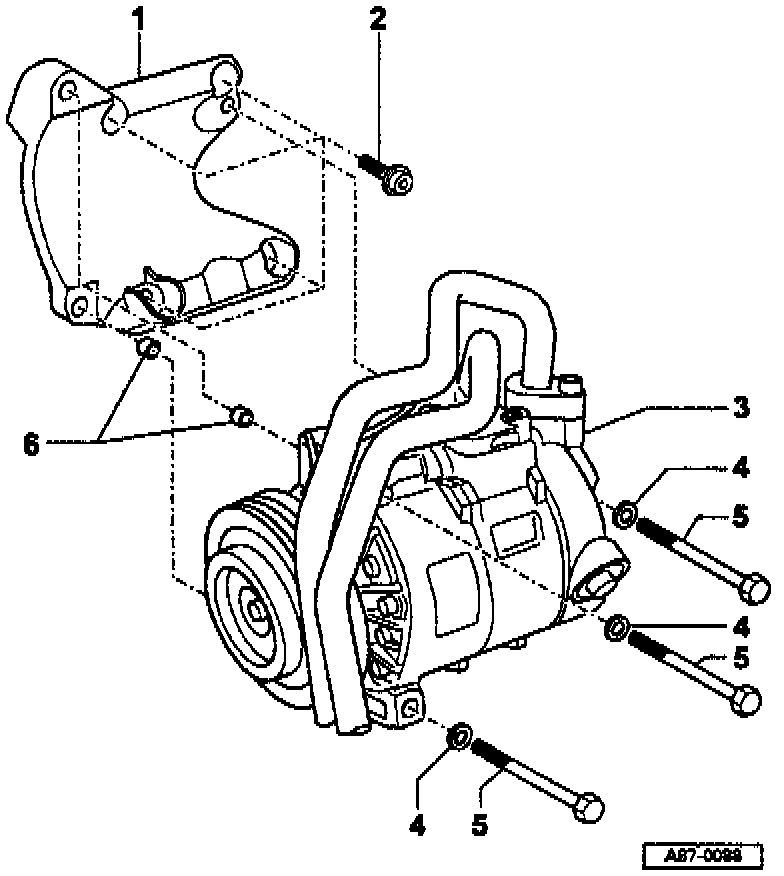
1 - Compressor bracket
2 - Socket-head bolt with washer
- 25Nm (18 ft lb)
3 - A/C compressor (Nippondenso) with A/C clutch -N25-
4 - Washer
5 - Hex-head bolt
- 25 Nm (18 ft lb)
6 - Centering bushing
WARNING:
Do not reuse any fasteners that are worn or deformed in normal use. Many fasteners are designed to be used only once and become unreliable and may fail when used a second time. This includes, but is not limited to, nuts, bolts, washers, self-locking nuts or bolts, ciclips, cotter pins. For replacements always use new parts.
Removing Compressor From Bracket
- Remove radiator coolant fan.
- Mark travel direction of ribbed belt.
- Remove ribbed belt.
- Remove compressor from bracket.
- Remove bracket.
Removing A/C Compressor Completely
- Discharge A/C refrigerant system
CAUTION: Support A/C compressor with a wire after removing from bracket. Do not allow compressor to hang from A/C line/hoses.