Control Module: Service and Repair
Removing
Location: In front of the right front seat under a cover in the foot well.
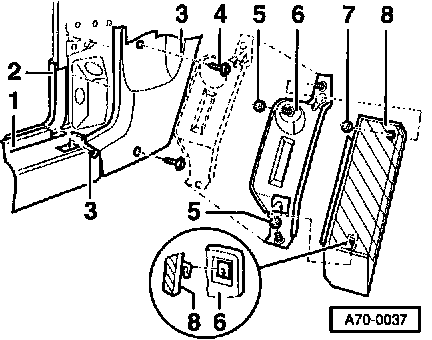
- Remove trim from right lower A-pillar -3-.
- Remove right sill scuff molding -1- in door area.
- Loosen carpeting from right inner sill panel and raise approx. 20 cm (8 inch).
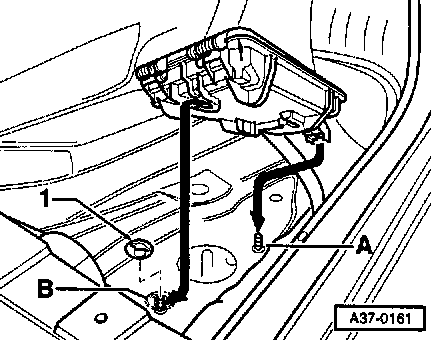
- Unclip container at position -A- from top.
Unclip container at position -B- as shown.
- Remove control module from container.
- Loosen multi-point connector, then remove connector from control module.
Installing
Install in reverse order. Note the following additional steps:
- Check container for water penetration, seal if necessary.
- Check that clip nut (-1- in illustration A37-0161) fits securely.

- Check harness routing:

- Switch ignition off and wait approx. 30 seconds.
- Push lock in direction of arrow and release connector
Install in reverse order.