Front Fender: Service and Repair
Front Fender, Assembly Overview
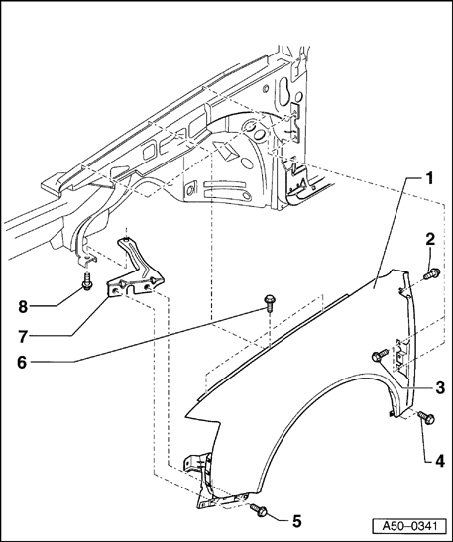
1 - Fender
- Remove bumper.
- Remove wheelhousing liner.
- Remove end plate Fig. 1.
- Remove headlights.
- Disconnect harness connectors for side turn signals.
- Remove bolts - 2 -, - 3 -, - 4 -, - 5 - and - 6 -.
2 - Bolt w/washer assembly
- 10 Nm (7 ft lb)
3 - Bolt w/washer assembly (2x)
- 10 Nm (7 ft lb)
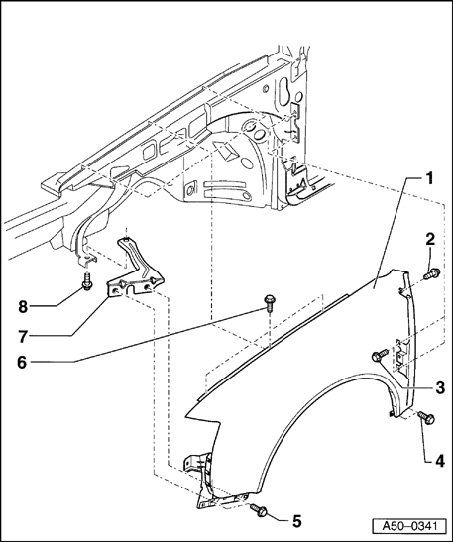
4 - Bolt w/washer assembly
- 10 Nm (7 ft lb)
5 - Bolt w/washer assembly
- 10Nm (7 ft lb)
6 - Bolt w/washer assembly
- 15 Nm (11 ft lb)
NOTES:
- As a running change, the bolt w/washer assembly will change from hex-head to Torx (R).
- Bolt w/washer assemblies coated with locking fluid must always be replaced.
7 - Bracket
8 - Bolt w/washer assembly
- 10 Nm (7 ft lb)
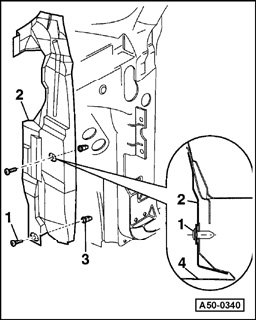
Fig. 1 Removing and installing end plate
- Remove front wheel.
- Remove wheelhousing liner.
- Remove bolts - 1 - from expanding clips - 3 - and remove plate - 2 - from fender - 4 -.