Front Axle Camber, Adjusting
Front axle camber, adjusting
The camber cannot be adjusted.
By moving the subframe it is possible to center the camber uniformly within the specified tolerance range.
In some cases it may be necessary to elevate the engine with an engine support to relieve some tension and weight from the subframe in order to move it.
- Remove noise insulation panel.
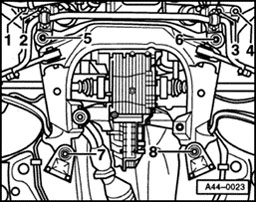
- Remove bolts -3- and -4-.
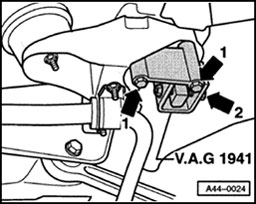
- Install VAG 1941 camber adjustment tool.
Note:
A plastic-coated lever may be used as an alternative to V.A.G. 1941 camber adjustment tool.
Tightening torque of bolts -1 -: 10 Nm (7 ft lb)
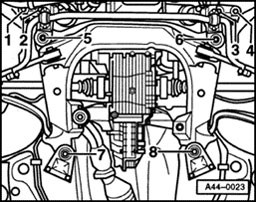
- Loosen bolts -1-, -2-, -5-, -6-, -7- and -8-.
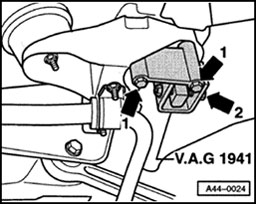
- Turn bolt -2- until specifications are achieved.
Wheel alignment specifications.
- Relieve tension on bolt -2- and check readings obtained. If necessary, correct camber again.
Removing VAG 1941 camber adjustment tool/plastic-coated lever
^ At least two bolts must always be tightened so that the position of the subframe does not change.
^ Bolts -5-, -6-, -7- and -8- must always be replaced.
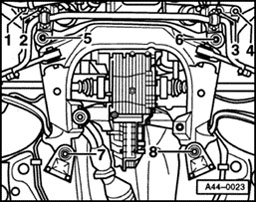
- Tighten bolts -7- and -8-.
Tightening torque: 110 Nm (81 ft lb) plus additional 1/4-turn (90°)
- Remove VAG 1941 camber adjustment tool or plastic-coated lever.
- Tighten both forward bolts -5- and -6-.
Tightening torque: 110 Nm (81 ft lb) plus additional 1/4-turn (90°)
- Tighten bolts -1-, -2-, -3- and -4-.
Tightening torque: 60 Nm (44 ft lb)
CAUTION:
Whenever the camber is adjusted, all wheel alignment settings must be rechecked.