Windshield, Installing
Windshield, Installing
- After preparatory work has been performed, apply the adhesive.
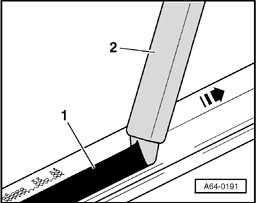
- Position complete surface of nozzle - 2 - onto window.
- - Arrow - indicates direction of application
NOTE: Cross-section thickness of adhesive bead - 1 - is determined by dimension of opening in nozzle tip and rate of application.
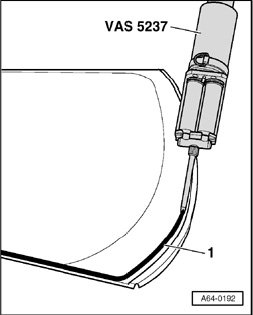
- Apply adhesive sealing material all around, as shown in illustration.
- Note varying spacing dimensions to window edge.
- Using two suction lifters, install windshield in windshield opening.
CAUTION: Window must be installed within 15 minutes, otherwise bonding properties of adhesive will be impaired.
- Align windshield at sides.
- Spacing between edge of window and roof frame must be 6 mm ± 0.5 mm.
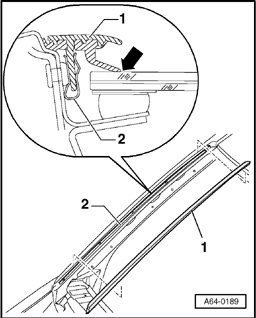
- Press drip rail - 1 - into retaining clips - 2 - until it stops only after curing time has elapsed.
- When pressing in drip rail, make sure sealing lip - arrow - lies flat against windshield and does not slip behind edge of windshield.
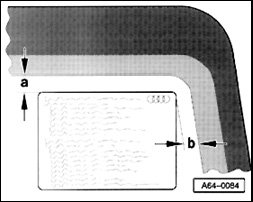
- Affix stickers on windshield (e.g. for airbag) in same position on new windshield. "Caution-Safety information" sticker
- Dimension - a - = 25 mm
- Dimension - b - = 10 mm