Windshield Assembly Overview
Windshield Assembly Overview
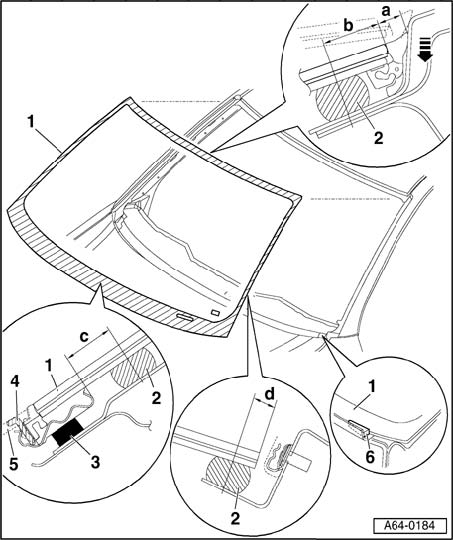
1 - Windshield
- Removing and installing
- Distance to roof dimension - a - = 6 mm + 0. 5 mm
- Even out side distances to A-pillar.
Note: Stickers on windshield (e.g. for airbag) must be replaced in same position on new windshield.
2 - Adhesive bead
- Observe curing times.
- Note varying spacing dimensions to window edge.
- Dimension - b - = 4 mm is achieved when you allow the nozzle tip to touch the upper molding when applying adhesive.
- Distances from side window edge dimension - d - = 4 mm
- Distance at lower window edge measured from clip dimension - c - = 10 mm.
- Bead cross section
- Bead width = 8 plusminus 2 mm
- Bead height = 13.5 +1.5 mm
3 - Spacers
- 5x
- Affix in regular intervals to retaining strip
4 - Protective piping
- Only installed as new part.
- Only remove after installing windshield and before installing plenum chamber cover
5 - Plenum chamber cover
- Pull protective piping - 4 - from retaining strip before installing plenum chamber cover.
- Press into fastening strip only after window adhesive curing time has elapsed.